I have a bit of a disorder when it comes to the weather. I usually gage what I will be wearing for the day off of what I feel that the weather will be and not what it actually is. For example, last week... it's 7:30 a.m. and I'm thinking it's the middle of March in Houston... hmm, sounds hot... I'll go with a skirt and short sleeved shirt. Then as I'm running out the door, I realize it's about 45 degrees with not a lot of time to turn back and change. But I still justify that it's March in Houston and it has got to be at least 75 degrees by about 10. Wrong again... we had a cold windy spell and I spent most of the day freezing. What's the point of this story you are wondering? I seem to ignore the weather when it comes to food too. I had already bought all the ingredients for this salad I had been dying to try so even though it might not have been the night for a light, spring salad, I made it for dinner. Not too worried about it now because I am finally getting around to sharing this and the weather has cooperated.
But what you really need to know is how amazing this salad is. I have to admit that it seems fancy to me so I wanted to try it because I thought if it was successful, it would be something impressive to serve for company. And even more than being delicious, it is pretty easy.
From my little kitchen to yours... Enjoy.
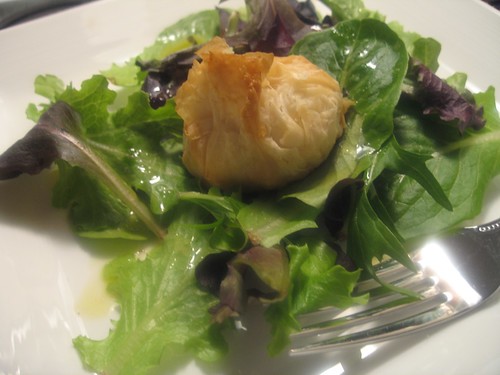
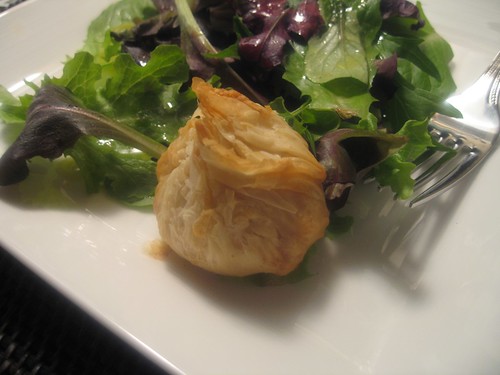
Warm Goat Cheese in Phyllo Salad
Adapted from Ina Garten's Back to the Basics
Recipe Notes
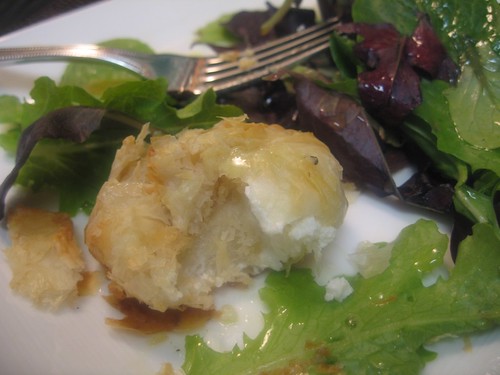
The original recipe calls for regular bread crumbs. I happened to have panko so I substituted, but either one will work. I did enjoy the little bit of crunch from the panko, but if you don't feel like venturing into the world of Japanese bread crumbs, you can use regular. The phyllo dough I bought ended up being quite tricky. Mine was less in sheets and more in little strips. As you can see the picture below, I just made a pinwheel with the strips and built the little cheese sacks from there. I was worried it would not work out because I did not have nice sheets, but there was no problem. Bottom line... don't worry if the bundles are kind of messy when they come together. Whether you have to adjust the amount of goat cheese that will fit or your phyllo dough is acting funny, just keep going and worry about making the bundles look pretty at the very end. You can always add extra phyllo layers to make the outside have a good presentation.
Ingredients
12 sheets phyllo dough, defrosted
6 tablespoons unsalted butter, melted
2 to 3 tablespoons panko bread crumbs (or plain bread crumbs... see note above)
12 tablespoons of goat cheese, divided into 6 balls
Baby salad greens, such as a spring mix or arugula
For the Vinaigrette
2 tablespoons champagne vinegar
1 teaspoon Dijon mustard
1/2 teaspoon minced garlic
1 teaspoon kosher salt
1/2 teaspoon freshly ground black pepper
1/2 cup good olive oil
Step by Step
Preheat the oven to 375 degrees.
Unroll the sheets of phyllo dough on a flat surface and cover them with a slightly damp towel. (if the towel is too wet, the dough will get sticky). Working quickly so the dough doesn't dry out, place one sheet of phyllo on a board, brush lightly with melted butter, and sprinkle lightly with bread crumbs. Place a second sheet of phyllo on top, brush with melted butter, and sprinkle with bread crumbs. Continue until you have 4 sheets stacked up. Cut the sheets in half crosswise to make 2 almost-squares.
Using two tablespoons of goat cheese at a time, make 6 small balls of goat cheese. Place each ball in the center of one phyllo square. Starting at one corner, fold the phyllo up over the cheese and continue folding and pleating the phyllo around the cheese, as though you're wrapping a round gift that's tied on top. You will end with extra phyllo dough on top; twist the excess into a top knot. Brush the discs all over with melted butter and place on a sheet pan lined with parchment paper. Continue with the remaining phyllo dough and goat cheese to make 4 additional packages.
Bake for 20 minutes, until the phyllo is lightly browned. Allow to cool for 5 minutes.
While the cheese packages bake, place the salad greens in a large bowl. Whisk the vinegar, mustard, garlic, salt, and pepper together in a small bowl. Still whisking, slowly add the olive oil, making an emulsion. Toss the salad greens with enough vinaigrette to moisten.
Distribute the salad among six plates and place on warm goat cheese package in the center of each plate, Sprinkle with salt and pepper and serve.
Leftover goat cheese bundles can be refrigerated in an airtight container for up to 2 days. Reheat in the oven at 350 degrees until bundle is heated all the way through, about 10 minutes.