8.26.2011

Peach Crumb Bars

peach crumb 1
The end is near.
peachcrumb2
The signals are mixed.  Around these parts, you could be fooled by the signs, but I feel very certain I am right... the end is near.peachcrumb3
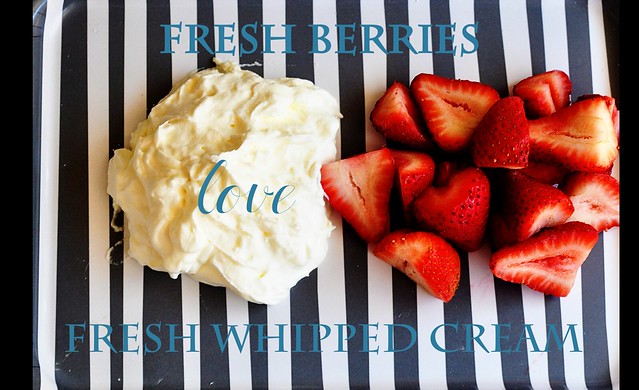
The end of amazing strawberries, peaches, blueberries, blackberries and such is coming.  Pretty much the only clear sign at this point is the calendar.  Because if I was going off the weather, you would think we are smack dab in the middle of it.peachcrumb4
But we are not so run... don't walk.... to the grocery or farmer's market and get in on the freshness and flavor of fruit that can only be found in the summer.

Did I mention these are extremely easy?  Yep, run.

From my little kitchen to yours... Enjoy.
peachcrumb5
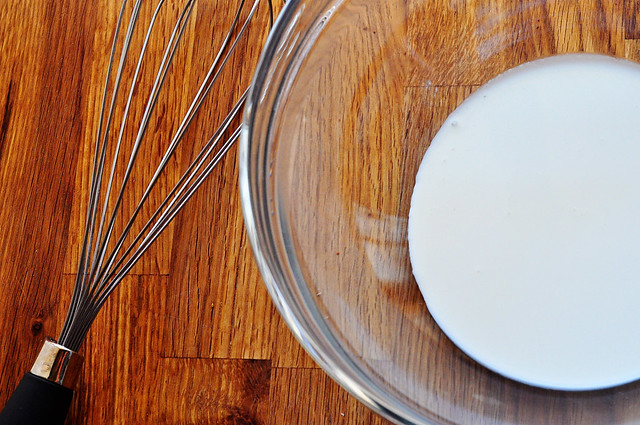
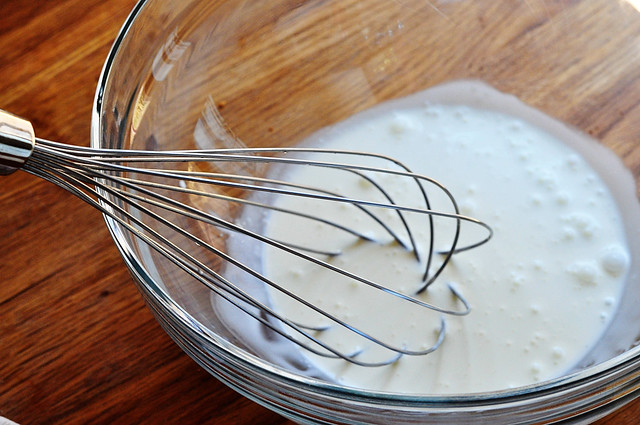
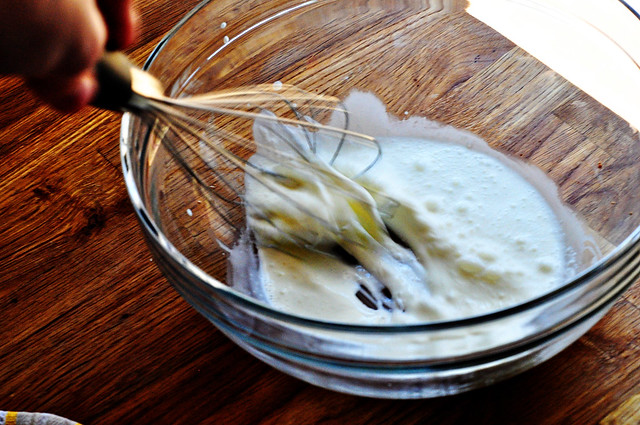
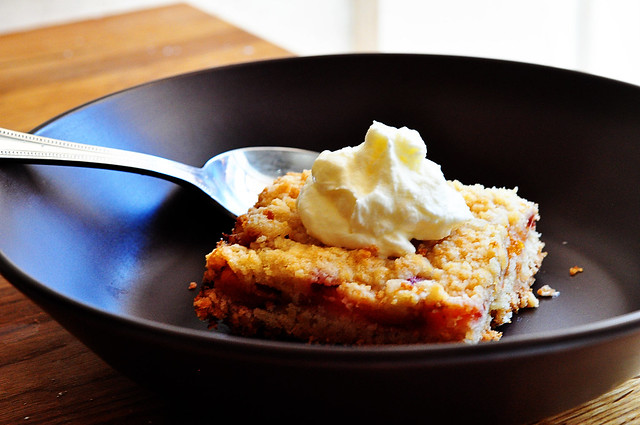
Oh, what do you know, we already have another desperate need for that fresh whipped cream.  This is truly the icing on the cake... the cherry on top... whatever you want to call something that finishes out a dish in a perfectly wonderful way.
peachcrumb6
Peach Crumb Bars
Adapted from Smitten Kitchen & Allrecipes.com
Recipe Notes
Even in peak season, peaches can be extremely hit or miss.  Depending on what kind of peaches you end up with, you might have to adjust a little bit.  Mine were great, but not overly juicy.  If you have really juicy peaches, you might want to add a tad bit more cornstarch.  When I first made these bars, we used really sweetened whip cream because the crust was not overly sweet.  Somehow, as the days went on, they got a little sweeter so we still put a dollop of cream on top, but I used less sugar.
Ingredients
1 cup white sugar
1 teaspoon baking powder
3 cups all-purpose flour
1 cup cold unsalted butter (2 sticks or 8 ounces)
1 egg
1/4 teaspoon salt
Zest and juice of one lemon
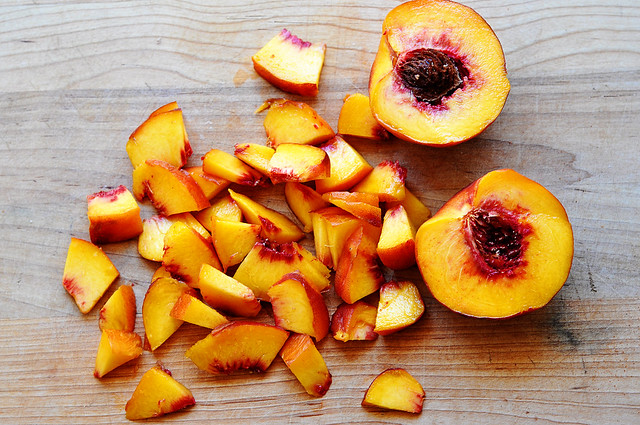
4 heaping cups of chopped peaches
1/2 cup white sugar
6 teaspoons cornstarch
Freshly whipped cream for topping (click here)

Preheat the oven to 375 degrees F.  Grease a 9×13 inch pan.

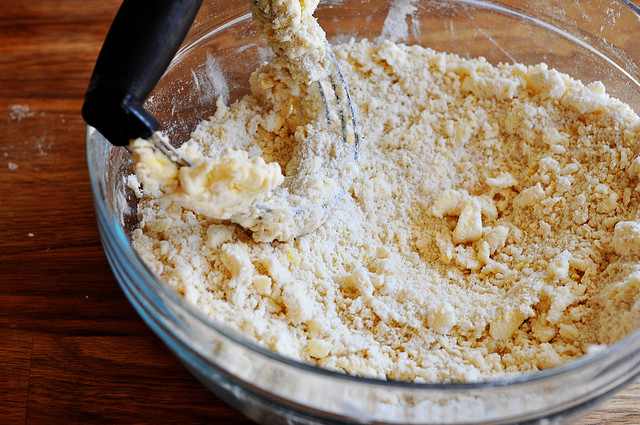
In a medium bowl, stir together 1 cup sugar, 3 cups flour, and baking powder.  Mix in salt and lemon zest.  Use a fork or pastry cutter to blend in the butter and egg.  Dough will be very crumbly and dry. Pat half of dough into the prepared pan.

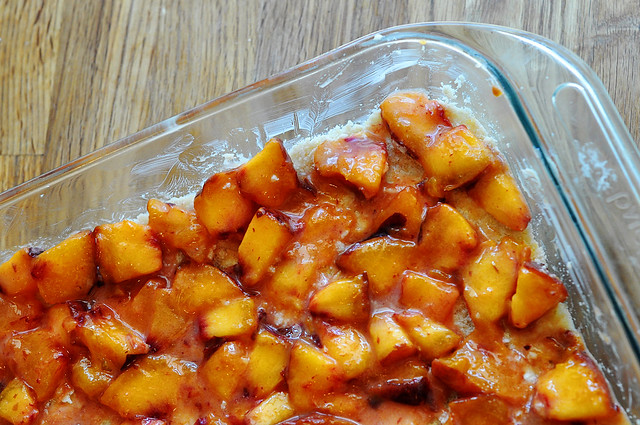
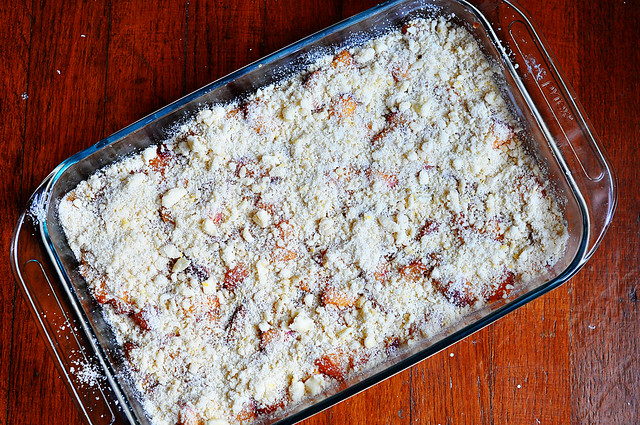
In another bowl, stir together the sugar, cornstarch and lemon juice.  Gently mix in the peaches. Spread the peach mixture evenly over the crust.  Crumble remaining dough over the berry layer.  You might have a little crust left over.

Bake in preheated oven for 45 minutes, or until top is slightly golden brown.   Cool completely before cutting into squares. Bars are easier to cut after being refrigerated.  Top each bar with a dollop of fresh whipped cream. 

Store in refrigerator in an airtight container for up to one week.

Makes 24 bars or 36 very small rectangles.

8.23.2011

Fresh Whipped Cream

Untitled
It's Tuesday.

You look like you could use a magic trick.  Nothin spices up a Tuesday like a little magic.

And I bet you this might be the tastiest magic trick you've ever seen. You also need this right now because it's the best {and easiest} dessert for this time of the year.  All you need is a little fresh whipped cream to make a bowl of fresh summer berries seem like a refreshing and fancy dessert.

And no, canned whip cream does not even come close to what this tastes like.  Sorry, but no.

Mr. Hungry was a little floored when he saw me whisk this up out of what he thought was liquid cream that only seemed to be useful for his coffee.

You just need a few dollops for small batches of berries so grab a whisk and this will be ready in minutes.

For bigger jobs, you might want to pull out the hand mixer or you could be whisking for quite awhile.

Summer berries are still at their prime so go ahead and put this at the top of your to do list before berries go back to being expensive and out of season.  Seriously... hurry.

From my little kitchen to yours... Enjoy.

Recipe Notes
The exact way you make this will depend on what you are making it for.  With fruit, I like to add a pretty good amount of sugar to make it sweet.  If you are adding a dollop to a pie or cake, you might want to only add a little bit of sugar because you already have so much sweetness.
If you are trying this for the first time, start with very little cream.  Watch how the process works and then add more.  If you are making more than one cup of cream, I would probably use a hand mixer (unless you have lots of time to whisk).
* Regular sugar or powdered sugar will work.  If you have powdered, use it.  If you don't, you do not need to buy any.  The only different is that you  need to add the regular sugar early in the process so that it has time dissolve into the cream.  Powdered sugar is preferable because after whipping, you can add more at the end to get to the exact sweetness you would like.
** A little vanilla goes a long way, but once again, the exact amount will depend on what you are making.  I always add a dash, but if I am putting cream on something that would be great with a vanilla flavor I add a little bit more.

What you need...
Heavy Whipping Cream
*Powdered Sugar or regular sugar
**Vanilla (optional)
Large bowl
Whisk

1.  Start with cold cream in a large bowl.  The colder the cream, the easier and faster it will whip.  Having a large bowl will also help quite a bit.
cream
2.  Time to start whipping.  Make wide strokes with a whisk, changing direction every so often.  This will help get air into the cream faster.  Bubbles will start to form.
cream2
3.  Now it's time put some muscle into it.
Exercising and making dessert at the same time?  This is just the best.
When the cream starts to thicken, add sugar and vanilla (if using).

Tip:  A good rule of thumb is two teaspoons of sugar for every cup of cream.  Adjust sweetness according to tasate.  Optional:  Add about a teaspoon of vanilla per cup of cream
cream3
And before you know it, you will have peaks that look like this.

Done! Seriously, we are done.  What was that, like 1 minute worth of work?  And you have great looking arms.

Ah, I love magic.
cream4

Keep in the refrigerator and serve within an hour of making.

Add a dollop to a bowl of mixed berries, perhaps a freshly sliced peach, or maybe on top of a piece of pie or chocolate cake.  But that means you cannot sit there and eat the whole bowl.  But no one's watching... maybe just the first batch... no one has to know.

8.18.2011

Watermelon Margaritas

watermelon marg
Big brothers are great.

Early in life? Not so much.

They steal your gameboy.  They lock you out of their room when they are shooting sweet music videos with the home camcorder (I just wanted to be a background dancer).  They make up fake rules when they are teaching you how to play ping pong. They leave your joint bathroom a nasty mess.

Later in life?  Fantastic.

They pick you up from the airport.  They give you advice about boys.  They share new music with you.  They marry someone great so you can have the sister you never had.   They understand your teen problems because they have the same crazy parents you do.  They have kids so you can have the greatest nephew ever.

And most importantly, they might introduce you to the best summer drink ever created.
watermelon 2
Watermelon margaritas.  Ah, I feel refreshed just talking about them.  They take one of the best fruits of the summer and add a boozy kick for a refreshingly wonderful cocktail.


They are the perfect cocktail to serve when friends come in town.  Thanks for visiting Linds!

Cheers to big brothers.  Love you, Shua.

From my little kitchen to yours... Enjoy.

Watermelon Margaritas
Adapted from Emeril Lagasse
Recipe Notes
There are a few steps of prep work to this recipe so I've broken it up into three parts.  Steps you need to make ahead, steps you can make ahead, and steps for when you are ready to have these.   But make sure you freeze the watermelon at 3 hours ahead of time.
Ingredients
2 teaspoon lime zest
1 cup water
1  cup sugar
1 seedless watermelon 
8 tablespoons fresh lime juice
1 cup premium 100 percent agave tequila
2 tablespoons orange-flavored liqueur (recommended: Grand Marnier or triple sec)
1 cup ice
lime wedges for garnish
Step by Step
Must be made at least 3 hours ahead of time...
Cut up watermelon into 1 to 2 inch chunks. Spread out in a single layer on a rimmed baking sheet. Freeze for at least 3 hours until frozen through.  If you only have room for one baking sheet and you have more watermelon than allowed, place a piece of parchment paper on top of watermelon chunks and add another layer (see picture below).

Can be made ahead of time...
In a medium saucepan, combine the lime zest, water, and sugar. Bring to a boil over medium heat, and cook, stirring, until the sugar dissolves. Remove from the heat. Cool to room temperature (Keep in a covered container in the refrigerator until ready to use.)

Chill margarita glasses in the freezer for 30 minutes. 


When ready to make margaritas...
In a blender, combine 5 cups of frozen watermelon, 8 tablespoons of the cooled lime syrup with the lime juice, tequila, orange-flavored liqueur, and ice. Blend until smooth.  

Makes 4 drinks.

My solution for not being able to fit two trays of watermelon in my freezer... 
a layer of parchment paper. 
watermelon

8.15.2011

Peanut Butter & Chocolate Icebox Pie

DSC_0288
Two words make me weak at the knees when used in the same sentence.

Peanut Butter & Chocolate.  

I should not be left alone with large amounts of anything that contains these two ingredients.  The fact that this particular combo takes peanut butter and turns it into a smooth thick peanut buttery sugary whipped custard topped with drizzled chocolate and crunchy peanuts, and not to mention that it is nestled in a graham cracker crust, is breathtaking. 

Are you ready for the best part?

It just so happens that this recipe can make you one big pie and four baby pies. 
choc pie with words
Discovering a recipe like this is the equivalent of what I can only imagine some people feel when the get to the top of Mt. Everest.  Yep, that epic.

Here are a few of my favorites about this dish:
1.  I hate taking a dessert to someone when you haven't tasted it yourself and as far as I know,  it is still  socially unacceptable to deliver 9/10 of a pie to someone.

2.  Mr. Hungry gets irritable when I bake and he doesn't get a good portion of the goods.

3.  This pie in particular happens to the be the bees knees because both the mama crust and baby crusts came straight from the grocery.

Who's ready to jump on the bandwagon and make this pie?  I mean come on, it will change your life.  Let's do this.

From my little kitchen to yours... Enjoy.

Peanut Butter & Chocolate Icebox Pie
{loosely} Adapted from Bon Appetit
Recipe Notes
You have got three options for what this pie will yield.  You can have one 6 oz. pie and four mini pies (this is what I did),  you can have one extra large pie or at least twelve mini pies.  You can't go wrong, but just know you might use a few more peanuts or a little less chocolate so use the toppings to your taste.  Graham cracker crusts both small and large are sold at most all grocery stored on the baking aisle.  If you cannot find them or just cannot find anything else to do with your time besides making a graham cracker crust, grab a box of graham cracker crumbs and use the recipe on the back.  But store bought works great for this recipe. You should definitely use a fresh vanilla bean for best results, but you can replace with two teaspoons of vanilla extract if you must.
Ingredients
Graham cracker crust (see recipe notes)
8 large egg yolks
12 Tbsp. sugar, divided
1 1/2 cups whole milk
1 vanilla bean, split lengthwise (click here for details on using a vanilla bean)
3/4 cup (1 1/2 sticks) unsalted butter, room temperature
1 cup creamy peanut butter
2 Tbsp. powdered sugar
1/2 tsp. kosher or sea salt
For the Topping
2 oz. bittersweet chocolate (no more than 61% cacao), chopped
2 1/2 Tbsp. unsalted butter
1/2 cup roasted, salted peanuts
Step by Step
Mix yolks and 6 Tbsp. sugar in a medium size bowl using a handheld mixer.  Beat at high speed until ribbons form, stopping once to scrape down side of bowl, about two minutes.  Combine milk and remaining 6 Tbsp. sugar in a large saucepan; scrape in seeds from vanilla bean and add bean.  Bring to a boil, stirring to dissolve sugar.  Remove bean.  With mixer running, gradually add hot milk mixture to yolk.  Pour mixture back into saucepan.  Clean bowl.  Whisking constantly, bring to a boil over medium heat.  Remove pan from heat; whisk vigorously for one minute.  Return custard to mixing bowl; beat on high speed until cool, about 4 minutes.  Mix in butter one Tbsp. at a time.  Add peanut butter, powdered sugar, and salt; beat to blend.  Scrape filling into graham cracker crust and smooth top.  Chill until set, 2-3 hours.

While pie is cooling stir chocolate and butter in a medium size glass bowl set over a saucepan of simmering water until melted and smooth.  Remove pie from refrigerator.  Drizzle the chocolate over the top in a thick layer.  Sprinkle with roasted peanuts and add more chocolate if desired.

8.12.2011

How To: Use a Fresh Vanilla Bean

When I first started cooking a few years ago, I would never consider making anything with an exotic ingredient such as a vanilla bean ( I also didn't make anything with chicken unless you were grilling a boneless, skinless chicken breast).  This was on my way too fussy ingredient list.  And then I actually found out how expensive they are and vanilla beans got added to my I'm too cheap to buy that list as well.  

Well, the stars seemed to align when I was in a cooking class and realized that there is nothing in the whole wild world that will replace the taste of a fresh vanilla bean.  I don't care if you have vanilla extract from the Himalayas.  Followed by the fact that I found out Costco sells vanilla beans in bulk.  I think I got 8 for about $10.  This is an outrageously good deal.  

If you don't go to Costco, you can find them at most upscale grocery stores and it's worth splurging for a really special dessert. 

I haven't thrown out my vanilla extract.  It still has plenty of uses, but creams and custards deserve the good stuff. Here are your two easy steps to getting to the good stuff. 


Using a very sharp knife... 
vanilla bean
... from top to bottom. 


Using the back of that sharp knife...
vanilla bean 2
That stuff that looks like dirt is the good stuff. 


Before you toss the pod, check and make sure your recipe does not use it.  Some call for simmering the pod with a custard before you discard it.

Check back {very soon} for a way to put this bad boy to good use. 

8.10.2011

Gorgonzola Iceberg Wedge Salad

wedge 2 
I just about never pass up an iceberg wedge salad on a restaurant menu.  And I can guarantee if I do, I already know their dressing is no good.  There is something so refreshing and satisfying about a good wedge  and I figured if you get the dressing down, the rest would be a piece of cake.

This gorgonzola dressing is absolutely perfect.  You'll never come close to matching its taste with a  bottled dressing.  And it's a whole lot healthier than those dressings made with mayo and sour cream.  Tastes even better the next day.


From my little kitchen to yours... Enjoy.
wedge

Gorgonzola Iceberg Wedge Salad
Ingredients
2/3 cup buttermilk
1/2 cup Greek yogurt (I used fat free)
1 large garlic clove, minced
8 ounces crumbled Gorgonzola cheese
salt & fresh ground pepper
1 head iceberg lettuce, cut into 4 wedges
1 cup grape tomatoes, sliced in half
Optional: 4 pieces of cooked, crumbled bacon
Step by Step
In a medium bowl, stir the buttermilk, Greek yogurt, and garlic together. Add in 2/3 cup of the Gorgonzola to the dressing. Smash the cheese into the sauce to help it blend.  Stir in a few more sprinkles of the gorgonzola and leave them chunky.  Season with salt & pepper and set aside.

Arrange the lettuce wedges on individual plates. Spoon the dressing over the wedges, top with tomatoes and remaining Gorgonzola (and bacon if using). Sprinkle fresh cracked pepper on top and serve.

Refrigerate dressing in an airtight container for up to 5 days.

Makes 4 salads.  Or two salads one night and two the next...

8.08.2011

Sangria

DSC_0269
What prestigious award did this sangria win, you ask?

Oh, it was big.  Real big.
lemons copyoranges copy
Mr. Hungry, our friend JD and I  headed to Barcelona, Spain for one of our weekend trips from Florence this summer.  We found the most amazing tapas bar... so amazing we ate there both nights of our stay.  The waiter told us that their sangria was very popular and we immediately ordered a pitcher.  I was surprised when he started making it from scratch right in front of us.  I was under the impression that you let Sangria sit for a long time to really get it good.
sangria 2 copy

sangria 3 copy 
After I had one sip, I was on a mission to find out this recipe.  All three of us decided we could most definitely make it the best.  Long story short, we knew there was a sangria competition to be held when we got home.  Well, that contest has officially taken place and I just happen to have the award winning recipe.  (I can't say I was that surprised considering I schmoozed our waiter for the recipe).

sangria copy
Are you ready for the secret?  Lemon Fanta!

Sadly, I could not find this when it was competition time so I used Fresca, but I'd go with Lemon Fanta if I were you.

It's a pretty perfect summer drink.  Cheers to staying cool.

From my little kitchen to yours... Enjoy.

Sangria
Recipe Notes
The key to keep this fresh is only adding the ice and Fanta (or Fresca) right before serving.  You can mix all other ingredients and refrigerate ahead of time, but add those two at the end.  Cointreau is an orange liqueur and is a little pricey.  However, you can use it in all sorts of drinks.  You can buy and small airplane size bottle of gin and brandy if you do not have those on hand.  I did not have a pitcher that was good for mixing so I mixed in a bowl and added to a pitcher.  Mixing in a pitcher or bowl will work just fine.
Ingredients
1 small orange, cut into thin slices
2 small lemons, cut into thin slices
1/4 cup sugar
1 Tablespoon Cointreau
1 Tablespoon Gin
1 Tablespoon Brandy
1 bottle red wine (I used a Cabernet)
1 can Lemon Fanta (or Fresca)
Ice
Tools
Wooden spoon
Glass pitcher
Step by Step
Place orange and lemon slices in the bottom of a glass pitcher (or large bowl).
Pour sugar and 3 liqueurs over the slices.
Mash the fruit with the wooden spoon until the juice is released from the slices. Fill the pitcher with ice.  Pour bottle of wine and can of Lemon Fanta and stir with wooden to spoon to mix.  Pour into glasses, garnish with fruit slices and serve cold.

8.02.2011

{slightly chunky} Tomato Gazpacho Soup

gazpacho copy
It's hot as blazes around here.  Until further notice, my oven is closed.

Who's with me?  If you're not with me, it means you live in one of those places with perfect summer weather and I would rather not hear from you right now.

But if you are in my boat... the temps are above 95 or the humidity hits you in the face like a wool blanket when you walk outside...then get ready.

This heat has even changed my taste buds.  I've never been one for cold soups.  Just no appeal really.  I liked em hot and savory, but since this i-must-eat-only-cold-things hit, it sounded like a pretty good idea to have something both cold and savory.

Not to mention the fact that tomatoes are out of this world right now.  It's amazing how good foods taste when they are actually in season.

There is a little bit of prep work here, but no heat so that's a plus.  Have any favorite chilled or frozen recipes you'd like to share?  Email me, please.  Let's band together against this heat, shall we?

From my little kitchen to yours... Enjoy.

Here are a few pics from the process...

The way I like to go about getting the seeds out of a cucumber.  Slice in half and then slice diagonally on both sides to remove the strip of seeds. 
DSC_0145
but as the saying goes, there's more than one way to skin a cat. 
DSC_0147

This is a good size chunk to aim for with all your veggies...
DSC_0148
This thing is a work horse...
gaz1
gaz 2mini food
Finally got all those veggies processed.  As you can see, I still had some chunks, which is why I chose the hand blender to help me out at the end.
DSC_0158

Tomato Gazpacho
Adapted from Ina Garten
Recipe Notes
I prefaced that this was slightly chunky because if you like gazpacho and you like it extremely smooth and creamy, that is not what you are going to get from this recipe, but I love the texture.
Ingredients
1  cucumber, halved and seeded, but not peeled
1 red bell pepper, cored and seeded
4 plum medium sized vine ripened tomatoes
1 small red onion
3 garlic cloves, minced
3 cups tomato juice (23 ounces)
1/4 cup white wine vinegar
1/4 cup olive oil
1/2 tablespoon kosher or sea salt
1 teaspoons freshly ground black pepper
Special Equipment
Small food processor
Optional Equipment
Hand blender
Step by Step
Roughly chop the cucumbers, bell peppers, tomatoes, and red onions into small 1 inch chunks. Put each vegetable separately into a small food processor fitted with a steel blade and pulse until it is coarsely chopped. Leave slightly chunky; do not completely liquefy.

After each vegetable is processed, combine them in a large bowl and add the garlic, tomato juice, vinegar, olive oil, salt, and pepper. Mix well and chill before serving. Optional:  If you would like a little more creaminess with small chunks, you can use a hand blender at the end to get the consistency that you like.
The longer gazpacho sits, the more the flavors develop.

Keep covered in the refrigerator for up to 3 days.

Serves 4-6. 

8.01.2011

Taste Florence Winner!

And we have a winner...
taste of florence pic


Congratulations to Stephanie! You were #33 on the comments... Congrats!
If you didn't win, you definitely should still put Taste Florence on your itinerary when in Italy!