12.25.2010

Christmas Quiche


Merry Christmas and a very Happy New Year.  We are having a wonderful white Christmas with Mr. Hungry's family and we had the most delicious quiche this morning.  Just wanted to share the recipe real quick in case you have a lazy day or a brunch coming up.  My sister in law shared this recipe and we prepped it on Christmas Eve and just reheated it the next morning.  Perfect breakfast to pop in the oven after everyone had opened presents.  Pretty darn good and I was especially excited because I've expressed my feelings on eggs (ew) and I actually loved this.  Once I participated in making quiche, I realized there's more cream and cheese than eggs,  so while this won't make you skinny, it's a special treat.

I got a few really fun, new things for the little kitchen that I can't wait to share...

See you next year!

Classic Quiche Lorraine
Ingredients
1 refrigerated pie crust (or frozen, thawed)
8 slices bacon, crisply cooked and crumbled
1 1/4 cup shredded swiss cheese (6 ounces)
1/3 cup finely chopped yellow onion
4 large eggs
2 cups heavy whipping cream (or half and half)
1/4 teaspoon salt
1/4 teaspoon pepper
1/8 teaspoon cayenne pepper (red pepper)
Step by Step
Preheat oven to 350 degrees. Poke holes in botttom of pie crust and bake for 10 minutes.   Do not let crust brown.  Put an even layer of the onion, bacon and cheese into the pie crust.  In a separate bowl, whisk together eggs, whipping cream, salt, pepper and cayenne until well blended.  Pour egg mixture on top of cheese.  Reduce oven to 325 degrees and bake quiche for 50 minutes or until a knife inserted in the center comes out clean.  Cool for 10 minutes, slice and serve.

To make ahead, allow quiche to completely cool.  Wrap tightly and store in the refrigerator overnight.  Reheat in a 350 degree oven for about 10 to 15 minutes, until warmed through.

12.10.2010

Gingerbread Cupcakes with Cinnamon Cream Cheese Frosting

DSC_0507

It's that time of year where you are bound to go to a Christmas party, cookie exchange, or be hosting a few friends.  These little cupcakes are a sweet treat. I made a mini version, but if you don't own mini cupcake pans, I'm sure the regular size will be tasty too.  The best part... the bottom is a cake mix, but the icing is sweet and creamy with a hint of cinnamon and orange.  So since everyone is busy in the holiday spirit, I'll keep it short.

From my little kitchen to yours... Enjoy.
DSC_0490

Gingerbread Cupcakes with Cinnamon Cream Cheese Frosting
Recipe Notes
Depending on the size of the cupcake, the baking time will vary.  Once the tops seem done, stick a toothpick in one and take them out when it comes out clean.  Start to check as soon as they start to not look done so you don't overcook them.  FYI, if you happen to shop at HEB grocery store, I have not been able to find the Betty Crocker Gingerbread Cake Mix there, but did have luck at Kroger.
Ingredients
Betty Crocker Gingerbread Cake Mix (check back of box for other ingredients)
1 cup (2 sticks) butter, softened
2 packages (8 oz) cream cheese, softened
8 cups (about 2 lbs) powdered sugar
1 tablespoon milk
1 tablespoon orange juice
1 teaspoon orange zest
1 teaspoon cinnamon
1/2 teaspoon vanilla
Step by Step
Bake cupcakes according to instructions on the back of the box.  In a large bowl, cream the butter and cream cheese together until soft a fluffy.  Add the powdered sugar one cup at a time and mix well.  Mix in the milk, orange juice, zest, cinnamon and vanilla. Pipe or spread on the cupcakes.  Store in an airtight container for up to 2 days.

12.07.2010

Little Kitchen Catering

Anyone tired of staring at spinach salad yet?

I know, I know... first I tell you I will have a week of Thanksgiving recipes, and then I leave you high and dry with a two during the biggest month of food.  Followed by the fact that I am not even sharing a recipe now.  But I haven't exactly been sitting around eating bon bons so I thought I would share what has been going on in the little kitchen.  Sunday night I catered a cocktail party for 75 and I have been in a tizzy of gourmet appetizers for a couple of weeks.  Unfortunately, I was way more focused on getting out hot food than getting good pictures, but I will share what I do have.  Starting with the menu...

Bloody Mary Soup Shot with Herb Marinated Shrimp and Olives
Baked Brie with Crackers and Fruit
Ham and Gruyere Thumbprints
Olive Tapenade Crostini
Roasted Shrimp Cocktail
Grilled Beef Tenderloin with Chipotle Mayonnaise, Arugula, Focaccia Toasts & Roasted Tomatoes
Spanakopita
Lamb Chop Lollipops
Prosciutto wrapped Asparagus with Marinated Tomatoes and Mozzarell
Gingerbread Cupcakes with Cream Cheese Frosting, Coconut Macaroons, Dark Chocolate Fudge Bites,
Madeleines, and Cheesecake Brownie Bites

This is the moment where I need to immensely thank my mother and friend Jennifer for being the best help a girl could ask for.  It was a tall order, but somehow we got all the food out and we are still standing.  Excuse the fuzzy iphone pics, but here's a sampling...

Prepping in the little kitchen...
IMG_0628

My new best friend, Pat with Roasted Shrimp Cocktail
IMG_0637

Display of desserts (just a sidenote, I simply filled the trays with desserts...did not decorate this beautiful island)
IMG_0633

Fuzzy pic of grilled beef tenderloin bites with roasted tomatoes, chipotle mayonnaise and arugula...
IMG_0640

very blurry pic of one of the food tables...
IMG_0644

close up of the bloody mary soup shots with shrimp and olives...
IMG_0645

Mr. Hungry's plate of leftovers... just a few of the items.

Sorry once again for the bad pictures, but I thought I would share what I have.  This may or may not be my sad attempt at getting some grace for being gone so long.  But I will be back with a few recipes from the party... hopefully sooner than later. 

11.10.2010

Spinach Salad with Pumpkin Seeds & Dried Cherries

DSC_0412

Continuing the week of Thanksgiving ideas...

We are not big salad people.  I have nothing against it and I actually love a good salad, but I find it not so necessary for weeknight meals.  If I make a salad, it usually gets pushed aside when there are other things to eat like pasta.  However, here come the holidays and I found a perfect salad that would accompany hearty dishes.  It's a little bit special with pumpkin seeds and dried cherries, but still very easy and not many ingredients in the dressing. If you are starting to think about a Thanksgiving meal, this could be a perfect fancy, but not fussy salad for the big day.


From my little kitchen to yours... Enjoy.

Spinach Salad with pumpkin seeds and dried cherries
Adapted from Food Everyday, Martha Stewart
Serves 4
Recipe Notes
There are a few options when it comes to dried cherries.  The only ones I have found that I don't like are the brand Sunshine that come in a yellow package.  Other than that, I have tried a lot of brands and I like them all.
Ingredients
4 teaspoons red wine vinegar
1 tablespoon dijon mustard
2 tablespoons olive oil
coarse salt and ground pepper
8 ounces baby spinach
1/2 cup thinly sliced red onion
1/2 cup dried cherries
1/4 cup raw pumpkins seeds
Step by Step
Preheat oven to 350 degrees.  Spread raw pumpkin seeds in a single layer on a baking sheet.  Roast for 10 minutes, until seeds have puffed and lightly browned.

In a large bowl, whisk together vinegar, mustard, olive oil until thickened and well blended. Season to taste with salt and pepper.

Add spinach, red onion and cherries and toss to combine.  Sprinkle with pumpkin seeds and serve immediately.

11.08.2010

Apple Spice Cake with Caramel Drizzle

Apple Spice Cake

One of the biggest days for food is coming up... Thanksgiving.

Now most people have the same traditional meal every year with lots of family favorites, but just in case you need to spice it up this year, you need this cake.

I cannot believe that in over a year of writing at this lovely little location, that I have not shared this cake.  It's about as cozy and fallish as a cake can get.  Juicy bites of apple and crunchy nuts wrapped in a full-of-spice cake, drizzled with caramel sauce is about as dreamy as it gets on a cold day.

And I know pies are usually the star of Thanksgiving, but this cake would complement them well and be a little unexpected.


Ingredients
1 1/3 cups vegetable oil
3 cups all-purpose flour
1 tablespoon ground cinnamon
1 teaspoon baking soda
1 teaspoon salt
2 cups sugar
3 large eggs
3 to 4 Granny Smith apples, cored and cut into 1/2-inch pieces (3 cups)
1 cup chopped assorted nuts, such as pecans and walnuts (optional)
1 teaspoon pure vanilla extract
Nonstick cooking spray with flour

Ingredients for Caramel Sauce
1 cup light brown sugar

1/2 cup (1 stick) unsalted butter
1/4 cup evaporated milk
1 teaspoon pure vanilla extract
pinch of salt
Step by Step


Preheat oven to 350 degrees. Spray a 12-cup Bundt pan with cooking spray; set aside.


In a medium sized bowl, sift together flour, cinnamon, baking soda, and salt.
In the bowl of an electric mixer fitted with the paddle attachment, combine vegetable oil, sugar, and eggs; mix on high speed until lemon yellow.
 With mixer on medium speed, gradually shake in dry ingredients until just incorporated.
Add apples and, if desired, nuts, to batter; mix to combine. Add vanilla, mixing until incorporated.
Pour batter into prepared pan, and bake until a cake tester inserted in the center comes out clean, 75 to 90 minutes.
Remove from oven, and cool slightly on a wire rack.  Invert cake onto rack; turn cake right-side up to cool completely on rack.  
Before serving, make caramel sauce.  Combine caramel sauce ingredients in a small saucepan over medium heat.  Stir until sauce is well combined and thickened.
Drizzle each piece with caramel sauce and serve immediately.  


10.28.2010

Candy Corn Pretzel Bites

DSC_0446And so the million combinations for pretzel bites continue...
However, this time we are using a Hershey Kiss that is seasonal so you better act fast!
DSC_0440
Have you seen these little guys?
DSC_0443
Candy corn flavored Hershey Kisses.  My friend Jennifer introduced me to them and while I actually can't stand candy corn, these are pretty addicting.  Add a pretzel and a dark chocolate m&m and you've got quite the perfect little bite. 
DSC_0445

Recipe Note
I have only seen the candy corn kisses at Target.  I scoured grocery stores for a long time so let me you save you a trip and just head to Target.  If you have made the original pretzel bites, know that these are a little different.  The candy corn hershey kisses do not harden as well as hugs do.  If you are making a big batch and want to throw them in a bag, I suggest making ones with double pretzels.  I had to lay them side by side with parchment paper on top or they get kind of melty on each other. 
Ingredients
1 bag candy corn Hershey kisses (see recipe note)
1 bag square pretzels
1 bag dark chocolate M&Ms
parchment paper
Step by Step
Preheat oven to 350 degrees. Cover a baking sheet with parchment paper.  Place one kiss on top of each pretzel.  Bake for 3 to 4 minutes, until slightly melty.  Remove baking sheet from oven and top each kiss with an m&m.  Press down slightly so that the hershey kiss smushes down on the pretzel.  Optional:  Press another pretzel on top instead of the m&m.

10.11.2010

nutty chocolate chip cookies

IMG_0005
I am in search of a signature cookie.  I know that there are much bigger fish to fry in the world, but this is close to the top of my list.  I just want that one cookie that you know will always be good, but is not too complicated so you could whip some up for any occasion.   

This here is my first attempt at finding that cookie, and it is a really good one.  I'm not quite ready to give up my search, but this was good enough to share.  A little nutty, a little chocolaty, but not too heavy.  The best part is that dough froze well and I will even venture to say that the cookies tasted better after the dough had been frozen.  

From my little kitchen to yours... Enjoy.

Nutty Chocolate Chip Cookies
Recipe Notes
It says to sift the flour.  If you do not a sifter, you can use a strainer.  You just want the flour to be fine, fluffy and have no clumps.  Another option is to just fluff the flour a little with the measuring cup before you measure it.  It is ideal to sift, won't totally ruin the cookie if you don't have a sifter.  I always bake cookies now with parchment paper.  Haven't seen a burnt edge since I started.  If you really don't want to buy this, you can cook on an ungreased cookie sheet, but I highly recommend the parchment paper. 
Ingredients
1 cup (2 sticks) unsalted butter, softened
1 cup granulated sugar
1 cup brown sugar, packed
2 large eggs
1 teaspoon vanilla extract
2 1/2 cups oatmeal
2 cups all purpose flour, sifted
1/2 teaspoon salt
1 teaspoon baking powder
1 teaspoon baking soda
1 (12 ounce) package semisweet chocolate chips
1 (4 ounce) bar Hershey's milk chocolate, grated
1 1/2 cup chopped walnuts
Equipment
blender
parchment paper

Step by Step
Heat oven to 375 degrees F.  In a bowl, cream butter and sugars until creamy and fluffy.  Add eggs and vanilla, mix well and set aside.

Place oatmeal in a blender and grind to a fine powder.  Add gradually to sugar- egg mixture, along with flour, salt, baking powder, and baking soda.  Stir just to combine all of the ingredients.  Add chocolate chips, grated chocolate, and nut.

Roll into golf ball- sized balls for a medium sized cookie.  For small cookies, use a heaping teaspoon. Line a baking sheet with parchment paper and place dough 2 inches apart.  Bake for 8-12 minutes (depending on dough size), until slightly golden brown.  

10.04.2010

soft pretzels

DSC_0415

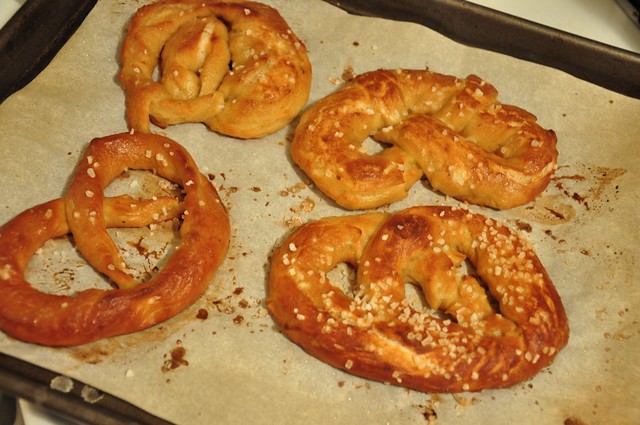
We had our own little Oktoberfest celebration this weekend and if I have my way, it will be the way we celebrate the occasion every year from here on after.  For that matter, it might be the way I celebrate everything.  We made soft pretzels and I am hooked.  It's a blessing and a curse when I find something I love so much.  A blessing because it's another great recipe to share but if I make these as often as I want, I would turn into one gigantic carb.
DSC_0413

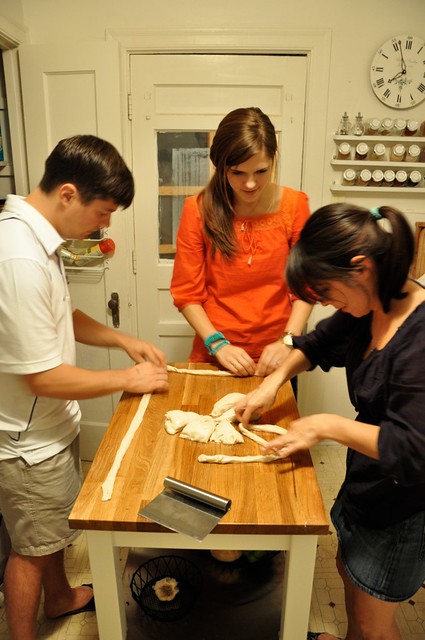
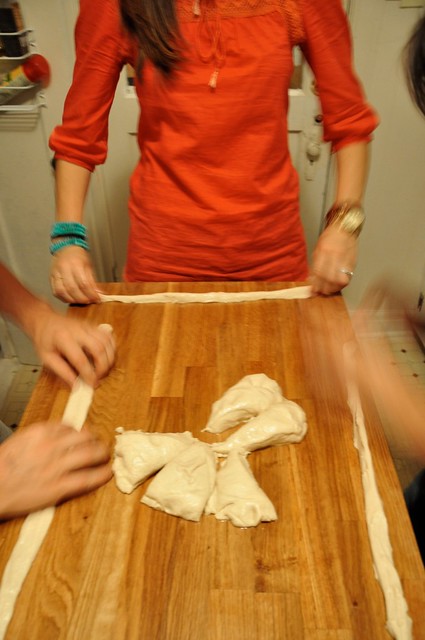
This is not by any means one of those quick recipes, but it was quite fun making them and even more fun eating them.  If you have a few friends or kids that want to join you in the kitchen, rolling these suckers is a fun little project.
DSC_0395


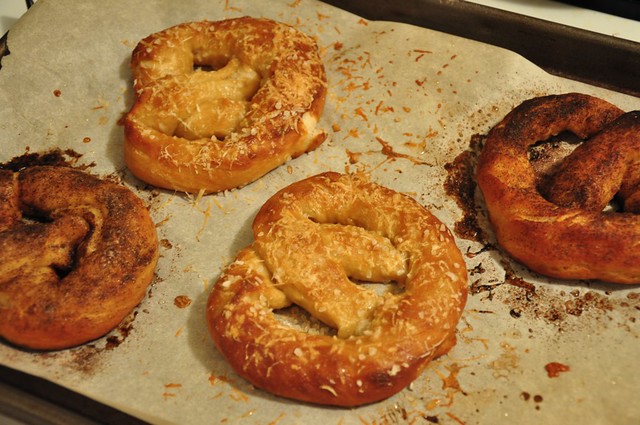
We added some parmesan cheese to a few and cinnamon sugar to a few more.
DSC_0417

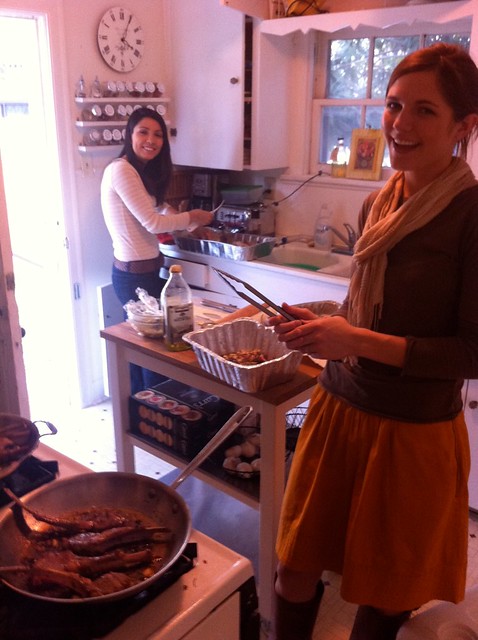
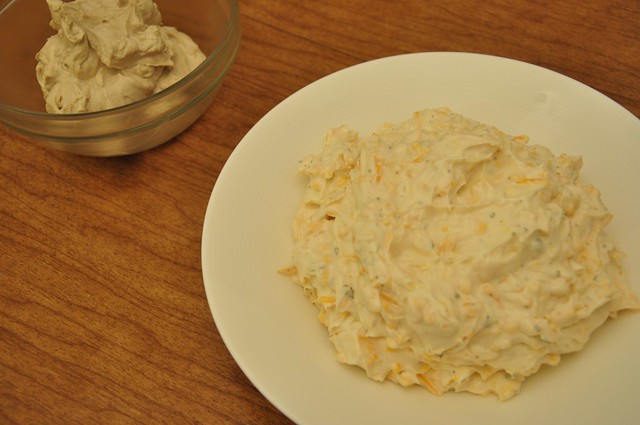
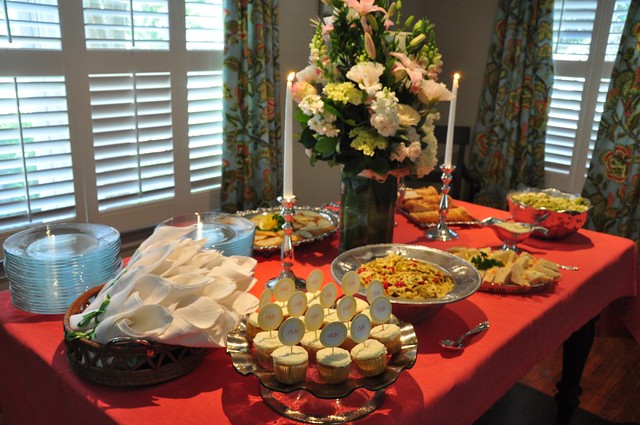
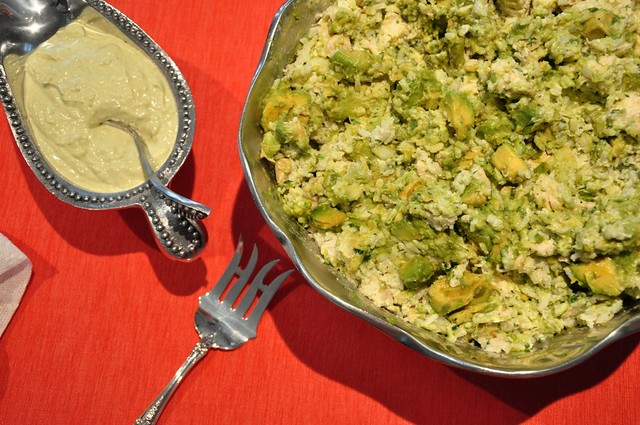
My friend Kate made two great dips... a worcestire dip and a beer cheese spread.
DSC_0411


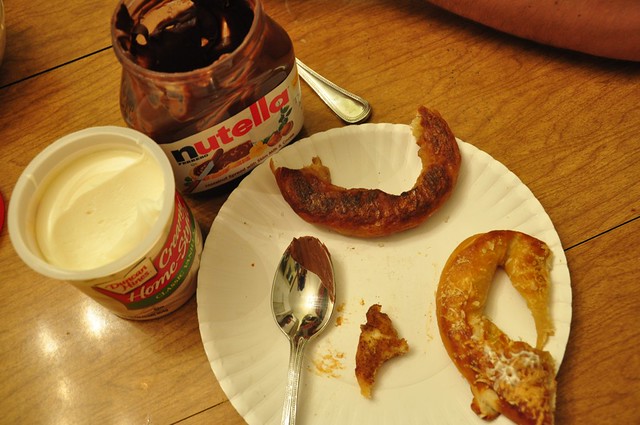
If this wasn't indulgent enough, after one bite of the cinnamon sugar pretzel, I heard, "this would be even better with some icing"... from another, "oh I think this would be good with some Nutella.  Well, what do you know, I had both in the pantry and they made the cinnamon sugar pretzels even better.
DSC_0421

This is the perfect weekend project.  Warning... make at least two per person or you might start feuds over who gets the goods.
DSC_0387

DSC_0389

pretzel rollin fun...
DSC_0394

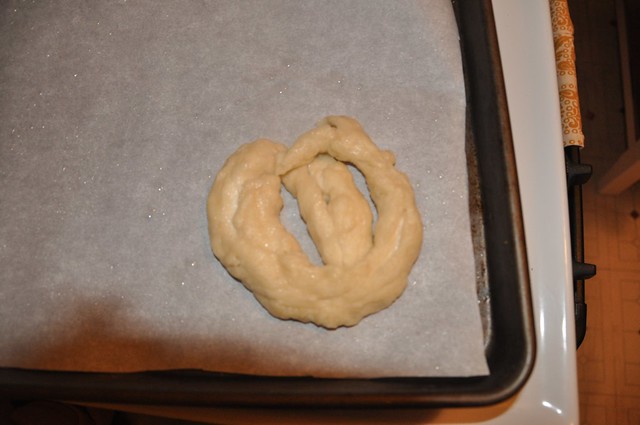
Don't be discouraged if your pretzels don't turn out well from the get go.  Even the ugly ones taste good... that was my first one, eek.
DSC_0403

DSC_0406

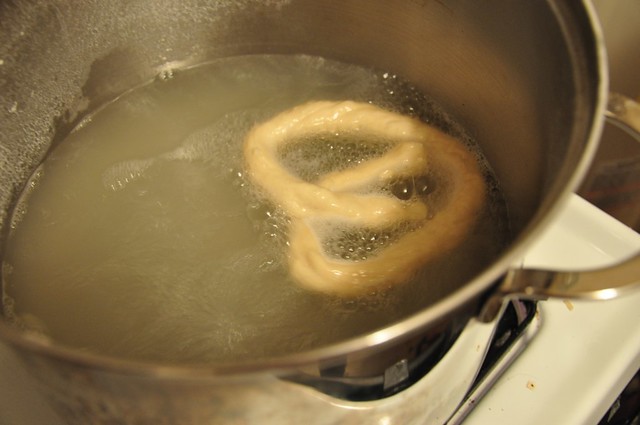
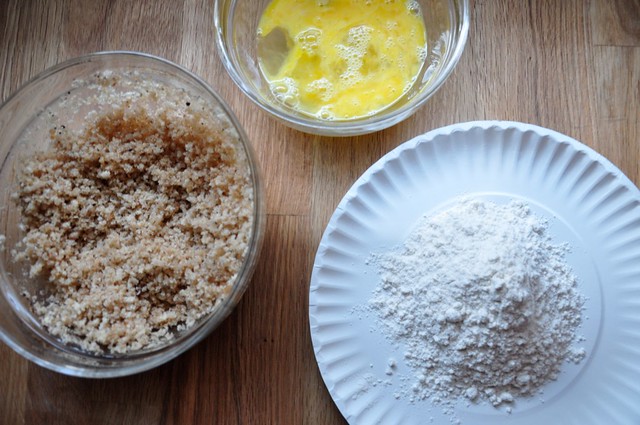
the baking soda bath... sounds weird, but makes for a great pretzel
DSC_0409

DSC_0413
Soft Pretzels
Adapted from Alton Brown, Food Network
Recipe Notes
Some people use pretzel salt and if you want to go all out, feel free. However, I used coarse sea salt and if you don't have it, I would suggest buying it.  You will use it way more than you think.  Make sure you provide a lot of time for these suckers because you will need to let the dough rise for an hour.  
Ingredients


1/2 cups warm (110 to 115 degrees F) water (a meat thermometer comes in handy to test temperature)
1 tablespoon sugar
2 teaspoons kosher salt
1 package active dry yeast
22 ounces all-purpose flour, approximately 4 1/2 cups
2 ounces unsalted butter, melted
Vegetable oil, for pan
10 cups water
2/3 cup baking soda
1 large egg yolk beaten with 1 tablespoon water
Coarse salt
Optional toppings
parmesan cheese, shredded
cinnamon and sugar

Equipent
stand mixer with a dough hook
parchment paper

Step by Step


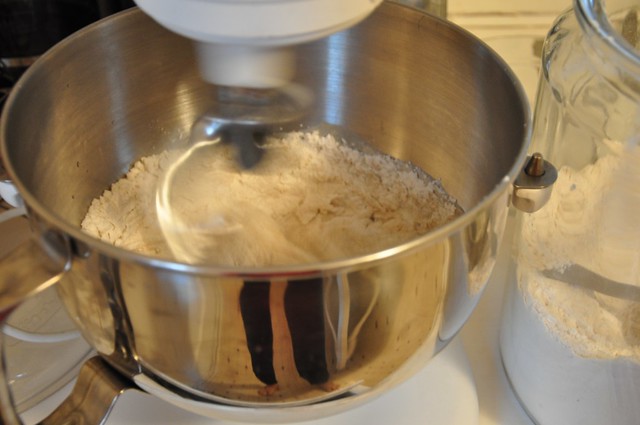
Combine the water, sugar and kosher salt in the bowl of a stand mixer and sprinkle the yeast on top. Allow to sit for 5 minutes or until the mixture begins to foam. Add the flour and butter and, using the dough hook attachment, mix on low speed until well combined. Change to medium speed and knead until the dough is smooth and pulls away from the side of the bowl, approximately 4 to 5 minutes. Remove the dough from the bowl, clean the bowl and then oil it well with vegetable oil. Return the dough to the bowl, cover with plastic wrap and sit in a warm place for approximately 50 to 55 minutes or until the dough has doubled in size.


Preheat the oven to 450 degrees F. Line 2 baking sheet pans with parchment paper and lightly brush with the vegetable oil. Set aside.


Bring the 10 cups of water and the baking soda to a rolling boil in a large pot.
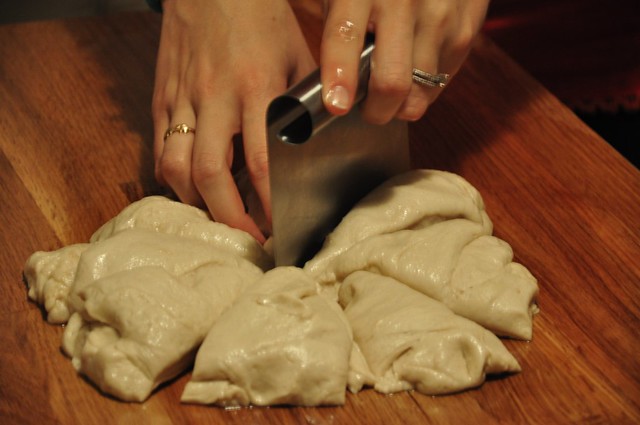
In the meantime, turn the dough out onto a slightly oiled work surface and divide into 8 equal pieces. Roll out each piece of dough into a 24-inch rope. Make a U-shape with the rope, holding the ends of the rope, cross them over each other and press onto the bottom of the U in order to form the shape of a pretzel. Pinch the dough at all places that it intersects tightly so that it will stay together.  Place onto the parchment-lined half sheet pan.
Place the pretzels into the boiling water, 1 by 1, for 30 seconds. Remove them from the water using a large flat spatula or strainer spoon and return to the baking sheet.


For regular pretzels:  Brush the top of each pretzel with the beaten egg yolk and water mixture and sprinkle with coarse salt.


For cinnamon sugar pretzel:  Brush with melted butter, dip in sugar and sprinkle cinnamon on top.

For parmesan pretzel:  Brush with egg wash and sprinkle with shredded parmesan cheese.


Bake until dark golden brown in color, approximately 12 to 14 minutes. Transfer to a cooling rack for at least 5 minutes before serving.

Serve warm with various dips.

9.22.2010

cherry almond granola

cherry almond granola
A little something has snuck into my world and stolen a good chunk of my free time.  It's called... the real world. 


I have had a job these past few years, but new this year I have been given more responsibility with a lot more hours.  The good news is I absolutely love it,  but the bad news is I don't have as much time to share what's going on in the kitchen.  Because yes, we are still eating around here so be patient with me and I will get back to sharing.

Enough about that because what you really need to know about is this recipe.  I have been on a search for a great granola recipe and I'm afraid my long search is over with just one recipe.  I was ready to buy pounds of oats and spend many an hour slowly toasting different recipes until I found just the right one, but this has become an instant favorite.
cherry granola 2
From my little to kitchen to yours... Enjoy.

Cherry Almond Granola
Adapted from Peace Meals, Junior League of Houston
Recipe Notes
I have never met a dried cherry I didn't like and I am sure any variety you find at your grocery will be great.  I used tart dried cherries for this recipe.  Though I haven't tried it myself, the original recipe suggests throwing in some mini chocolate chips after the granola has cooled for an afternoon snack.
Ingredients
1/4 cup vegetable oil
1/4 cup honey
1/4 cup brown sugar
2 teaspoons pure vanilla extract
3 cup old-fashioned rolled oats
1 1/4 cups sliced almonds
1 cup dried cherries (an extra 1/2 cup if you love these)
1 cup sweetened flaked coconut
1/4 flax seeds
parchment paper
Step by Step
Preheat the oven to 300 degrees F.  Line a rimmed baking sheet with parchment paper.  In a large bowl, mix together the oats, almonds, cherries, coconut and flax seeds.  Stir together the oil, honey, brown sugar and vanilla in a small saucepan over low heat.  Stir until well blended and sugar has dissolved.  Pour sugar honey mixture over granola and mix to coat well. Spread the granola on the prepared baking sheet and bake for 32 minutes or until golden brown, stirring halfway through.  Cool completely, then loosen from the baking sheet and crumble.  Store in an airtight container.

Makes 8 cups.

9.01.2010

little kitchen loves... the marta glass

Every once in a while, something makes its way into your kitchen and just makes everything better.  That's how I feel about the Marta glass.  I first read about them here and after staring at the chips and cracks on our current glasses, I decided we needed a change.  I am in love with the Marta glass from CB2.  I can be a little bit of a cheap skate, especially with breakables because we seem to always, well, break them.  So the price tag on these babies was also very attractive because I can rest easy knowing its not going to break the bank if we break one.  

They are light but sturdy and are perfect for everything from water to wine.  We went with two sizes... the middle and the one on the right.  I love them both, but I also wish we had a few of the biggest one too.  Probably my next investment.
DSC_0388
They also make great, sleek vases.  Wouldn't a line of these in different sizes be great table decor?  I plan on trying it sometime and will share.

8.29.2010

creamed corn + a confession

DSC_0448
I battled the idea of renaming this altogether because I know I would personally have no interest in reading a post about creamed corn. However, I promise you should keep reading. This is the best creamed corn, maybe corn in general, that I have ever had. This is not your sloppy, goopy creamed corn that you would get served at a cafeteria.

This is crisp corn kernels that have been sauteed in onions and cream sauce and is absolutely delicious. And once again, this couldn't be easier. So, please, take my word for it and try this dish while there is still great summer corn at grocery stores.
DSC_0447


Now on to the confession...

I cannot make skirt steak... also known as flank steak. I am really beside myself about it. The key to skirt steak is the way you cut, so I've heard, and I've cut this darn meat every which way and I still get a barely-able-to-chew piece of meat. I've done marinades, I've grilled, I've seared and still... nothing but hours of chewing. My friend Jennifer told me about this meal from Real Simple and I don't feel like it was a total loss because of the great sides, but if someone could give me a few hints on skirt steak I would be forever grateful.

DSC_0458
If I get any good hints and can re-make this meal, I will share... and I will tell you about the salad because it was easy and delicious, but I'm going to hold out on you in hopes someone tells me something about skirt steak.

Creamed Corn
Recipe Adapted from Real Simple
Recipe Notes
Melt the butter in a medium saucepan over medium-high heat. Add the onion and cook until soft, about 4 to 5 minutes. Add the corn, half-and-half, ½ teaspoon salt, and ¼ teaspoon pepper and simmer until the corn is tender and the half-and-half is slightly thickened, 5 to 8 minutes.

8.19.2010

Oven Baked Chicken Tenders

DSC_0445

These. are. so. good. and easy.

Crunchy and flavorful chicken tenders that are healthier and much easier to prepare than frying them up.  I have always had a thing for Panko bread crumbs (they are just so versatile) so I found a recipe for chicken tenders and substituted the bread crumbs and cereal mixture for my main squeeze panko and voila, here is a pretty darn good recipe if I do say so myself.

From my little kitchen to yours... Enjoy.

p.s. have you bought a meat thermometer yet?? I really hope you have because this is another great recipe where having a meat thermomter allows for perfectly cooked, tender, juicy chicken tenders.  I promise you will not regret this purchase.
DSC_0440
Oven Baked Chicken Tenders
Recipe Notes
The spices of one of the recipes I was combining called for Allspice.  I didn't realize until right before making these that I didn't have any so I cam up with my own subsitute... half ground cloves and half cinnamon.  If you have those two on hand, they will work just great.  If you have never used Panko, they are a Japanese bread crumb and I find that most grocery stores carry them now.
2 cups panko bread crumbs
2 tablespoons brown sugar
1 teaspoon salt
1/2 teaspoon black pepper
1/2 teaspoon ground allspice (see recipe note)
3 tablespoons vegetable oil
1 1/2 pounds chicken breast tenders, 2 packages
1/3 cup all-purpose flour
2 eggs, beaten
1/4 cup barbecue sauce

Preheat the oven to 375 degrees F.

Pour the Panko bread crumbs in a shallow dish. Mix in sugar, salt, pepper, and allspice. Place flour in a separate shallow bowl. Place eggs in another separate bowl.

Drizzle about 3 tablespoons vegetable oil evenly over the breading, tossing and turning it to mix the oil all through the panko mixture.

Dredge the chicken through the flour, egg, the flour again, the egg again and then the panko mixture. Arrange the tenders on a nonstick baking sheet. Place the chicken tenders in the oven and bake for about 15 minutes, turning over once. If you have a meat thermometer, heat to 165 degrees. Serve hot chicken tenders barbecue sauce for dipping.

8.15.2010

lily's luncheon

DSC_0403
I am officially over missing the original little kitchen and I am full fledge in love with the new one.  You could say this luncheon for 30 was its first big test and it passed with flying colors.  In fact, it makes me question how I did things like this in the original little kitchen.  I have to say it is a combination of having great windows in here and the fact that Mr. Hungry actually fits in the kitchen at the same time to help assemble everything.

This was a luncheon for a darling 5 month old baby named Lily who was christened at her church last week.  The only mistake I made last weekend was not getting a picture of her to share with you.
DSC_0405
DSC_0404
DSC_0394
On the menu was...
Tomato Bruschetta
Artichoke Dip
Avocado Chicken Salad with avocado dressing
Assorted Breads and Crackers
Pesto pasta salad with feta and pine nuts
Egg Salad and Pimento Cheese Sandwiches
Triple Lemon Cupcakes

8.09.2010

Chicken with Artichokes and Angel Hair

DSC_0406
Finally, a real dinner, a new recipe, in the new little kitchen.  You see, I have been cooking.  It's just that when things have been so crazy around here, it has been much easier to fall back on a few favorites than to explore a new recipe.  But something just felt so right about making this meal.  So the cooking will be picking up again.   Slowly but surely I'm getting comfortable in this new place.

This was a great quick night meal that jazzes up chicken just a bit.

From my little kitchen to yours... Enjoy.
DSC_0390

DSC_0393
To deglaze the pan, simply scrape the bottom of the pan once the chicken broth is added.  This allows the bits of chicken that get stuck to the pan to add flavor to the sauce. 
DSC_0401

DSC_0404
Chicken with Artichokes and Angel Hair
Adapted from Martha Stewart Everyday Food
Serves 4
Recipe Notes
The original recipe calls for boneless, skinless chicken breast.  I used boneless, skinless tenders because that is what I had on hand.  Either will work, but the most important part is to pound it really thin.  If your chicken breast is really thick, you can cut it lengthwise first, and then pound it out a little more.  Another key is adding a good bit of salt and pepper to the flour for the chicken.  This is the main flavor for the chicken so add a good amount.  I used whole wheat angel hair pasta, but if I was making this for guests, I would probably use regular.... either will work great.
Ingredients

Salt and ground pepper
1/4 cup all-purpose flour
8 thin chicken cutlets (about 1 1/2 pounds total) see recipe notes
2 tablespoons olive oil
1 cup reduced-sodium chicken broth
1 can (14 ounces) artichoke hearts 2 tablespoons rinsed and drained capers
2 tablespoons butter
8 ounces angel-hair pasta (whole wheat or regular)
1/2 cup parsley leaves

Set a large pot of salted water to boil. Place flour in a shallow dish, and season well with lots of salt and pepper. Dredge cutlets, shaking off excess. In a large skillet, heat 1 tablespoon oil over medium-high. Cook chicken in batches, adding remaining oil as needed, until light golden, 1 to 3 minutes per side; transfer to a dish.

Add broth to skillet, and bring to a boil; cook until reduced by half. Add artichokes, capers, and the chicken with any juices. Gently swirl to combine, and bring just to a boil. Remove skillet from heat. Add butter and stir until melted.

Add pasta to boiling water. Cook until al dente; drain. Serve chicken and sauce over pasta, topped with parsley.


8.04.2010

Cheesy Potatoes

DSC_0384
I want to be very clear from the get-go that these are not everyday potatoes; I battled with the idea of titling this post special occasion potatoes or vacation potatoes because they are indulgent and amazing, but it is slightly scary how easy they are to make.

Confession: Earlier this summer, we spent a weekend with a whole bunch of friends at another friend's ranch.   We split up meal duties and one night I was assigned "sides."  Months earlier, when we scheduled this weekend, I had big plans of whipping up something great for a side.  My only excuse for mediocrity was that we were in the middle of this debacle, but seriously that is no excuse.  Long story short, when the day actually came and we were headed out to the ranch, I was blank... I couldn't think of anything to bring.  We ran by the grocery store and I racked my brain, but nothing, nothing came to mind.  I am embarrassed to say that I grabbed a bag of white rice.  white rice?! My brain was fried and I had no idea what anyone else was bringing and I thought maybe my rice would just blend in with the rest of the meal.

Well, I still haven't heard the end of that decision, probably because I didn't even make the rice.  When it came time for dinner on Saturday, I smelled something in the kitchen that immediately made me even more insecure about my rice.  My friend, Amy, made these cheesy potatoes and just from hearing the words cheesy potatoes, I knew my sad, white rice would not be touched.

Once I ate these potatoes, I was feeling even lower (if that is possible), because it definitely seemed like she had been slaving over these all day; and, they were amazing!  I told her how much I loved them and she quickly shared with me how easy they are to prepare.  Well, that is an understatement.  For something that seems so decadent and delicious, the 5 minutes it takes to put these together will astonish you.  You will quickly see why I have the need to call these special occasion potatoes... the ingredient list is probably enough to give you a heart attack, but it is so so worth it.

So, thank you Amy for sharing this recipe with me!

Cheesy Potatoes
Recipe Notes
The recipe called for thawing out the frozen potatoes by setting them on the counter for an hour or two.  I (as usual) was throwing this together last minute and did not have time to let the potatoes thaw.  Instead, I followed the directions on cooking the potatoes to get them warmed up.  Add a tablespoon of olive to a nonstick skillet and heat over medium heat.  Cook potatoes for 5 to 10 minutes.  You do not need to cook them through, just enough to where they are no longer frozen.
Ingredients

2 lb bag of frozen hash browns, thawed (diced potatoes) see recipe note
8 oz. bag of shredded cheddar cheese
1/2 cup chopped onion
1 teaspoon salt
1 teaspoon pepper
1 stick of butter, melted
1 can of cream of chicken soup
8 oz. sour cream
Step by Step
Mix all ingredients together.  Spread in a 9 x 13 greased pan. Bake at 350 for 20-25 covered and then remove foil and bake for additional 20-25 until gold and bubbly on top. 

7.29.2010

Peanut Butter Patsy's

DSC_0353

We spent the weekend at the beach with some friends and had a great time.  So I can report back to all of you who are afraid to go to the oil stricken beach, head on down to Galveston... it's still as beautiful as ever, not a tar ball in sight. Our biggest problem was that we woke up Saturday morning and realized we didn't have anything to snack on all day, which is one of my favorite activities no matter where we go.  We headed to the grocery store to get some snacks  and were doing our best to come up with something quick and easy.  I remembered these little sussies that I hadn't shared with you yet.  Our family friend Patsy told me about these  so I thought this was an appropriate name.
If you like the combo of sweet and salty as much as I do, you are going to love this one. That's about it... They are quick, easy and addicting.
DSC_0349

DSC_0343

Peanut Butter Patsy's
Ingredients
Saltine crackers
Crunchy peanut butter
Large marshmallows
Step by Step
Preheat to oven to broil.  Spread 1-2 teaspoons of crunchy peanut butter in the center of each cracker.  Place a marshmallow on top of each dollop of peanut butter.  Place crackers on a baking sheet, not touching each other.    Place in oven until tops of marshmallows are golden and bubbly.  Watch carefully so that marshmallows do not burn, they will cook very quickly.  Allow to cool slightly and serve.