10.30.2009

{houston readers} New Farmer's Market In Town


Fellow Houstonians, there is a new Farmer's Market coming to town and I wanted to share the info I have about it so far.  Highland Village will now have a farmer's market on Saturday mornings from 8 am to 12 pm starting tomorrow, Saturday, October 31.   If you are unfamiliar with the farmers markets in Houston, there are a couple on Saturday mornings and a few during the week, but in my opinion, there is definitely room for more.  Here is a little blurb about the new market!

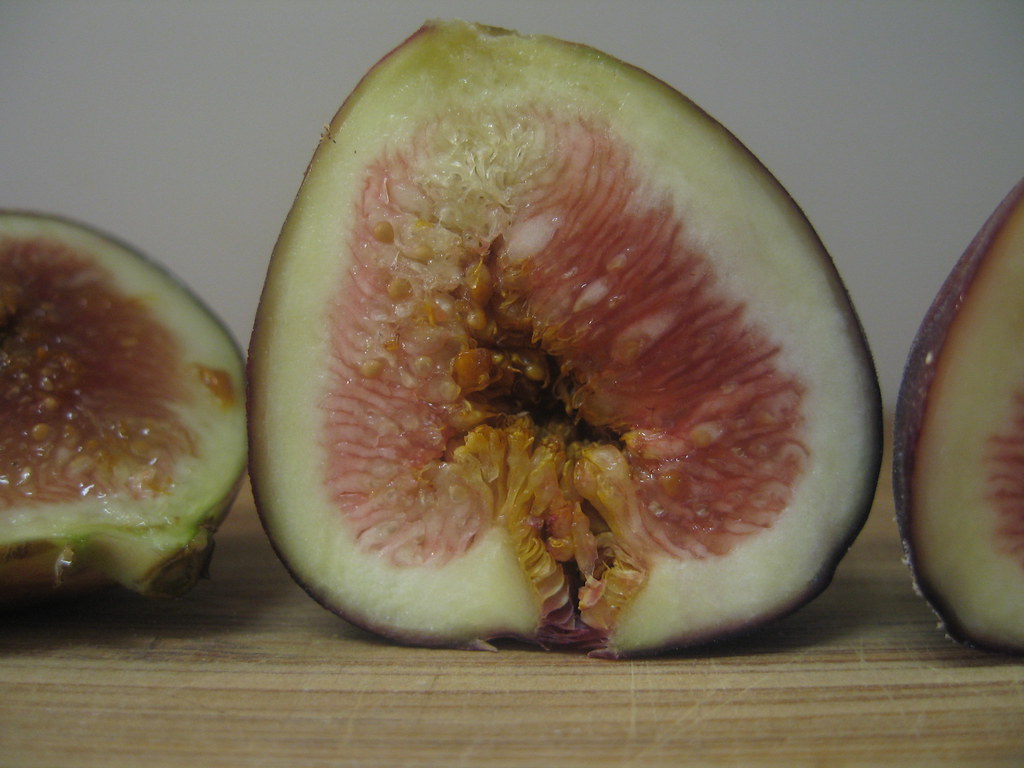
A permanent covered structure (next to Jos. A Banks and across the street from Escalante’s Mexican Restaurant) will house up to 24 vendors. Seasonal growers will rotate throughout the year bringing the freshest goods of each season to Houston such as blueberries, figs, strawberries and peaches. A baker will bring fresh baked breads, desserts, brownies and pastries that will pair nicely with the organic coffee vendor. One unit will supply free-range beef, lamb, pork, goat, chicken and wild boar while several vendors will have a variety of free-range eggs. A soap maker will provide lotions and handmade goat’s milk soaps.
Unusual and anticipated features at the market include Queen Bee Marshmallows, a vendor selling 20 different varieties of handmade marshmallows, and Texas Wild, a vendor who owns his own shrimp boat bringing peeled and whole shrimp to the market.

Just thought I would share, and maybe I will see some of you there this Saturday (probably not though if you plan on going at 8).

10.28.2009

Roasted Pumpkin Seeds


Tis the season to carve pumpkins and the saying, "One's man trash is another man's treasure," has quite possibly never been more true.  I am sure the majority of pumpkin carvers dig all that pumpkin goo out of the pumpkin, discard, and go on to carving the pumpkin.  Well, those precious little seeds can be quite the tasty snack if you are willing to deal with that pumpkin goo a little bit longer and clean them up. Enjoy.

Roasted Pumpkin Seeds
Ingredients
Pumpkin seeds, cleaned with all pumpkin pulp discarded
Olive oil
Sea Salt
Step by Step
1.  Preheat oven to 325 degrees.
2.  Pat seeds dry.  Spread in a single layer on a baking sheet.
3.  Lightly drizzle with olive oil and sprinkle with sea salt.
4.  Roast seeds for about 25 minutes until lightly browned.  After 10 minutes of browning, shake pan to toss seeds and make sure are sticking to the pan.
5.  Let cool.  Store in an airtight container until ready to serve.

10.26.2009

Marathon Cookies


I have a new motto... If you can't do something yourself (or not crazy enough to try), bake for those who can.  My boss ran a marathon last weekend and my coworkers and I did our best to support her since we could not fathom doing anything like that ourselves.  I found these little energy cookies at 101 Cookbooks.  If you have not been there, you definitely should go.  Heidi focuses on all natural, healthy cooking and has been doing so for years.  She has a cookbook that is sold at Anthropologie... what a dream.  I saw that she came up with this little cookie (if you can call something that contains kidney beans a cookie) when she was also cheering someone on during a marathon and wanted to give them a few bursts of energy.   So if you find yourself with a marathon runner that you need to give some energy to, try these cookies.  You will not truly appreciate that these cookies are pretty tasty until you take a look at the ingredients list... chopped dates, kidney beans, anise seeds.... but trust me, they are pretty darn good.

Click here for the recipe at 101 Cookbooks.


10.20.2009

Peanut Butter Cup Cookies


These cookies really need no introduction.  If you have the love that I do for Reese's peanut butter cups, you are probably not reading this because you have already left for the store to buy the ingredients.  And yes, they are that good.  I put my own little twist on them with the second batch.  I used the new dark chocolate Reese's cups and it's hard to say which one is better.  I loved the dark chocolate ones and they were the favorite among most of the tasters, but Mr. Hungry preferred the ones made with regular Reese's.  So my advice is to try both... you will be glad you did.


  • Peanut Butter Cup Cookies
  • Adapted from Real Simple, October 2009
  • Makes about 24 cookies
  • Recipe Notes
  • As I mentioned earlier, I made two batches of these.  I made one with regular peanut butter cups, but I used dark chocolate peanut butter cups for the second batch.  Both were delicious.  I have also found a new love for parchment paper.  They have made perfect cookies for me lately, and I have to admit I was notorious for burnt edges in the past.  But if you are one of those master bakers, you might have your own method for perfect cookies.  And in general, everyone's oven can be a little bit different so find what suits you best.  
  • Ingredients
  • 1 1/2 cups all-purpose flour
  • 1 teaspoon baking soda
  • 1/2 teaspoon kosher salt
  • 1/2 cup (1 stick) unsalted butter, at room temperature
  • 3/4 cup dark brown sugar
  • 1/2 cup granulated sugar
  • 1 large egg
  • 1 teaspoon pure vanilla extract
  • 1 12-ounce package small peanut butter cups, coarsely chopped (regular or dark chocolate)
Step by Step
1.  Preheat the oven to 375 degrees.
2.  Line two baking sheets with parchment paper.
3.  Whisk flour, baking soda and salt in a medium sized bowl.  
4.  In a separate bowl, beat the butter and the sugar until creamy.
5.  Add the egg and vanilla and combine until creamy.
6.  Gradually add flour mixture until just combined.
7.  Fold in the peanut butter cups.
8.  Using a tablespoon, drop mounds of dough about 2 inches apart. 
9.  Bake until edges become slightly brown, 12 to 15 minutes.
10.  Transfer to a baking rack to cool.

10.16.2009

Cranberry & Fig Breakfast Cookie


So I am not silly enough to think that I have enticed all of you with this post, but I do know if you are a lover of figs like I am, you are very interested.  There is not a real fine line with figs... you usually love them or are scared of them, at least in their raw form.  I myself very much look forward to this time of year when figs are in the grocery stores and are reasonably priced.  I found this recipe a long time ago in some sort of health magazine.  They pitched these little breakfast cookies as a great snack or breakfast after a good run or workout.  Now I have to admit I made these for breakfast this week and I have no intention of going on a good long run before I have one.  However, they are a healthier version of one of my favorite muffins.  And back to those of you who are not a fan of figs, I would still encourage you to try this cookie because they are not overly figgy (yes, I said figgy), but the fruit adds great natural sugar.  The bites of sweet fig and tangy cranberry make this cookie such a perfect breakfast treat.

Cranberry & Fig Breakfast Cookie
Recipe Notes
If you cannot find figs, feel free to substitute more cranberries.
Ingredients
3/4 cup packed brown sugar
1/4 cup butter, melted
2 large eggs
1/4 cup finely chopped figs
1/2 cup sweetened dried cranberries
1 teaspoon vanilla extract
1 cup all purpose flour
1/2 cup whole wheat flour
1/2 cup unprocessed bran OR old fashioned oatmeal
1/2 teaspoon baking soda
1/4 teaspoon ground cinnamon
1/4 teaspoon ground allspice
1/4 cup sliced almonds
Step by Step
1.  Preheat oven to 350 degrees.
2.  Combine first 3 ingredients in a large bowl.  Stir in chopped figs, cranberries and vanilla.
3.  Lightly spoon flours into dry measuring cups; level with a knife.  In a separate bowl, combine flours, bran, baking soda, cinnamon and allspice, stirring with a whisk.
4.  Add flour mixture to egg mixture, stirring just until moist.  Gently fold in almonds.
5.  Drop a 1/4 cup of batter 4 inches apart on 2 nonstick baking sheets.  Bake in two batches for 12 minutes each or until almost set.  Cool 2 minutes on pans.  Remove from pans and cool completely on wire racks.


10.14.2009

Chicken Noodle Soup


Can you tell I'm ready for the cold weather?  One day last week, there was about an hour of cool breezes here in Houston and with all this talk of the first days of fall I had to make soup. Sure, the cool breeze had dissipated by the time I had even bought the ingredients from the store, but that didn't stop me.  I simply cranked down the air conditioning and enjoyed this wonderful soup.

Before I had ever made chicken noodle soup, I had quite the misconception that you must slave over the stove all day to produce a great batch.  Quite the contrary with this recipe I adapted from Rachael Ray.   I know she is quite the controversial topic in the food world, but you can't argue with her good recipes such as this one.  I did a little adapting, but have to say I might have already found my favorite chicken noodle soup recipe on the first try! You can put it together very quickly and the addition of the fresh herbs at the end, makes this a hearty yet fresh soup. Enjoy!

Chicken Noodle Soup
Adapted from Rachel Ray, Food Network
Servings: 4 large bowls, 6 regular bowls
Recipe Notes
If you have not heard me say this before, I am quite the salter.  I will just say I added quite a bit of salt to this and leave it at that.  My suggestion is that you wait till the soup is almost finished and taste and add salt slowly till it is to your taste.
Ingredients


2 tablespoons (2 turns around the pan) extra-virgin olive oil
2 medium carrots, peeled and chopped
1 parsnip, peeled and chopped
1 medium onion, chopped
2 ribs celery, chopped
2 bay leaves, fresh or dried
3 teaspoons of salt
1 teaspoon of pepper
10 cups good quality chicken stock (2 boxes)
1 pound (the average weight of 1 package) chicken breast tenders, diced
1/2 pound wide egg noodles
A handful fresh parsley, chopped
1 1/2 tablespoons of fresh dill, chopped
salt and pepper
Step by Step
1.  Place a large pot over moderate heat and add extra-virgin olive oil. 
2.  Work close to the stove and add vegetables to the pot as you chop, in the order they are listed.
3.  Add bay leaves and salt and pepper. 
4.  Add stock to the pot and and raise heat till soup comes to a boil. 
5.  Add diced chicken tenderloins, return soup to a boil, and reduce heat back to moderate. Cook chicken 
two minutes and add noodles. 
6.  Cook soup an additional 6 minutes or until noodles are tender and remove soup from the heat.
7. Stir in parsley and dill, remove bay leaves and add additional salt and pepper to taste.
8. This is a thick soup. Add up to 2 cups of water if you like chicken soup with lots of broth.


Ever seen one of these before?

I hadn't... It's a parsnip.  I was worried I was going to have to search the ends of the earth for what I thought was some fancy schmancy ingredient, but there it was at my local grocery store... amongst all the other produce I buy daily. If for some reason it is not at yours, I wouldn't sweat it... just add an extra carrot.


This went perfectly with mini cheese toasts.

10.12.2009

Ham & Swiss Pizza


Should I change the name of this site to “The Little Kitchen Pizzeria… and the Occasional Cookie”?  I seem to be stuck in a rut… well, I don’t consider it a rut at all, but it seems like the Little Kitchen has become a broken record of pizzas and friends in the kitchen (which have been some of my favorite cooking times).  I am more than okay with this and I hope you are too.  But don’t worry, I will spin out of my pizza making frenzy eventually and continue to broaden my horizons.  

For now, I must share two new great pizzas that I discovered with my friend Mary.  I like to think I was ahead of the curve on this pizza thing because just this month, every magazine I have read (Real Simple, In Style, Food Everday, etc.) has a whole section on making pizza at home.  I guess I should say Bon Appetit was really the one ahead of the game because their May issue with Giada’s pizza is what started me down this wonderful road.  I have continued to use the same crust, but I have tried all these new toppings and these two pizzas came from Real Simple this month.  I thought both of them were delightful and the tomato olive pizza was a fresh alternative with no cheese (even though I have to say the slices of brie we added to half the pizza were my favorite part).  Most of these articles I have been reading about pizzas have all used store bought dough.  If my homemade dough is what is keeping you from trying pizzas, you should definitely start with store bought dough and find one you like…. Too bad I’m already partial to the homemade kind...Enjoy!
Ham & Swiss Pizza
Adapted from Real Simple, October 2009
Ingredients
flour, for rolling out pizza dough
1 pound pizza dough, thawed if frozen
2 tablespoon olive oil
2 shallots, cut into very thin slices and separated
12 sprigs fresh thyme
kosher salt and black pepper
1/2 pound thinly sliced deli ham
1/2 cup swiss or gruyere cheese (2 ounces)
Step by Step
1.  Preheat oven to 425 degrees.
2.  Sprinkle a clean surface with flour.  Roll our pizza dough into a rectangular shape that will fit a baking sheet.
3.  Cover baking sheet with parchment paper.  Transfer pizza dough onto baking sheet covered with parchment paper. 
4.  Lightly brush with dough with olive oil.  Sprinkle with salt and pepper.
5.  In a medium bowl, toss shallots, thyme, remaining olive oil and a 1/4 teaspoon each of salt and pepper. 
6.  Top the dough with ham, cheese and shallot mixture.  
7.  Bake for 15 to 20 minutes, until crust is crispy and browned. 

Tomato, Olive & Scallion Pizza


Tomato, Olive & Scallion Pizza
Adapted from Real Simple, October 2009
Recipe Notes
We added thin slices of brie to half of this pizza just to try it out.  (Honestly, I was having a hard time trusting we could make a tasty pizza without any cheese).  The slices of brie paired perfectly with the olives and tomatoes, but it turns out this pizza was delicious without the cheese as well.
Ingredients
1 pound pizza dough, thawed if frozen
2 beefsteak tomatoes (about 1 pound), thinly sliced
2 scallions, thinly sliced
1/4 cup pitted kalamata olives, halved
2 tablespoon olive oil
kosher salt
black pepper
brie, thinly sliced (optional)

  • Step by Step
  • 1.  Preheat oven to 425 degrees.
  • 2.  Sprinkle a clean surface with flour.  Roll our pizza dough into a rectangular shape that will fit a baking sheet.
    3.  Cover baking sheet with parchment paper.  Transfer pizza dough onto baking sheet covered with parchment paper. 
    4.  Top the dough with the tomatoes, scallions and olives.  If using slices of brie, add on top of tomatoes.  Drizzle with the oil and sprinkle with kosher salt.  Top with a 1/4 teaspoon of pepper.
    5.  Bake until crust is crisp and edges are browned, 15 to 20 minutes.

10.11.2009

Homemade Cookie Cake


One of my best friends, Lea, does not like cupcakes.  I know, I know, it took our breath away too when she admitted this to me and a few friends, who couldn't imagine a world without cupcakes.  Well, her birthday is today and I still had to find a way to celebrate with a sweet treat, so I decided to try my hand at a homemade cookie cake.  This is my first attempt and I think it turned out pretty darn good.  I know some of you food purists would be appalled to know that I used pre-made cookie dough, but I did make a homemade buttercream icing, which makes all the difference if you ask me.  If you are in a hurry and don't like to mess with things like a kitchen full of powdered sugar dust or a piping bag, you could just buy the pre-made icing that already has a fancy tip on it (I know, I know... shoot me for all my shortcuts!).
Happy Birthday Lea!


Homemade Cookie Cake
Recipe Notes
I have started cooking all of my cookies (and cookie cakes) on parchment paper.  I have found it to be the most fool proof way to produce perfectly cooked cookies with no burned bottoms.  If you have a different method, feel free to use it.  And the best part, you just crumple it up and your clean up is finished.
Ingredients
1 tube of refrigerated chocolate chip cookie dough (two if you want an extra large cake)
parchment paper
flour
for the icing
1 cup (2 sticks) butter, room temperature
3 cups powdered sugar
2 teaspoons milk
food coloring
Step by Step
1.  Preheat oven to 375 degrees (or whatever temperature prepared cookie dough package says)
Lightly flour a rolling pin and a piece of parchment paper so that dough will not stick to either.
2.  Using a rolling pin, roll out cookie dough into desired shape on a piece of parchment paper.  Make sure that dough is evenly rolled for best baking.
3.  Transfer parchment paper with cookie dough onto a baking sheet.  Bake for 10 to 20 minutes, depending on thickness and shape of dough.  Remove when edges are very slightly browned.
4.  Allow to cool completely. Using the edges of the parchment paper, transfer the cookie cake onto the surface that you will be serving from.  Gently loosen cookie cake from parchment paper with a spatula.  Slip parchment paper out from underneath the cake.  If cookie cake is sticking to paper, try tearing the parchment paper and removing half from one side of the cake and half from the other. 
5.  Ice the cake with buttercream icing and store in the refrigerator until ready to serve.
Step by Step for Buttercream Icing
1.  Cream the butter on medium speed until light and fluffy. 
2.  Gradually add the powdered sugar, then add the mild and blend until smooth. 
3.   Add  food coloring until desired color.

10.09.2009

The Little Kitchen That Could... hosts lots of visiting cooks!


I believe my Little Kitchen has proved it can handle lots of big projects... cooking a dinner party for 8, cupcakes that use every bowl in your kitchen, and the constant grind of almost daily cooking.  But now, it has definitely accomplished a new feat... 4 cooks in the kitchen! Sure there was lots of shimmying by each other, and a little ducking and dodging as cookies were coming out of the oven and pizzas were being created, but it might be the best evening the Little Kitchen ever had.


I have been waiting to have a group over for pizzas and college friends in town was the perfect opportunity.  I had also been drooling over the Reese's peanut butter cup cookies in Real Simple this month so voila, the menu was made.  The chicken pesto pizza is one of my favorites and the detailed recipe can be found here.  Our other pizza was something my friend Lea whipped up, which was the chicken pesto pizza with a few jazzed up ingredients.  She used pesto, chicken, parmesan, minced garlic, thinly sliced tomatoes, fresh spinach leaves and topped with a little mozzarella cheese! yum, yum, yum... Glad you could join me girls! Oh, and I'll be back with the cookie recipe!


10.08.2009

And the Winner is...

So we have a winner for the Berndes Crepe Pan Giveaway! drumroll..... MEGAN MICHELSON! Congrats Megan and your Berndes Pan will be shipped to you shortly.  I don't know about you, but I have a hard time believing anyone truly picks a random name for a blog contest (especially when you have friends enter!) so if you need reassurance that this random drawing really took place, I have posted the actual drawing below.  Literally as I was cooking dinner last night right when I got home, I pulled out a bowl and put together this drawing.  So it's nothing fancy, just proof!

Thank you all for entering and I hope to have more drawings in the future.  Megan's crepe comment was one that included pumpkin and cinnamon.  My true plan was to make the crepe that the winner had suggested for this post.  But two things got in my way... First, it is still too gosh darn hot here in Houston to think about making anything as "fallish" and cozy as a pumpkin and cinnamon crepe.  Secondly, I couldn't have you kind folks waiting any longer to know who won the pan and I just didn't have time crank out a new crepe tonight.  So I will be back with a version of a pumpkin crepe and maybe our crepe pan winner could share her first crepe with us from her kitchen!

Disclaimer: I'm slightly appalled at where this youtube video decided to pause on here.  I mean really?  Do I need this up close and personal bewildered look on my face captured?  Oh well, I'm not tech savvy enough to know how to change it so please disregard!

10.07.2009

Crunchy Shrimp with Asian Sauce


I just love chinese food, but have never been to really replicate my favorite take-out dishes at home.  When my friend Rachel told me about this recipe, I knew I wanted to try it immediately and I was so excited to have a new yummy dish with an Asian flare.  The best part would definitely be that this is a much healthier version of Chinese food as well.  You can make it with brown rice too for even a healthier twist.  This dish was extremely easy to throw together and so good we will be making it again and again.  When Rachel sent me this recipe, there were no measurements included for the sauce so  I added below exactly what I did in case you like to follow a recipe exactly, but feel free to change it up because you really can't mess it up! Enjoy!


Crunchy Shrimp with Asian Sauce
Recipe Notes
When lightly frying the shrimp, a lot of my panko bread crumbs fell off.  This will probably happen to you too, but just remove the crunchies that fall of when you take the shrimp out of the pan.  When spooning the shrimp onto the rice, spoon the crispies onto the rice as well.  If you leave them all in the pan while making the sauce, they will 2 become soggy and you will lose that good crunch.  I thought serving the sauce on the side worked best for two reasons... Everyone likes to pour a different amount of sauce and that keep the bread crumbs crunchy until right before eating.  Also, the sauce is quite salty so you do not really use it all.  You can also try this breading method with other meats like chicken or pork if you are not a shrimp fan.
Ingredients
2 egg whites
1 1/2 cups panko bread crumbs, mixed with 1 teaspoon of salt and 1 teaspoon of pepper
1 1/2 cups of shrimp (about 25 medium sized shrimp_
1 tablespoon olive oil
1/2 a bunch of green onions, coarsely chopped
1/4 cup of chicken broth
1/2 cup of soy sauce
1 cup of button mushrooms, roughly chopped
steamed rice
Step by Step
1.  Dip shrimp in egg white and then into bread crumbs to coat each shrimp evenly.
2.  Heat olive oil over medium to high heat in a large saute pan or skillet.
3.  Lightly fry shrimp for about 1 to 2 minutes on each side, until shrimp are cooked through and bread crumbs are browned.
4.  Remove shrimp and crunchy bread crumbs from pan and cover with foil to keep warm.
5.  In the same pan, add green onions, chicken broth, soy sauce and mushrooms.  Let sauce come to a slight boil and stir.  Turn down heat and allow to simmer for 5 to 10 minutes.
6.  Spoon shrimp and crunchies on top of steamed rice and serve with sauce on the side.

10.06.2009

Crepe Pan Winner Update... Read Below

I'm sorry... I'm sorry... I'm sorry.

No, I didn't cancel the contest or trick all of you into coming up with crepes and not giving away a crepe pan.  I'm apologizing because I need a little more time to reveal the winner!  You might not think this is the crisis I am acting like, but I just hate that I'm going to have to extend it a little.  Secretly, I just can't get the post together because I'm going to a cooking class! I am so so excited but I just can't do it all (and make it to work in the morning).  The Little Kitchen has also been very busy and very crowded with lots of extra cooks (it has also been the most fun I have had in that little hallway!!) so I will report on those fun cooking adventures as well.  I hope you will be okay with my extension and I promise to announce the winner by Friday!

Until then, I will be sharing one of my favorite new recipes tomorrow!

10.01.2009

Lemon Curd & Blueberry Crepe


This is a crepe that was on the menu at one of the best crepe places I've been to; Flip Happy in Austin, TX.  I happened to have some lemon curd left over from my triple lemon cupcakes so I decided to give this a try.   The slightly tangy lemon curd paired with the sweet blueberries are a perfect combination.  Enjoy and keep entering the contest below for a few more days!

Lemon Curd & Blueberry Crepe
Ingredients
Crepes made from Basic Crepe Batter
1 tablespoon of lemon curd (per crepe)
2 tablespoons of blueberries (per crepe)
1 teaspoons of powdered sugar (per crepe)
Step by Step
1. When crepe is almost completely cooked, but still in pan on the heat, spread 1 tablespoon of lemon curd on to crepe.
2.  Slide crepe off of heat and fold into a pie shape.
3.  Top with blueberries and powdered sugar and serve.
4.  If making more than one, keep crepe with lemon curd filling in the oven on 200 degrees.  Remove  crepes from the oven when all are finished and top with blueberries and powdered sugar.