9.22.2010

cherry almond granola

cherry almond granola
A little something has snuck into my world and stolen a good chunk of my free time.  It's called... the real world. 


I have had a job these past few years, but new this year I have been given more responsibility with a lot more hours.  The good news is I absolutely love it,  but the bad news is I don't have as much time to share what's going on in the kitchen.  Because yes, we are still eating around here so be patient with me and I will get back to sharing.

Enough about that because what you really need to know about is this recipe.  I have been on a search for a great granola recipe and I'm afraid my long search is over with just one recipe.  I was ready to buy pounds of oats and spend many an hour slowly toasting different recipes until I found just the right one, but this has become an instant favorite.
cherry granola 2
From my little to kitchen to yours... Enjoy.

Cherry Almond Granola
Adapted from Peace Meals, Junior League of Houston
Recipe Notes
I have never met a dried cherry I didn't like and I am sure any variety you find at your grocery will be great.  I used tart dried cherries for this recipe.  Though I haven't tried it myself, the original recipe suggests throwing in some mini chocolate chips after the granola has cooled for an afternoon snack.
Ingredients
1/4 cup vegetable oil
1/4 cup honey
1/4 cup brown sugar
2 teaspoons pure vanilla extract
3 cup old-fashioned rolled oats
1 1/4 cups sliced almonds
1 cup dried cherries (an extra 1/2 cup if you love these)
1 cup sweetened flaked coconut
1/4 flax seeds
parchment paper
Step by Step
Preheat the oven to 300 degrees F.  Line a rimmed baking sheet with parchment paper.  In a large bowl, mix together the oats, almonds, cherries, coconut and flax seeds.  Stir together the oil, honey, brown sugar and vanilla in a small saucepan over low heat.  Stir until well blended and sugar has dissolved.  Pour sugar honey mixture over granola and mix to coat well. Spread the granola on the prepared baking sheet and bake for 32 minutes or until golden brown, stirring halfway through.  Cool completely, then loosen from the baking sheet and crumble.  Store in an airtight container.

Makes 8 cups.

9.01.2010

little kitchen loves... the marta glass

Every once in a while, something makes its way into your kitchen and just makes everything better.  That's how I feel about the Marta glass.  I first read about them here and after staring at the chips and cracks on our current glasses, I decided we needed a change.  I am in love with the Marta glass from CB2.  I can be a little bit of a cheap skate, especially with breakables because we seem to always, well, break them.  So the price tag on these babies was also very attractive because I can rest easy knowing its not going to break the bank if we break one.  

They are light but sturdy and are perfect for everything from water to wine.  We went with two sizes... the middle and the one on the right.  I love them both, but I also wish we had a few of the biggest one too.  Probably my next investment.
DSC_0388
They also make great, sleek vases.  Wouldn't a line of these in different sizes be great table decor?  I plan on trying it sometime and will share.

8.29.2010

creamed corn + a confession

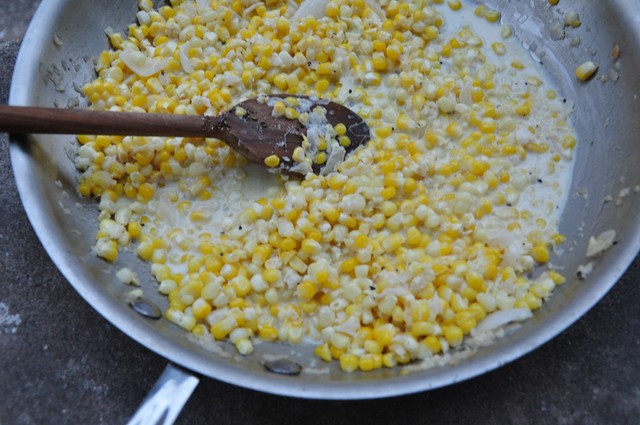
DSC_0448
I battled the idea of renaming this altogether because I know I would personally have no interest in reading a post about creamed corn. However, I promise you should keep reading. This is the best creamed corn, maybe corn in general, that I have ever had. This is not your sloppy, goopy creamed corn that you would get served at a cafeteria.

This is crisp corn kernels that have been sauteed in onions and cream sauce and is absolutely delicious. And once again, this couldn't be easier. So, please, take my word for it and try this dish while there is still great summer corn at grocery stores.
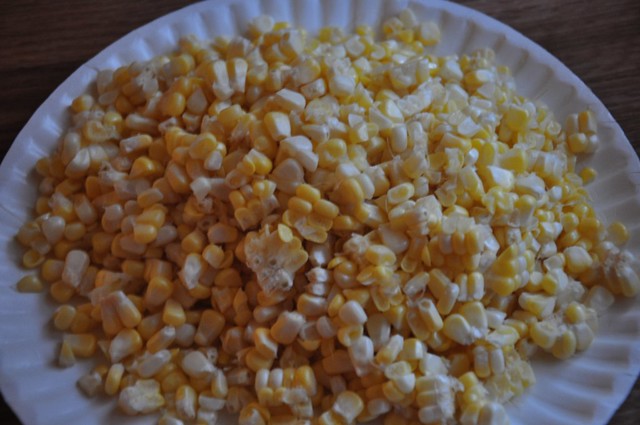
DSC_0447


Now on to the confession...

I cannot make skirt steak... also known as flank steak. I am really beside myself about it. The key to skirt steak is the way you cut, so I've heard, and I've cut this darn meat every which way and I still get a barely-able-to-chew piece of meat. I've done marinades, I've grilled, I've seared and still... nothing but hours of chewing. My friend Jennifer told me about this meal from Real Simple and I don't feel like it was a total loss because of the great sides, but if someone could give me a few hints on skirt steak I would be forever grateful.

DSC_0458
If I get any good hints and can re-make this meal, I will share... and I will tell you about the salad because it was easy and delicious, but I'm going to hold out on you in hopes someone tells me something about skirt steak.

Creamed Corn
Recipe Adapted from Real Simple
Recipe Notes
Melt the butter in a medium saucepan over medium-high heat. Add the onion and cook until soft, about 4 to 5 minutes. Add the corn, half-and-half, ½ teaspoon salt, and ¼ teaspoon pepper and simmer until the corn is tender and the half-and-half is slightly thickened, 5 to 8 minutes.

8.19.2010

Oven Baked Chicken Tenders

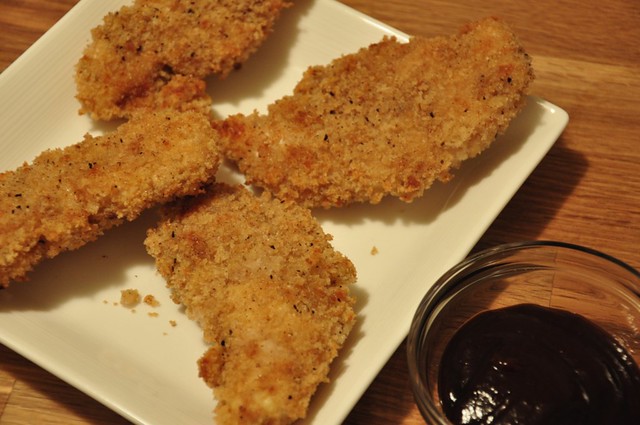
DSC_0445

These. are. so. good. and easy.

Crunchy and flavorful chicken tenders that are healthier and much easier to prepare than frying them up.  I have always had a thing for Panko bread crumbs (they are just so versatile) so I found a recipe for chicken tenders and substituted the bread crumbs and cereal mixture for my main squeeze panko and voila, here is a pretty darn good recipe if I do say so myself.

From my little kitchen to yours... Enjoy.

p.s. have you bought a meat thermometer yet?? I really hope you have because this is another great recipe where having a meat thermomter allows for perfectly cooked, tender, juicy chicken tenders.  I promise you will not regret this purchase.
DSC_0440
Oven Baked Chicken Tenders
Recipe Notes
The spices of one of the recipes I was combining called for Allspice.  I didn't realize until right before making these that I didn't have any so I cam up with my own subsitute... half ground cloves and half cinnamon.  If you have those two on hand, they will work just great.  If you have never used Panko, they are a Japanese bread crumb and I find that most grocery stores carry them now.
2 cups panko bread crumbs
2 tablespoons brown sugar
1 teaspoon salt
1/2 teaspoon black pepper
1/2 teaspoon ground allspice (see recipe note)
3 tablespoons vegetable oil
1 1/2 pounds chicken breast tenders, 2 packages
1/3 cup all-purpose flour
2 eggs, beaten
1/4 cup barbecue sauce

Preheat the oven to 375 degrees F.

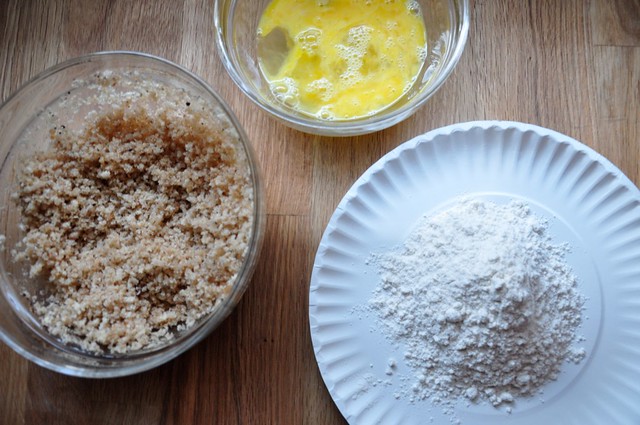
Pour the Panko bread crumbs in a shallow dish. Mix in sugar, salt, pepper, and allspice. Place flour in a separate shallow bowl. Place eggs in another separate bowl.

Drizzle about 3 tablespoons vegetable oil evenly over the breading, tossing and turning it to mix the oil all through the panko mixture.

Dredge the chicken through the flour, egg, the flour again, the egg again and then the panko mixture. Arrange the tenders on a nonstick baking sheet. Place the chicken tenders in the oven and bake for about 15 minutes, turning over once. If you have a meat thermometer, heat to 165 degrees. Serve hot chicken tenders barbecue sauce for dipping.

8.15.2010

lily's luncheon

DSC_0403
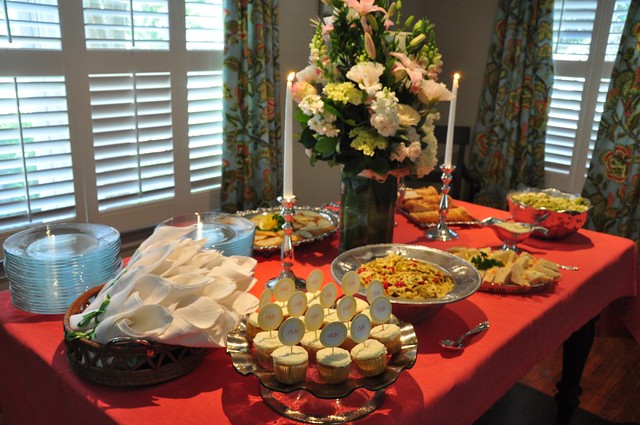
I am officially over missing the original little kitchen and I am full fledge in love with the new one.  You could say this luncheon for 30 was its first big test and it passed with flying colors.  In fact, it makes me question how I did things like this in the original little kitchen.  I have to say it is a combination of having great windows in here and the fact that Mr. Hungry actually fits in the kitchen at the same time to help assemble everything.

This was a luncheon for a darling 5 month old baby named Lily who was christened at her church last week.  The only mistake I made last weekend was not getting a picture of her to share with you.
DSC_0405
DSC_0404
DSC_0394
On the menu was...
Tomato Bruschetta
Artichoke Dip
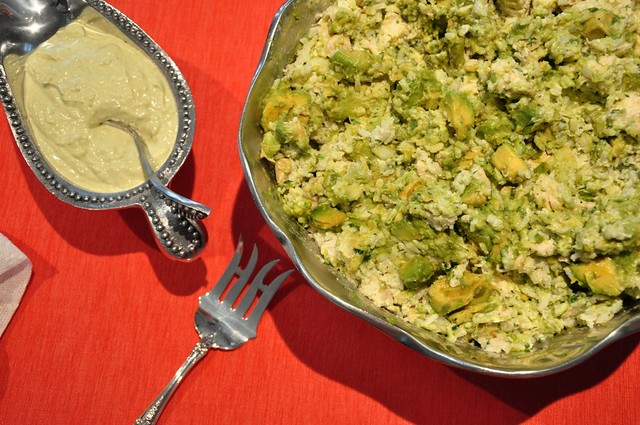
Avocado Chicken Salad with avocado dressing
Assorted Breads and Crackers
Pesto pasta salad with feta and pine nuts
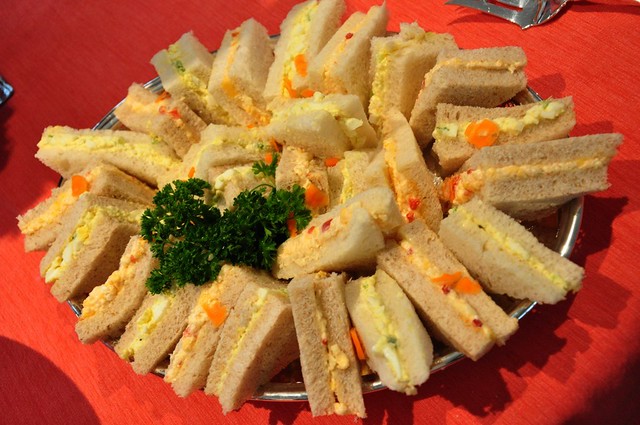
Egg Salad and Pimento Cheese Sandwiches
Triple Lemon Cupcakes

8.09.2010

Chicken with Artichokes and Angel Hair

DSC_0406
Finally, a real dinner, a new recipe, in the new little kitchen.  You see, I have been cooking.  It's just that when things have been so crazy around here, it has been much easier to fall back on a few favorites than to explore a new recipe.  But something just felt so right about making this meal.  So the cooking will be picking up again.   Slowly but surely I'm getting comfortable in this new place.

This was a great quick night meal that jazzes up chicken just a bit.

From my little kitchen to yours... Enjoy.
DSC_0390

DSC_0393
To deglaze the pan, simply scrape the bottom of the pan once the chicken broth is added.  This allows the bits of chicken that get stuck to the pan to add flavor to the sauce. 
DSC_0401

DSC_0404
Chicken with Artichokes and Angel Hair
Adapted from Martha Stewart Everyday Food
Serves 4
Recipe Notes
The original recipe calls for boneless, skinless chicken breast.  I used boneless, skinless tenders because that is what I had on hand.  Either will work, but the most important part is to pound it really thin.  If your chicken breast is really thick, you can cut it lengthwise first, and then pound it out a little more.  Another key is adding a good bit of salt and pepper to the flour for the chicken.  This is the main flavor for the chicken so add a good amount.  I used whole wheat angel hair pasta, but if I was making this for guests, I would probably use regular.... either will work great.
Ingredients

Salt and ground pepper
1/4 cup all-purpose flour
8 thin chicken cutlets (about 1 1/2 pounds total) see recipe notes
2 tablespoons olive oil
1 cup reduced-sodium chicken broth
1 can (14 ounces) artichoke hearts 2 tablespoons rinsed and drained capers
2 tablespoons butter
8 ounces angel-hair pasta (whole wheat or regular)
1/2 cup parsley leaves

Set a large pot of salted water to boil. Place flour in a shallow dish, and season well with lots of salt and pepper. Dredge cutlets, shaking off excess. In a large skillet, heat 1 tablespoon oil over medium-high. Cook chicken in batches, adding remaining oil as needed, until light golden, 1 to 3 minutes per side; transfer to a dish.

Add broth to skillet, and bring to a boil; cook until reduced by half. Add artichokes, capers, and the chicken with any juices. Gently swirl to combine, and bring just to a boil. Remove skillet from heat. Add butter and stir until melted.

Add pasta to boiling water. Cook until al dente; drain. Serve chicken and sauce over pasta, topped with parsley.