3.25.2010
armed & ready
I wish I was normal...
It seems to me that when most people know that their in-laws are coming in town, their brother-in-law is staying with them and they all of a sudden find out that a very exciting and rare event will be taking place where they live, which will likely bring lots of out of town friends through their door this weekend, this spurs most people on to get their home looking extra clean for the weekend. Not me... I know of all these events and all I can seem to do is come up with more things to make in the kitchen because I can't stand the thought of anyone coming over and not having something to eat.
I also don't like the idea of being stuck in the kitchen when we do have guests (doesn't work well with the little kitchen... guests always want to help out if everything is not finished and we all know this kitchen is most conducive to a one man operation... although it has been pushed to the limit before). We will be having my parents and Mr. Hungry's family over on Friday night to watch that very exciting event I was telling you about so I did all the prep work I could beforehand. I thought homemade pizzas would make for a delicious and casual meal. And I'll cut to the chase about this event... Baylor has made it to the Sweet 16! This is a very big deal for quite a few reasons... We are Baylor alumni, this hasn't happened in... (I won't even talk about how long it's been), and the game is in Houston! The last reason being why I also felt the need to pop a few other treats in the oven... We have friends from college who might be stopping by.
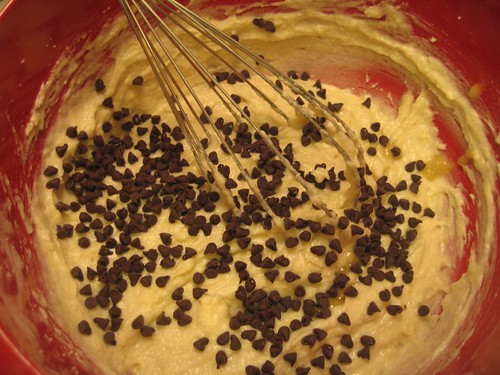
So that brings me to my current situation... it's a little past 10 p.m. on Thursday and here I sit taking a small break from what I have done... grated 5 lbs. of cheese, made 8 pizza doughs, sliced up some grilled chicken... and what I am still working on... blackberry shortbread bars and banana chocolate chip snack cake and still hoping to get motivated to clean this place up. A blackberry bar can only keep you distracted from undusted shelves for so long...
...will be back with the recipes.
3.22.2010
Chocolate Peanut Butter Cupcakes
So I talked about these cupcakes the other day... I had an order for 24 birthday cupcakes and it was decided that half would be these chocolate peanut butter cupcakes. Oh, these are one of my absolute favorites and I was glad to hear they went over well at the party. The little kick of peanut butter frosting that is hiding inside of these is what makes them so special. Well, that's about it... these are delicious... knock yourself out.
From my little kitchen to yours... Enjoy.
Chocolate Peanut Butter Cupcakes
Recipe Notes
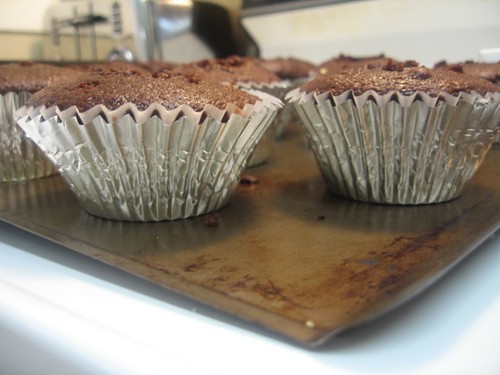
These cupcakes are made in XL foil cupcake liners because having a bigger cupcake allows for more peanut butter frosting. These cups are also nice because you don't even need a cupcake pan to make cupcakes. They stand alone on a regular baking sheet and you can remove the foil layer when they are finished baking. You can make these in a regular cupcake pan, but you will not have as much cupcake left after you carve some out for the peanut butter frosting. The XL cupcake cups can be found in almost any grocery store next to regular cupcake liners. To make these extra special, you can make homemade chocolate frosting, but the peanut butter frosting and mini chocolate chips are two new twists that make this cupcake seem very special even if you use boxed cake mix and frosting. If you are piping the icing on, you will need 2 cans, but if you are just spreading the chocolate frosting on top, you will have enough with one can.
Ingredients
12 XL stand alone cupcake cups (see recipe notes above)
1 boxed devil's food cake mix + ingredients to make cupcakes
1 cup of smooth peanut butter
1 1/4 cup of powdered sugar
1 stick of butter, softened
2 cans of chocolate fudge flavored frosting
2 cups mini chocolate chips
Step by Step
Bake cupcakes according to directions, filling cupcakes cups 2/3 of the way full. Allow a few minutes extra baking time for extra large cupcakes. To test: Push cupcake with finger... when it springs back, cupcakes are done. Allow to cool completely.
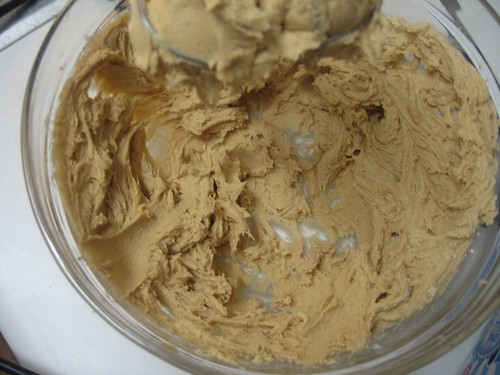
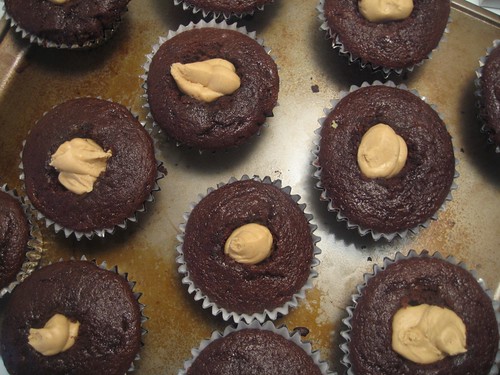
While cupcakes are baking make peanut butter frosting. Combine peanut butter, powdered sugar and butter in a bowl. Beat until combined and a smooth frosting has formed. Spoon peanut butter frosting into a ziploc bag. Cut the tip off of the bag.
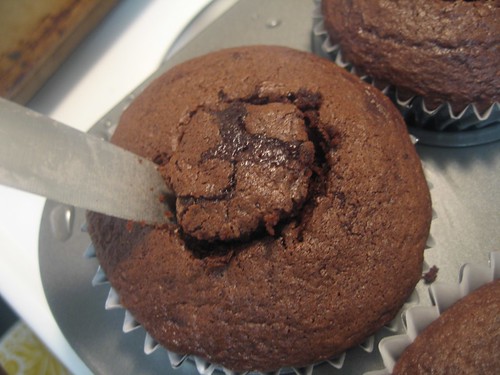
Using a sharp knife, cut a small cone shape in each cupcake and remove cone. To do this, cut into cupcake diagonally and draw a circle. (see picture above) Pipe a small dollop of frosting into each cupcake. Cover and place cupcakes in the refrigerator. Allow the peanut butter icing to firm up. (This will make frosting the top easier.)
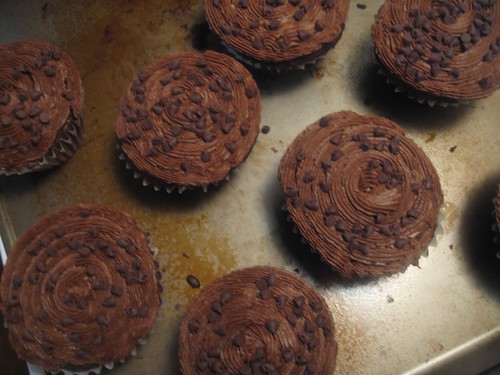
Remove from refrigerator and top cupcakes with chocolate frosting. Option #1: Spread icing on with a knife. Option #2: Place chocolate frosting in a piping bag and pipe icing on to cupcake. Immediately sprinkle each cupcake with mini chocolate chips before the icing dries.
3.17.2010
Birthday Cupcakes
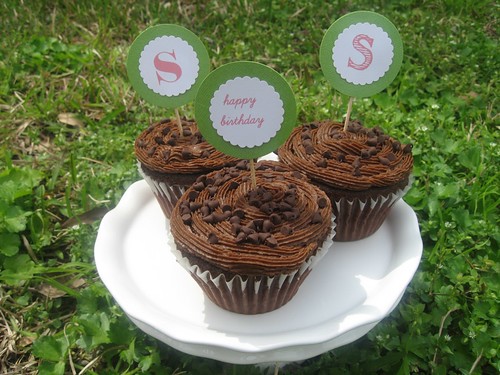
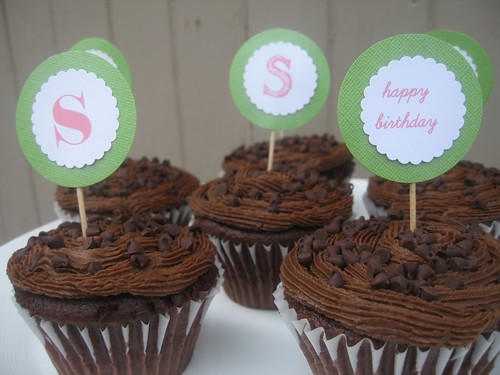
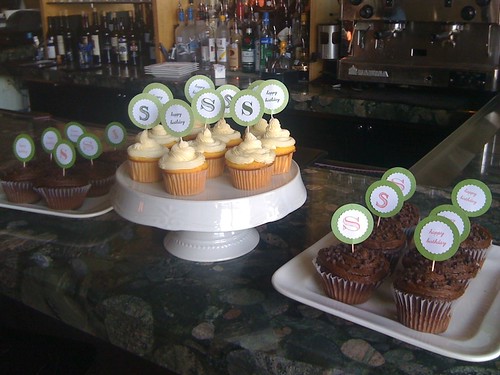
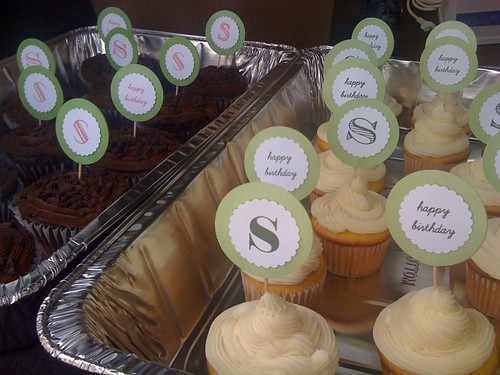
I had an order for birthday cupcakes this weekend and considering I didn't get any, I sure was excited about them. I suspect the excitement was because I wanted to experiment with cupcake toppers. These were for a 60th birthday party and the order was for a dozen triple lemon cupcakes and a dozen chocolate chip peanut butter cupcakes (recipe coming soon). The birthday girl's name started with an S so I decided to do different font S's on one side with happy birthday on the other. I have to say they sure do spruce up a cupcake and can be made with paper and toothpicks. If you don't love this idea, I'm sorry... because I have a feeling you will be seeing these at every opportunity I get to top something.
3.16.2010
Lemon Pistachio Tart
I have concluded that there are three types of dessert lovers in this world. Those who love the rich and chocolaty types... Those who prefer lighter sometimes fruity desserts... and those who love anything that is sweet, whether it be a hint of sugar or a make-you-pass-out-for-the-rest-of-the-day piece of cake. (I fall into the third category in case you were wondering). My friend and colleague, Frances had a birthday last week and she is definitely in the second category of my made-up dessert world. So to celebrate, I made this lemon pistachio tart. It was the perfect combination of tangy and sweet lemon, mixed with crunchy and salty pistacios, all wrapped up in a buttery, crumbly crust. If you can manage to keep your crust alive, this is a pretty simple dessert that looks quite fancy.
This was my first attempt at a tart and I have to be honest again... it was not all smooth sailing. So if you are taking your first spin with a removable tart pan, read this. If you are interested in a tart pan and don't want to invest in one, I found mine for $5.25 at Marshall Home Goods in Houston, which was the exact same one I had seen at Williams Sonoma for $21.00. These can be found at most home discount stores at one time or another. But I have already found it to be worth the five buckaroos and will be doing some more tart experimenting soon.
From my little kitchen to yours... Enjoy.
This was my first attempt at a tart and I have to be honest again... it was not all smooth sailing. So if you are taking your first spin with a removable tart pan, read this. If you are interested in a tart pan and don't want to invest in one, I found mine for $5.25 at Marshall Home Goods in Houston, which was the exact same one I had seen at Williams Sonoma for $21.00. These can be found at most home discount stores at one time or another. But I have already found it to be worth the five buckaroos and will be doing some more tart experimenting soon.
From my little kitchen to yours... Enjoy.
Lemon Pistachio Tart
Adapted from Peace Meals
Recipe Notes
This recipe originally called for Meyer lemons. Couldn't find those and regular lemons worked just perfectly so I went ahead and left them out. But if you happen to have great meyer lemons at your grocery store, you should try them out.
Ingredients
Crust
3/4 cup unsalted butter
1/4 sugar
1 tablespoon powdered sugar
2 cups all-purpose flour
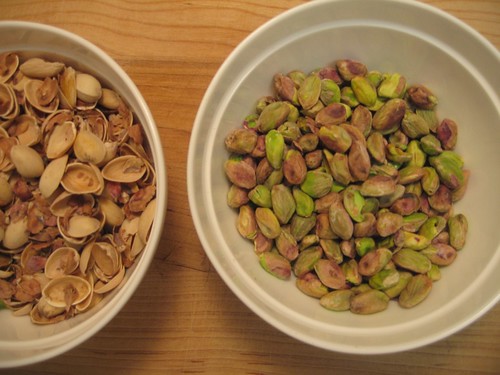
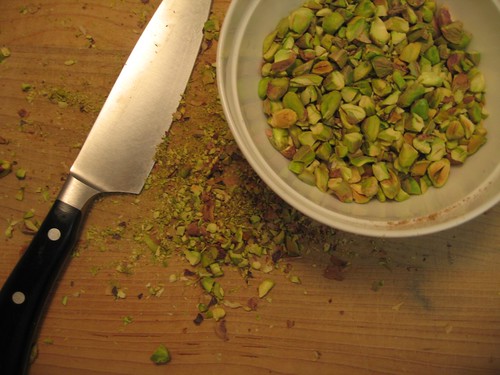
1/2 cup chopped shelled pistachios
Filling
1 cup sugar
2 tablespoons all-purpose flour
1/2 teaspoon baking powder
1/2 teaspoon salt
2 eggs, at room temperature, beaten
1 teaspoon grated lemon zest
2 tablespoons fresh lemon juice
Topping
1/2 cup powdered sugar, sifted
1 tablespoon fresh lemon juice
1 tablespoon butter, melted
1/4 cup chopped shelled pistachios
1 tablespoon powered sugar
Step by Step
Crust
Preheat the oven to 325 degrees F. Melt the butter in a medium saucepan over low heat. Remove the butter from heat and add both sugars, stirring to combing. Mix in the flour. Let the mixture cool for 15 minutes; the dough will still be warm. Press the dough against the bottom and up the sides of a 9-inch tart pan with a removable bottom. Bake for 15 minutes. Allow the crust to cool. Sprinkle the pistachios evenly over the crust.
Filling
Stir together the sugar, flour, baking powder and salt in a medium bowl. Add the eggs, lemon zest and lemon juice, and stir to blend. Pour the filling into the partially baked crust. Bake for 30 minutes or until the crust is golden. Let cool.
Topping
Combine the powdered sugar, lemon juice and butter in a small bowl. Spread the glaze over the cooled tart. Sprinkle with the pistachios and powdered sugar to finish.
3.15.2010
Tart Tragedy
Ever since I started sharing my little kitchen, the has been a misconception about this place. Some of you have started sharing your blunders with me and telling me how that would never happen in the little kitchen. Well, let me tell you, I don't have enough time in my day to go through all the mess ups, mistakes and even wounds I have from cooking, but today I will give you a sneak peek at just one.
So it's my first run with my new tart pan with a removable bottom and I thought things were going smoothly with my first tart until I tried to take this little sucker out of the oven. In a rush, I thought I could just pop this out without any problem all the time being very aware that the bottom was removable. So as you can see that didn't work out and I accidentally tapped the bottom, which led to crust flying everywhere. What I didn't capture were the pieces of crust that lit on fire from hitting the burning coils. For a minute I thought... this is it... this is the end of the little kitchen... I've officially burned this little box to the ground. Thankfully, pieces of buttery crust don't have a long burn life and before I knew it, the flames were out and I just needed to clean up this mess.
So there was good and bad news from this. Good news is I was only baking the first part so I didn't even lose the filling. Bad news was how long it took me to figure out the solution. So I whipped up another crust (good thing this is the easiest crust I have ever made) and started over. As I'm about to pop it in the oven and have come up with my elaborate plan to get this out of the oven... plan: when tart is done, I will slowly and daintily nudge the pan towards the edge of the oven with one hand while balancing a baking sheet on the other hand to slide it on to... and then it hits me... bake the darn thing on a baking sheet from the get go! ugh... where is my mind? So there you go... lesson learned. Always place a tart pan with a removable bottom on baking sheet before cooking. duh
*Great tart recipe coming soon
3.11.2010
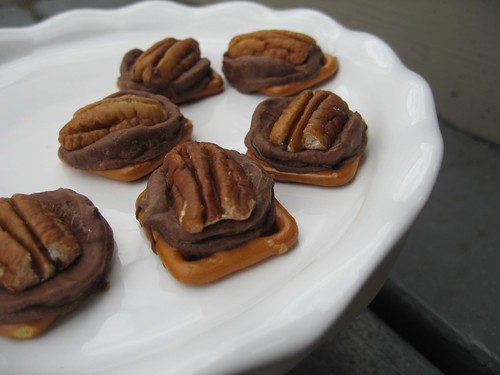
Pecan Rolo Pretzel Bites
And they're baaaaaack. I'm sorry, but you people just keep giving me too many good ideas for these little puppies. And I have to say this is a pretty darn good one. And I personally don't see the harm in having as many combinations as possible. If you've made a these or these, you probably still have extra pretzels in your pantry so you might as well give these a whirl. And that's about all I can say about these... they're just good and easy.
Pecan Rolo Pretzel Bites
Ingredients
Square Pretzels (I used Snyder's brand)
Rolo's (one per bite)
Pecan halves (one per bite)
Parchment Paper
Step by Step
1. Preheat oven to 200 degrees F.
2. Line a cookie sheet with parchment paper.
3. Place a single layer of pretzels at least an inch apart.
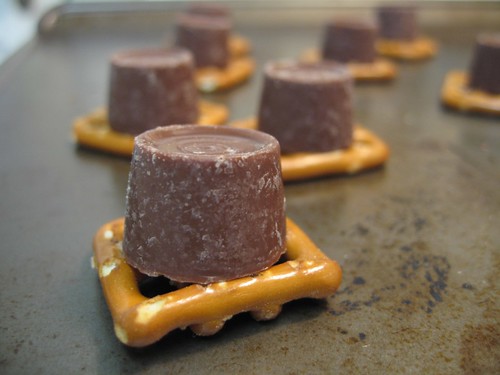
4. Place a Rolo on top of each pretzel.
5. Bake in oven for about two minutes. When Rolo's are slightly melty, remove from oven.
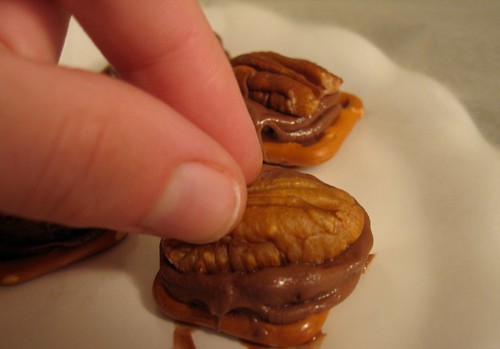
6. Place a pecan on top of each and push down slightly.
7. Allow to cool in refrigerator until completely hard, about 30 minutes.
8. Before serving, bring pretzel bites back to room temperature. Make sure and do this or the center of the Rolo's will be quite chewy.
9. Store in an airtight container for up to two weeks.
Subscribe to:
Posts (Atom)