4.17.2011

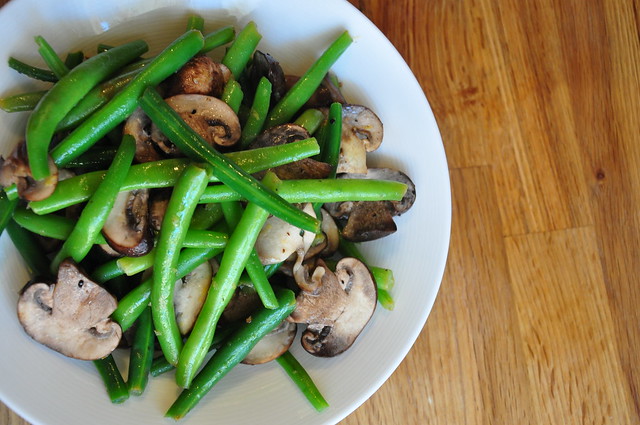
Lemony Green Beans with Mushrooms

lgb 2
I have not always had the best relationship with green beans.  For the longest time, I thought of green beans in one way... short, a lifeless shade of green and extremely mushy, served along side mystery meat and mashed potatoes.  They only seemed to show up in cafeterias for me and they just seemed sad.  It really wasn't until I spotted this recipe in my favorite cookbook that I thought I should give them a shot.  Sure glad I was able to move on because this is a keeper.  Bright and crisp beans mixed with mushrooms in a light and lemony sauce is just wonderful.  Just a few ingredients, healthy and quick... what more could you ask for?

From my little kitchen to yours... Enjoy.
lgb1
Lemony Green Beans with Mushrooms
Adapted from Peace Meals, Junior League of Houston
Recipe Notes
Cremini mushrooms look a lot like white button mushrooms.  The outsides are just a little darker and they have a heartier taste.  I recommend using these, but if you can't find them, substitute white button mushrooms.  For the green beans, "trimmed" simply means to cut off both ends.  For a how to on blanching the beans, click here.  Remember, you want them to stay crisp so cook just until they turn bright green. 
Ingredients
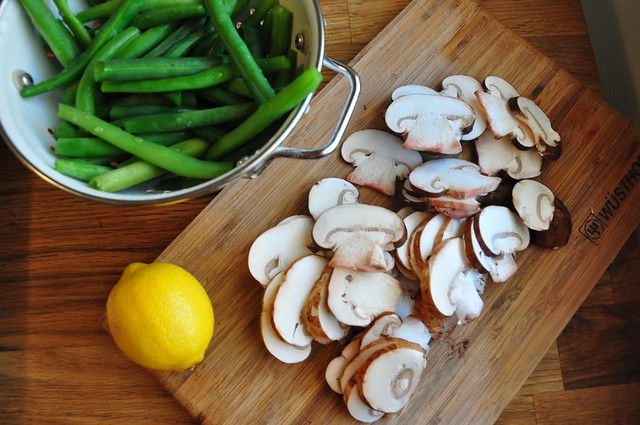
3/4 pound fresh green beans, washed and trimmed
2 tablespoons butter
8 ounces cremini mushrooms, cleaned and sliced about a 1/4 inch thick
coarse salt and freshly ground pepper
zest and juice of one lemon
Step by Step
Blanch the beans in boiling water and cook for about 4 minutes until tender and bright green.  Cool the beans under cold running water, drain and set aside.  Heat the butter in a medium saute pan over medium- low heat.  Add mushrooms and cook for 2 minutes over medium heat.  Do not stir.  Season well with salt and pepper.  Mix in seasonings and continue to cook for 2 minutes.  Add beans, lemon zest and juice.  Cover pan and cook for 3 minutes.  Serve immediately. 

4.11.2011

Thin Mints

DSC_0834

The search for a homemade thin mint recipe started about 3 weeks ago when I ordered Mr. Hungry his favorite Girl Scout cookies and thought I was being quite generous with 4 boxes.  I assumed he would eat a few now and we would probably have a box a week in the freezer over the next month.  Six days later when all 4 boxes were gone, I decided it was time to find a homemade alternative.  I mean, I love supporting the Girl Scout's and all, but our grocery budget doesn't quite allow $20 a week to support a cookie habit.  Just a few days later, I found out these cookies were on someone else's mind as well.

These were great and especially when frozen, taste just like the real thing.  From your house filled with mint aromas from the baking process to the delight of having these stocked in the freezer even when it's not Girl Scout cookie season, this one is a keeper. 

From my little kitchen to yours... Enjoy. 
DSC_0825

DSC_0828


DSC_0831

Thin Mints
Adapted from Baking Bites
Recipe Notes
It's best to use a high quality chocolate for this recipe.  I used Guittard semi-sweet chocolate chips and they worked great.  If your chocolate is not quite thin enough, you can add a little extra butter, but beware, if you add too much butter, your chocolate will not harden as well.   For the cooking time, make sure you take cookies out when edges are firm, but before the whole cookie is very firm.  My friend Allison said hers turned out "beyond crisp."  Every oven is a little different, so test the edges at 11 or 12 minutes and adjust accordingly.
Ingredients
for the cookies:
2 1/4 cups all purpose flour
1/4 cup cornstarch
6 tablespoons unsweetened cocoa powder
1/2 teaspoon salt
1 cup white sugar
1/2 cup unsalted butter, room temperature
1/3 cup milk (any kind)
1/2 teaspoon vanilla extract
3/4 teaspoon peppermint extract
for the coating:
12 ounces dark or semisweet chocolate
1/2 cup butter, room temperature
parchment paper
Step by Step
In a small bowl, whisk together flour, cornstarch, cocoa powder and salt.  In a large bowl, cream together butter and sugar until fluffy.  With mixer on low speed, add the milk and the extracts.  The mixture will resemble curdled milk. Slowly add the flour mixture until well incorporated and fluffy.

Shape dough into two long logs, about 1 1/2 inches in diameter (4 cm).  Wrap in plastic wrap and freeze for at least 2 hours, until very firm.

Preheat oven to 375 degrees F. Using a sharp knife, slice dough into round no more than 1/4 inch thick. Slice carefully so they are as close to the same thickness as possible.  You will have some very soft and others very hard if they differ too much in thickness.  Make sure they are no more than 1/4 inch thick or they won't be crispy.  Place on a parchment lined baking sheet.  Cookies can be very close together because they will not spread much at all.

Bake for 13 minutes (see recipe notes); until the edges of the cookie are firm.  Allow cookies to cool completely.  In a microwave safe bowl, combine chocolate and butter. Microwave on high power for 30 seconds.  Remove and stir; continue microwaving in 30 second increments, stirring between each, until chocolate and butter are completely melted and smooth. 

Dip each cookie in melted chocolate and rotate to cover whole cookie.  Using a fork, scrape off extra chocolate so there is a thin coating.  Place cookies on parchment paper or wax paper to allow to cool and set; at least 45 minutes.  Reheat chocolate as necessary to keep is smooth and easy to dip into.

Best served frozen. 

Makes 4 dozen cookies.

4.08.2011

Kitchen Registry 101: any questions or advice?

I get quite a few emails and questions about wedding registries pertaining to the kitchen.  And after my experience, I love nothing more than trying to share the little info I know on the subject because let me tell you, it was a train wreck at times for me.  Whether you are really into cooking or not, let's face it, you will most likely get more stuff for your kitchen when you are getting married than any other time in your life and if you do it right, you will have things that last you a life time.  So I am going to put together a few posts about things I'm glad I knew when registering and things I wish I had known.  If you have any questions or things you would like me to cover, leave a comment or send me an email.    I am by no means am an expert so if you have any tips you learned along the way, I'd love to include them so shoot me an email.

This is where my registering story began, three years ago... 

When you get engaged, some girls start dreaming about the dress they will wear and the flowers they will carry.  Me?  I started having dreams of Le Creuset dutch ovens and 12 cup food processors.  Getting to pick out shiny new kitchen gear and then receive these gifts at parties and in the mail from dear friends and family seemed magical.  Am I alone here?

Mr. Hungry and I took off for the registry event at Williams Sonoma that takes place every Sunday before the store opens because in my mind, this store was a must.  This is where I almost lost my mind.  I quickly realized that the endless types of fry pans to the 6 options for zesters was more than I had expected.  I mean, I liked to cook, but when it came to brands and materials, I didn't really have a clue.

And then I had to deal with what I had not even thought about... Mr. Hungry having his own ideas as to what we needed in the kitchen.  As I am stressing over trying to educate myself on nonstick pans vs. stainless steel pans, I start to hear this little beep beep... beep beep.  I realized this was the sound of the scanning gun we had been given and quickly put it together that I could not see Mr. Hungry who was armed with the gun.  I turn the corner to see him scanning some drinking glasses.  I thought no, no you don't just pick random glasses.    I wrestled the gun away and went back to trying to find a normal cheese grater instead of this gourmet one that cost $40.00.  Apparently I had set the gun down while looking at different options because before I knew it, I was hearing those beeps again.  I go searching for him again and found him crouched down in front of an industrial size meat slicer. Yes, apparently Williams Sonoma sells these and apparently Mr. Hungry thought it was a must have.  I laughed until I realized he was serious.  He said, "Ash, of course we need this... I will cut fresh meat for sandwiches all the time."  Besides the fact that the actual machine would take up a whole counter, I said... REALLY?? You think we are going to keep slabs of meat around that could feed an entire army??  We left.

This began our troubles with registering.  Between being overwhelmed and coming to the realization that there would be two of us doing this, we left.  I needed to figure a lot out before we even thought about going to another store.

Looking back it was comical, but at the time, I was just stressed.  So, from picking out everyday dishes to what types of pans to invest in I will share the world of registering according to me, which like I said, I'm no expert, but I feel like I've learned a lot along the way.

Leave a comment or email me, ashleaktaylor@gmail.com with questions you would like me to cover or advice you have to share.


Stay tuned...

4.05.2011

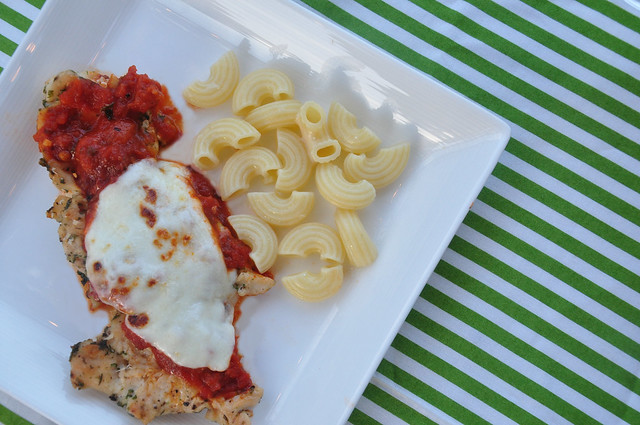
A great make ahead meal... Lightened Up Chicken Parmesan

chicken parm

After this post, I've been trying to deliver on my promise for fast and healthy recipes.  Combining that with this post and the picture disaster, I found it appropriate to re-post this recipe.  I also made it oh-so practical by subbing my favorite canned tomato sauce for the homemade one.
{however the homemade one is still amazing and the recipe is here}

Now on to why this is such a great make ahead meal.  You can basically do all the cooking and prepping before, refrigerate and pop it in the oven for broiling whenever you are ready to eat.  Makes it pretty perfect to put together right before dinner time.  The total prep is not hard either so if you have about 30 minutes, you can put this altogether at one time.

From my little kitchen to yours... Enjoy.

pasta sauce


p.s. This is my favorite pasta sauce for absolutely everything...  Bertolli Olive Oil and Garlic


IMG_6163


IMG_6168
Lightened Up Chicken ParmesanRecipe Notes
If your broil browns things extremely quickly, you can put the setting on 500 degrees F to let the cheese melt instead of putting it on broil.  If you have a great french skillet and are making 4 or less chicken breasts, follow the instructions about putting the pan in the oven.  If you don't have a great pan, you  have more than 4 portions, or if you are making it ahead of time and are going to be refrigerating, cook all of the chicken as directed and then transfer chicken to a glass casserole dish before adding sauce and cheese.
Ingredients
For the chicken
3 tablespoons olive oil
1 teaspoon fresh rosemary leaves
1 teaspoon fresh oregano or thyme leaves
1 teaspoon fresh Italian parsley leaves
Salt & freshly ground black pepper
4 chicken cutlets (or if they are really thin and small, use 8)
Thin slices of fresh mozzarella (1 or 2 per piece of chicken) OR 1/2 shredded mozzarella
4 teaspoons grated parmesan
2 tablespoons unsalted butter, cut into pieces
1 1/2 cups favorite jarred marinara sauce (see my favorite above)
Step by Step
Preheat the oven to broil.

In small bowl, stir the oil and herbs to blend.  Season with salt and pepper.  Dip each chicken cutlet in the olive oil herb mixture until well coated.  Heat a large oven-proof skillet over medium high heat.  Add the cutlets and cook just until brown, about 2 minutes per side.  Remove the skillet from heat.  (see recipe note if you are not using a high quality, heavy duty pan or if you are making this for later).

Spoon the marinara sauce over and around the chicken.  Lay a slice of mozzarella on each piece of chicken or place a small amount of shredded mozzarella on each.  Top with a teaspoon of parmesan on each piece.
Broil until the cheese melts and sauce is bubbling, about 1 minute.

4.04.2011

The tale of a chicken cutlet.

cutlet
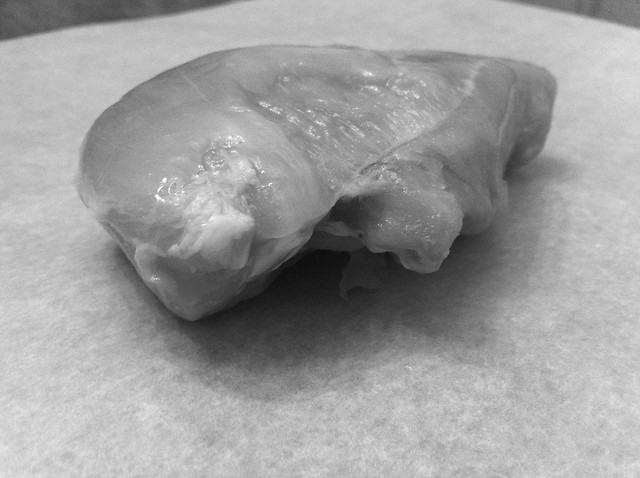
Are you familiar with the term chicken cutlet?  If not, let me put it in these terms.  You go to the store and buy a boneless skinless chicken breast.  It's this thick and chunky piece of meat that sometimes even has a little bit of fat on it.  Now you go to a restaurant and order some fabulous chicken dish and you get this tender, very thin and juicy piece of meat.

Maybe it's just me, but for a long time I just could not figure out how to get that kind of chicken at home.  Enter the term chicken cutlet.  This is that sweet thin piece of chicken that soaks up any kind sauce wonderfully.  So this is a quick how to on how to get yourself one of those.

Now there is nothing glamorous about a fledgling piece of meat or the fact that I only had my iphone to photograph with, so I chose the dramatic black and white photos to tell the story of the chicken cutlet.


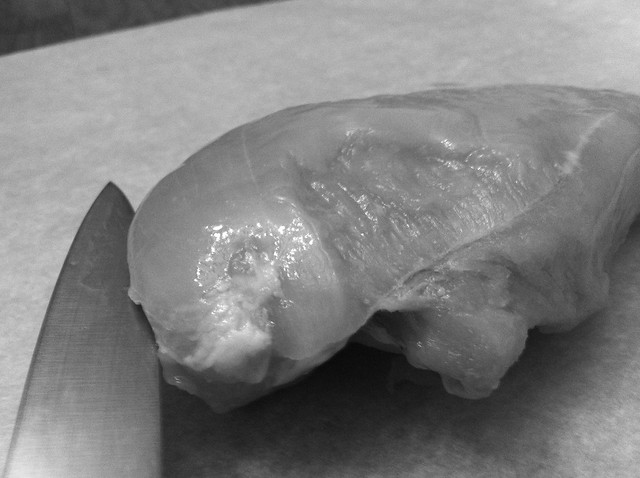
Take a chunky, straight from the super market, boneless, skinless chicken breast.  Place it on parchment paper on a sturdy counter top.
chicken 1
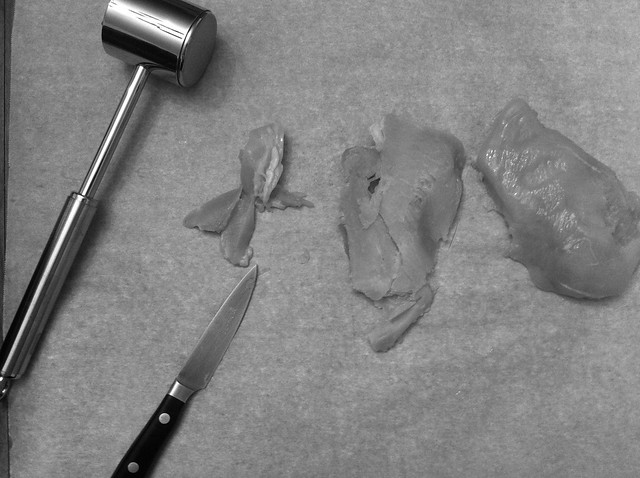
Using a sharp knife, cut the chicken in half horizontally.  If your chicken is not too thick, you can skip this step, but I have never met a piece that didn't need a slice. Cut off any pieces of white fat.
chicken 2


chicken 3
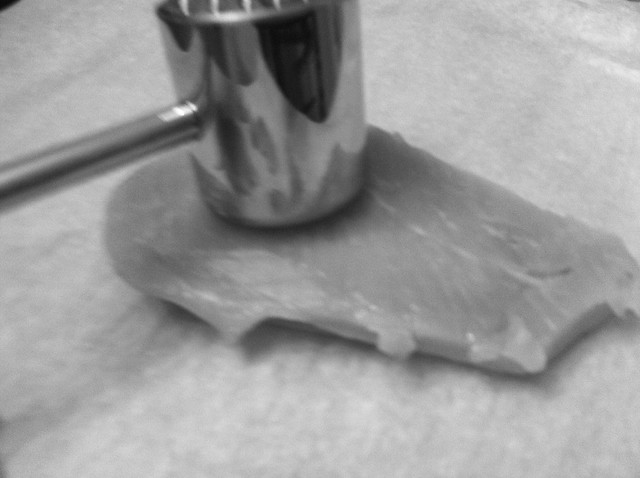
The preferred tool would be a meat tenderizer so if you have one, pound out the chicken until it's extremely thin.  If you do not have one of these, lay a piece of parchment paper on top of the chicken and use the bottom of a very sturdy, thick glass and pound it out really thin.  You could use a rolling pin to pound it too.
chicken 4
In summary, the step I found the most important is cutting it in half horizontally.  This leaves only a little pounding left to do.  I'll be back soon with a couple of my favorite recipes using chicken cutlets.  If you take my word for it, try this one or this one.  They were part of my picture debacle so there are not photos of the finished product, but they sure are tasty.

3.29.2011

Lemon Pistachio Tartlets + a confession + some news

tartlet pic
First the confession...
Have you heard of Food52?  I have and I have been secretly holding out on you because I want to to win and I would like to keep the entries to a minimum.  Okay, so I realized this was unfair of me and if you haven't, you should check it out.

It is a website that requests a certain type of recipe each week for a contest {for example: give us your best late winter tart recipe} and you have one week to turn in a recipe.  If you win, you are published in a cookbook that they publish once a year... get it? 52 recipes for 52 weeks= food 52.  Anyway, they upped the ante big time a couple of weeks ago and when they asked for late winter tarts, they announced that if you won, you would be flown to New York to be on the Martha Stewart Show to make your tart to help celebrate her new pie and tart cookbook.

I was beside myself. Being on the Martha Stewart show is on my bucket list and although I'm at the ripe old age of 26, you can never check things off too soon.  Anyway, I went to work on lots of versions of this original recipe and came up with my lemon pistachio tartlets.  By the time I finally turned it in, I really didn't have much hope of actually winning.  There seem to be true professionals on this site who have been entering for years and I was up against 265 other tarts.

No I did not win, but...
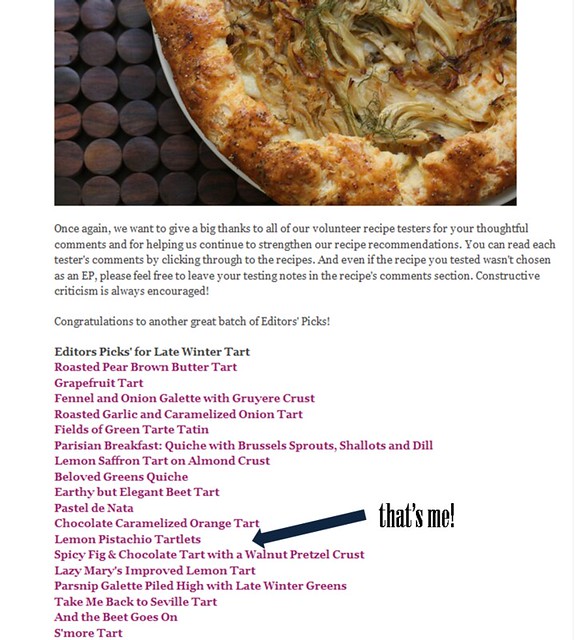
So when I found out I wasn't chosen as one of the top two to be voted on, I wasn't that surprised, but I had high hopes of being a part of the honorable mentions... aka editor's picks.  Food52 puts out a few of their picks of all the entries and asks members of the community to test them out.  Those that are given great reviews are picked as Editor's Picks.

So I am happy to say that I did get picked as an Editor's Pick! It was exciting for me and especially because I am still venturing into the world of making recipes my own.
tart pic

So all that to say, I just wanted to share a little foodie triumph and share this recipe that would be pretty darn perfect for brunch or shower.  I love easy, mini pick up food, which is why I insisted on these being mini and they turned out to be quite addictive too.

Just in case you want to check out other editor's picks, click here for a link to the blog post... 


Now for the tartlets...
lemon pistachio 2

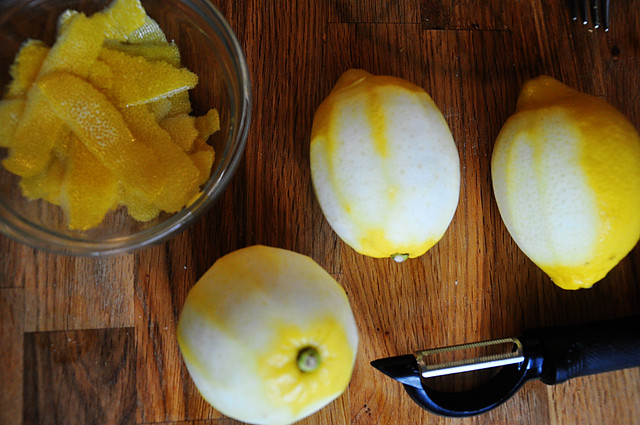
peeled lemons


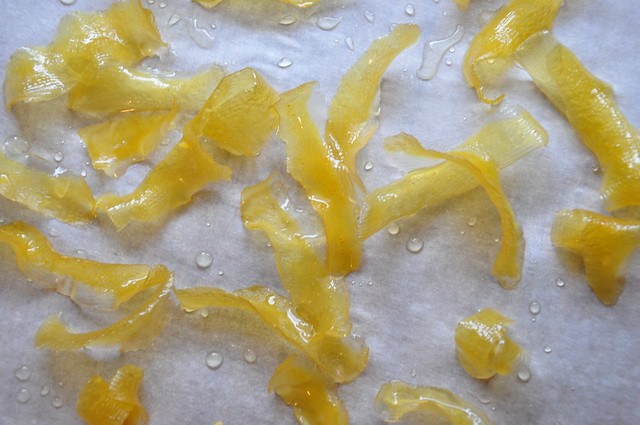
candied peels

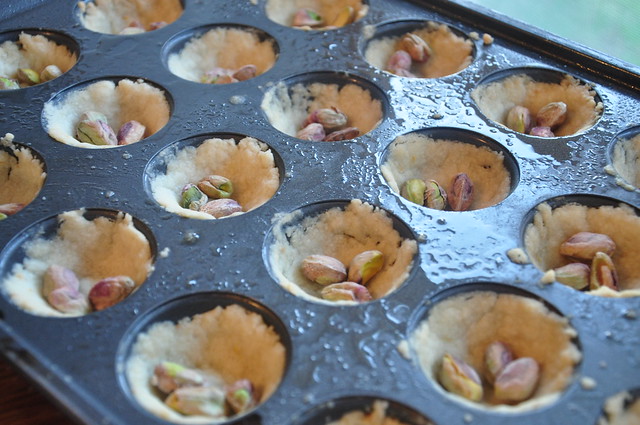
crusts


Lemon Pistachio Tartlets
Recipe Note: If you would rather not mess with candied lemon peels, you can leave that garnish off, but I do like the extra layer of lemon myself. 
Makes 48 tartlets
For the crust and candied lemon peels:
  • FOR THE CANDIED LEMON PEELS
  • 3 large lemons (look for ones with thick skin)
  • 3 cups sugar
  • FOR THE CRUST
  • 3/4 cups unsalted butter
  • 1/4 cup sugar
  • 1 tablespoon powdered sugar
  • 2 cups all purpose flour
  • 2 teaspoons fresh lemon zest
  • 1 teaspoon almond extract
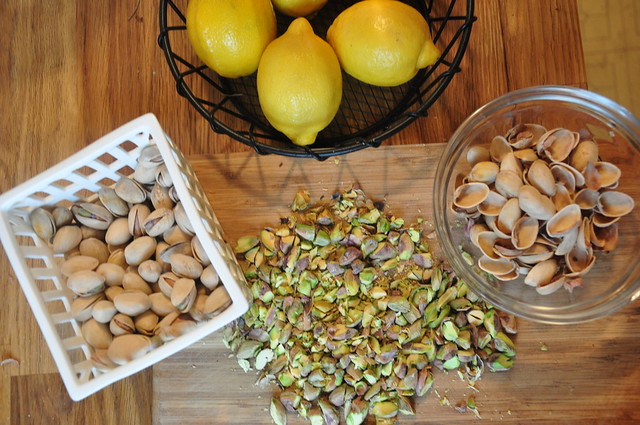
  • 144 whole roasted and salted pistachios, shelled (about 2 cups unshelled)
  1. Preheat oven to 325 degrees. Using a vegetable peeler, peel off pieces of the skin from top to bottom into long ribbons. Place peels in a saucepan and cover with water. Bring water to a boil and simmer for one minute. Drain water and repeat one more time. Dissolve 3 cups of sugar into 2 cups of cold water. Bring water to a boil and add lemons. Turn heat to low and let simmer for one hour.
  2. Meanwhile, melt butter in medium sized saucepan over low heat. Remove from heat and add sugars, zest and almond extract. Stir to combine. Add flour and stir with a wooden spoon until combined and crumbly. Let crust rest for 15 minutes.
  3. Spray two mini muffin tins with a good coat of nonstick cooking spray. After crust has rested for 15 minutes, spoon a heaping teaspoon of crumbly dough into each cup. The goal is to get the entire cup covered with the least amount of dough. Technique: Using your thumbs, press dough into the bottom of the pan. Then, use your thumbs to spread the dough up the sides until whole cup is covered evenly. Bake crusts for 8 minutes. Allow to cool and drop 3 pistachios into each cup.
  4. After lemon peels have simmered for an hour, remove from liquid and allow to cool. Cut peels into 1 inch chunks. Lemon peels will not dry out completely, but can be stored in an airtight container for up to two weeks.
For the filling, glaze and finishing touches:
  • FOR THE FILLING
  • 1 1/2 cup sugar
  • 3 tablespoons all purpose flour
  • 3/4 teaspoons baking powder
  • 3/4 teaspoons salt
  • 3 XL eggs, room temperature, beaten
  • 2 teaspoons grated lemon zest
  • 3 tablespoons fresh lemon juice
  • FOR THE GLAZE
  • 1/2 cup powdered sugar, sifted
  • 1 tablespoon fresh lemon juice
  • 1 tablespoon butter, melted
  • FOR FINAL TOUCHES
  • 1/4 cup powdered sugar
  1. Prepare filling while crusts are baking and lemon peels are simmering. In a medium sized bowl, stir together sugar, flour, baking powder and salt. Add eggs, zest and juice and stir to combine. Using a tablespoon, fill each crust cup with lemon filling. Fill to the top of the crust line, but do not go over. (if filling floods out over crust, it will be more difficult to remove from pan). Bake for 15 minutes. Remove from oven and cool in pan.
  2. Meanwhile, prepare glaze. Combine powdered sugar, lemon juice and butter in a small bowl. Using a pastry brush or small spoon, paint the top of each cooled tartlet with the glaze and place a sliver of candied lemon on top of each. Slide a small, sharp pairing knife in between the crust and pan until each tartlet pops out. When ready to serve, dust heavily with powdered sugar.
  3. Can be stored in an airtight container up to one week.