

I thought gnocchi would be a great first pasta dish to share because there is no special equipment needed... just patience. This is not a dish for the faint of heart. It can take practice and patience. I am probably not winning you over right now on the idea of venturing into gnocchi making, but I don't want to make this seem like all rainbows and butterflies. However, if you get it right, you will jump for joy at what you have created.
Gnocchi is little pillows of pasta made out of potatoes. It pairs really well with fresh tomato sauces or thick cheese sauces. I wanted to share the recipe I learned at Villa San Michele. Simple and just so fresh.
So here we go.
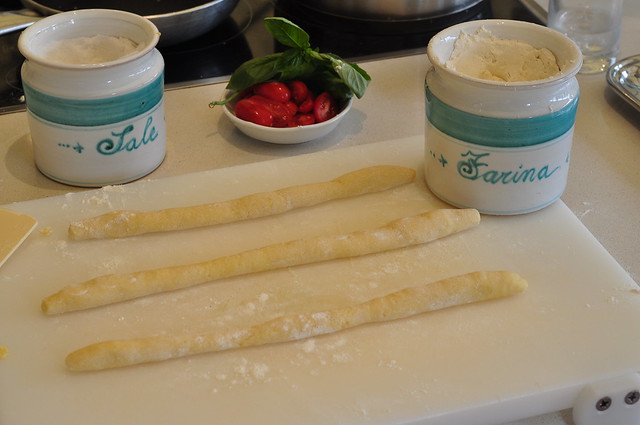
Gather your ingredients.
(We will chat about those riced potatoes at the end)
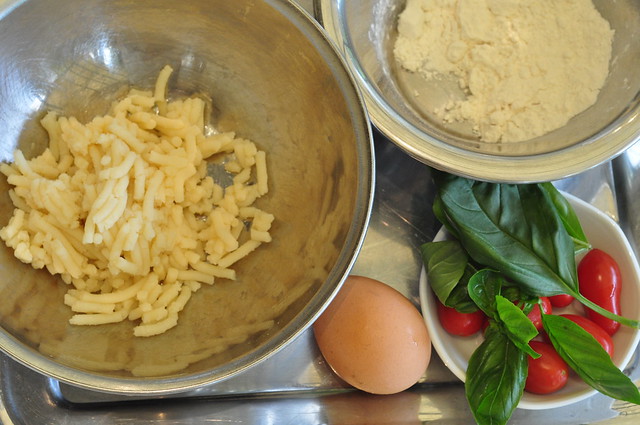
Place your flour, potatoes and egg in a bowl.
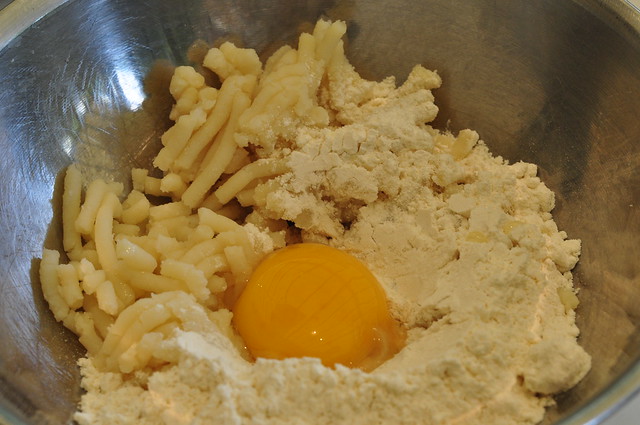
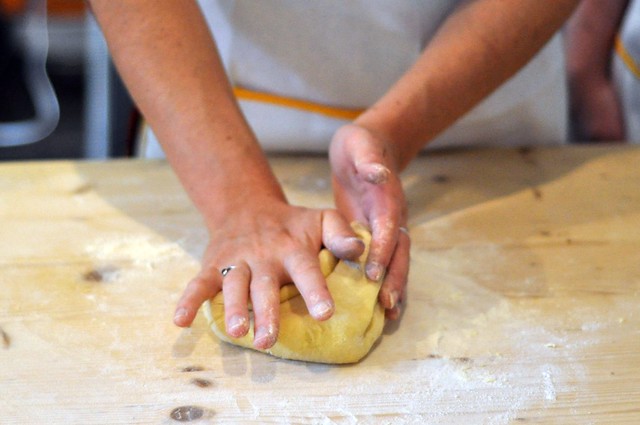
Using your fingers, press the ingredients together until you get a nice ball of dough.
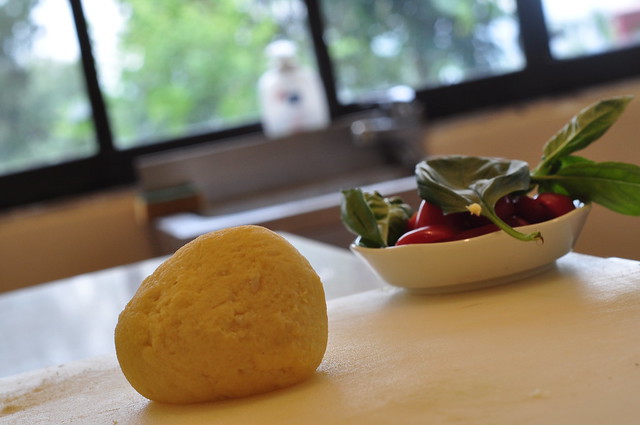
Knead the ball of dough until smooth with no big lumps.
Take about a 1/4 cup of dough and roll out into long strands about an inch thick.
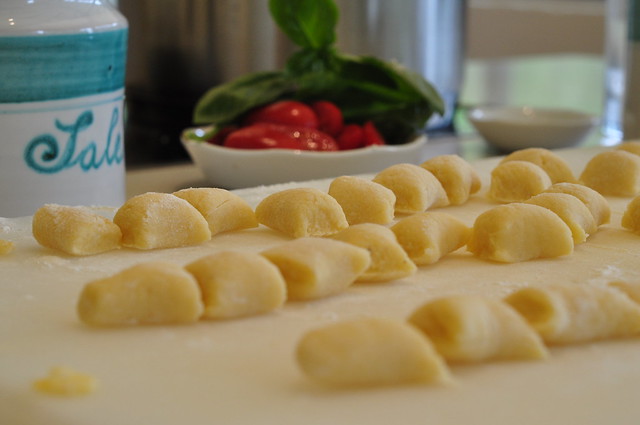
Cut into 1 inch pillows.
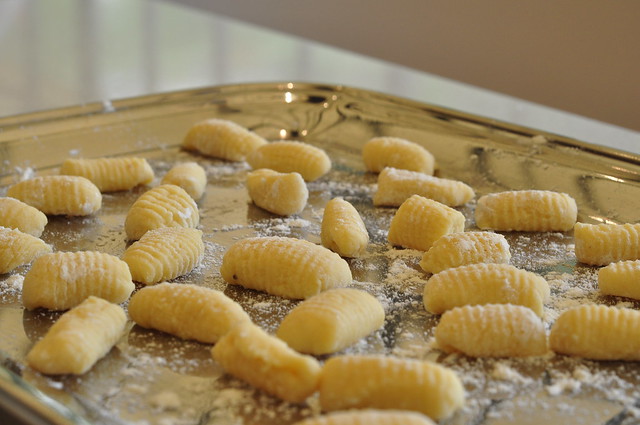
To get perfect ridges, you would need a gnocchi paddle, but you can use the back of a fork to form ridges. Press each pillow against the back of a fork to indent small lines. This will help the gnocchi soak up sauce.
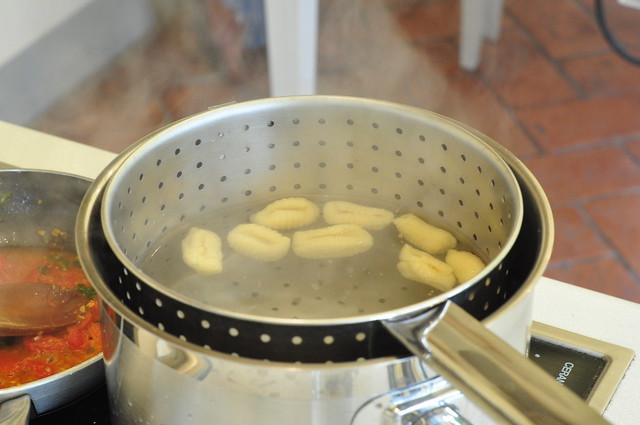
Cook gnocchi in salted boiling water. The gnocchi will float to the top when they are finished cooking.
While sauce is still cooking add gnocchi and toss. Serve hot. And just like that, you've made homemade pasta.
Go on, put yourself out there.. try this in your own kitchen. If not, just make sure this class is on your bucket list.
Gnocchi
Recipe from Villa San Michele Cooking School
Recipe Notes
One more warning. This is not the normal little kitchen recipe. It's not quick, it's not something you are going to read and get on the table tonight, but instead a fun kitchen project that is rewarding if you stick with it.
Ingredients
About 2 pounds of starchy potatoes (2 or 3 large russets)
2 or 3 pinches of salt
1 whole egg
1 egg yolk
1 cup unbleached, all purpose flour
Step by Step
Fill a large pot with cold water. Salt the water, then cut potatoes in half and place them in the pot. Bring the water to a boil and cook the potatoes until tender throughout, this takes roughly 40-50 minutes.
Remove the potatoes from the water and allow to cool only enough for you to be able to touch them. You want to mash them while they are still hot. Place each potato piece on a large cutting board and peel it before moving on to the next potato. To get the potatoes mashed, you can either push them through a ricer or just use a fork. If using a fork, you want to create a nice fluffy potato base so you do not want to mash it to death. Run your fork through the potato until there are no noticeable lumps.
Cool the potatoes enough so that egg will not cook when added to the potatoes. When potatoes are cooled, place in a medium sized bowl. Add the beaten egg and egg yolk, flour and salt. Mix together using your hands until you create a dough ball. The dough should be moist, but not sticky. Add a little extra flour if the mixture is too sticky. Cut dough into 8 pieces. Roll each piece out into a long skinny log, about a ½ inch thick. Using a pastry cutter or knife, cut ¾ inch little pillows. Dust with flour and repeat until you have used all of the dough. Save the potato water.
Let the potatoes cool spread out across the cutting board - ten or fifteen minutes. Long enough that the egg won't cook when it is incorporated into the potatoes.
To shape the gnocchi, hold a fork in one hand and place a gnocchi pillow against the back of the fork prongs. With pressure, use your thumb and press in and down the length of the fork. With confidence and an assertive (but light) touch, use your thumb and press in and down the length of the fork. The gnocchi should curl into a slight curved shape, their backs will capture the impression of the fork prongs as tiny ridges, goodperfect for catching sauce later. Set each gnocchi aside, dust with a bit more flour if needed, until you are ready to boil them. This is the step that takes practice. My first five to ten always look a little rough, but you will get the motion down.
When you are ready to cook the gnocchi, bring a pot of salted water to a boil. Drop in about 20 at a time so they are not too crowded. They will let you know when they are done because they will float to the top. Using a slotted spoon, remove from the water about 10 seconds after they have reached the top. Add to whatever sauce you will be serving. Continue until all gnocchi are cooked. Lightly drizzle with more sauce or olive oil. Serve hot.
Serves 6.


That looks so delicious! I might just have to test my skills on this soon.
ReplyDeleteI love making fresh pasta, but for some reason, gnocchi is scary to me. I've made it once, and I was terrified it was going to be heavy. You've inspired me to make it again!
ReplyDeleteReally good gnocchi is hard to come by and it definitely will NOT be found in any grocery store! Yours looks fabulous. I attempted to make it once and it was a total disaster. That was three years ago, so I think it's time I gave it another go!
ReplyDeleteGorgeous Ashlea / absolutely lovely. Welcome int he world of fresh pasta!
ReplyDeleteThese look like pillows from heaven...seriously. I want to be in your kitchen and maybe I'll get the nerve up to try making them myself.
ReplyDeleteohohh, what an amazing experience it must have been to be taking cooking classes in Italy! Home-made gnocchis are a fabulous dish! They taste so good! It is worth the effort :-)
ReplyDelete