Showing posts with label seasonal cooking: summer. Show all posts
Showing posts with label seasonal cooking: summer. Show all posts
6.19.2012
6.14.2012
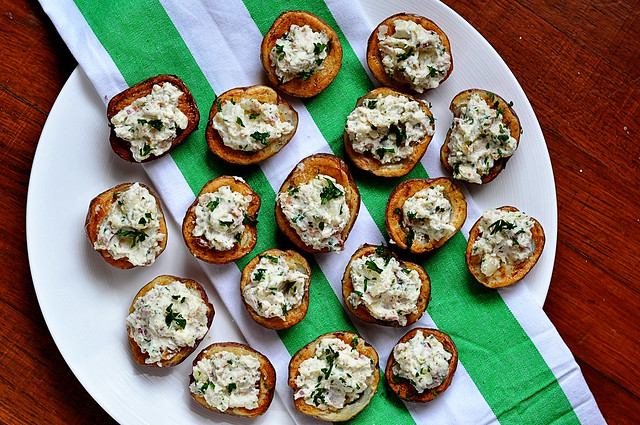
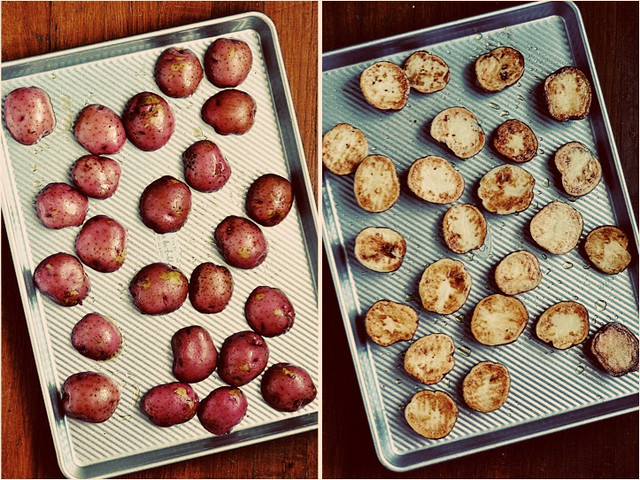
Mini Potato Boats + Father's Day Food
Father's Day is upon us. Here's what you should do...
Invite your pops over. If he is not a Southern Baptist minister, crack him open a beer. Find him a cozy chair to settle into and hand him the remote to channel surf for a couple hours. Don't worry, you don't have to be a witness to the channel surfing. You will be busy in the kitchen cooking up a storm. Let's make man food and make our dads proud (and full).
Invite your pops over. If he is not a Southern Baptist minister, crack him open a beer. Find him a cozy chair to settle into and hand him the remote to channel surf for a couple hours. Don't worry, you don't have to be a witness to the channel surfing. You will be busy in the kitchen cooking up a storm. Let's make man food and make our dads proud (and full).

9.01.2011
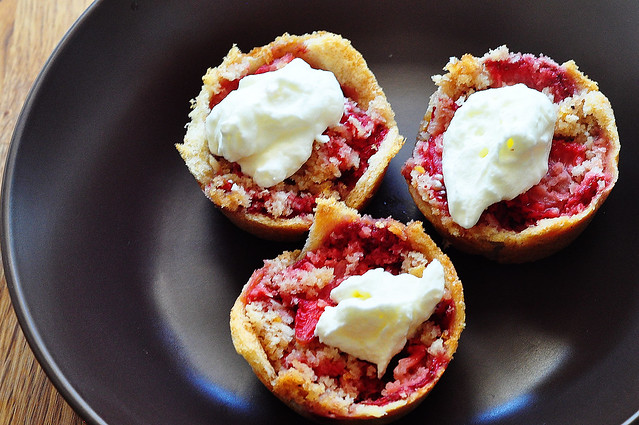
Strawberry Brown Butter Bettys
I took myself pretty seriously the other day about the whole end-of-great-fruits-is-near announcement. I actually made these the same day I made the peach bars because I just had the need to get all this fresh fruit into different buttery, crumbly wrappers before it went bad.
I guess it all started when I went overboard on stocking up on fruit in the first place. And once I had eaten my 18th bowl of fresh berries and whipped cream for dessert, I decided to try a few fancier things. But don't get me wrong... the fresh whipped cream is just as important on these sussies as it is for fresh fruit.
I have to say my vote went to the peach bars. However, we were a divided household. Mr. Hungry loved these. So who knows where you'll end up, but at the end of the day, they are both top notch fruity little desserts.
From my little kitchen to yours... Enjoy.
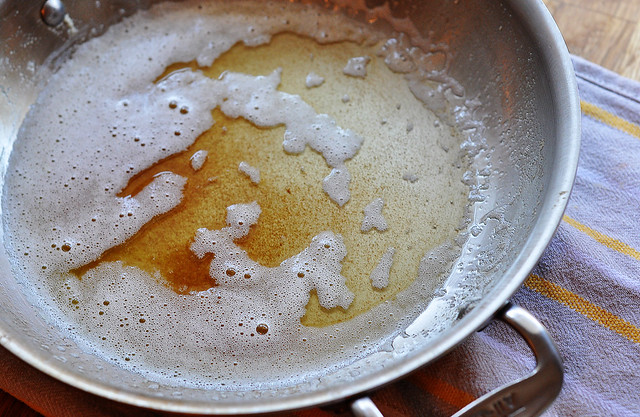
Have you ever made anything with brown butter? You totally should. Think deep buttery golden flavor. Woah, who knew butter had a whole different dimension? This is the color you're going for.
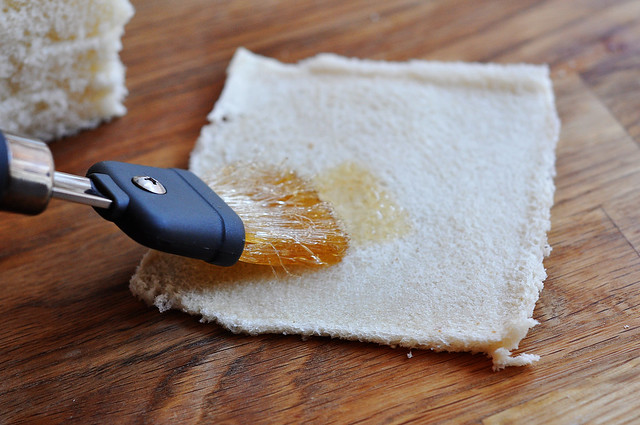
Did you know white bread loves brown butter? Oh yeah, it soaks this stuff right up and becomes nice and crispy. I have never loved plain old sandwich bread so much.
Strawberry Brown Butter Bettys
Adapted from Smitten Kitchen
Recipe Notes
Every strawberry is different so you will want to adjust the amount of sugar depending on the sweetness of your berries. These were made with farmer's market berries that had great flavor, but were not overly sweet.
Recipe Notes
Every strawberry is different so you will want to adjust the amount of sugar depending on the sweetness of your berries. These were made with farmer's market berries that had great flavor, but were not overly sweet.
3/4 stick unsalted butter
1 teaspoon granulated sugar
6 slices white sandwich bread, crusts removed
1/4 cup packed light brown sugar
1/2 teaspoon lemon zest, finely grated
1/8 teaspoon salt
1/2 cup panko bread crumbs(Japanese bread crumbs)
2 cups strawberries, stemmed and sliced into thin slices
Fresh whipped cream, for serving (lightly sweetened)
Step by Step
Preheat oven to 350°F and adjust oven rack to the middle of the oven.
In a small pot, melt butter over medium heat. Once melted, reduce heat to medium-low. The butter will melt, then foam, then turn clear golden and finally start to turn brown and smell nutty. If you have been at it for awhile and have not seen any brown, turn the heat up slightly. Stir butter frequently and scrape up any bits that might stick to the pan. Don’t take your eyes off the pot as while you may be impatient for it to start browning, the period between the time the butter begins to take on color and the point where it burns is less than a minute. The process should take 4 to 6 minutes. Remove from heat.
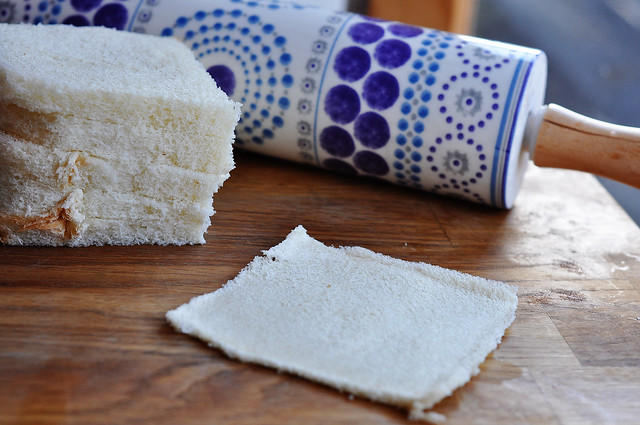
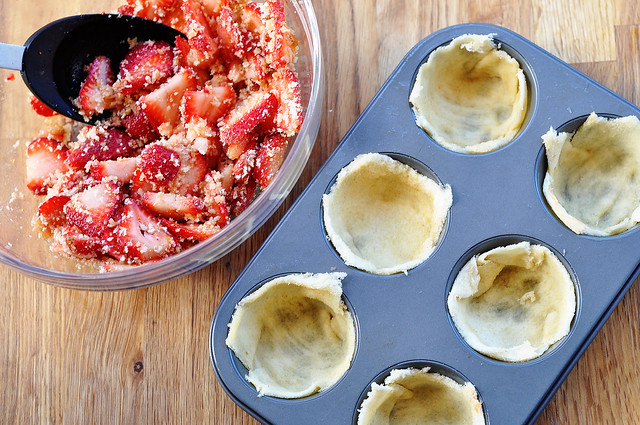
Lightly brush the muffin cups with the brown butter, then sprinkle with granulated sugar. Roll bread slices with a rolling pin to flatten. Brush both sides with additional brown butter, then gently fit into muffin cups.
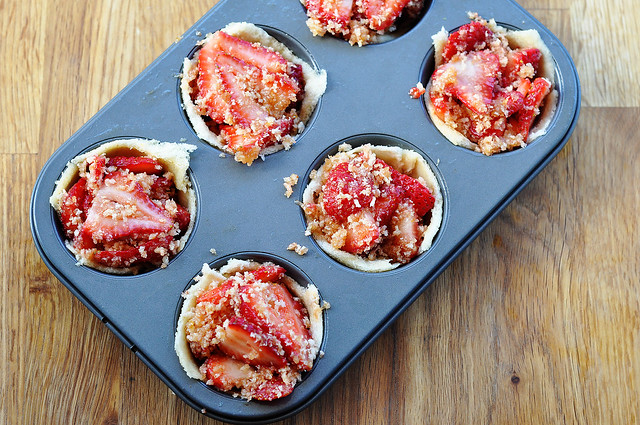
Stir together brown sugar, zest, salt and panko, then add strawberries and toss to coat. Stir in remaining brown butter. Heap strawberry mixture into cups, pressing gently.
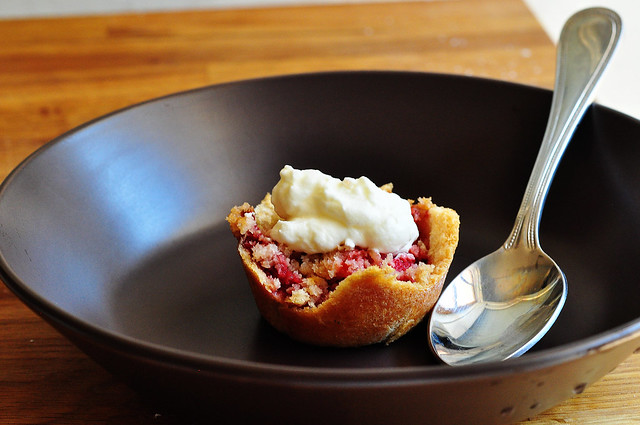
Cover pan with foil and bake 15 minutes. Uncover and bake until strawberries are very tender, about 10 minutes more. Let stand 5 minutes before removing from pan. Serve warm or at room temperature with a dollop of fresh whipped cream.
Can be covered with foil and kept refrigerated for 2 to 3 days. You can reheat for a few minutes in the oven or eat at room temperature. Just make sure to whip up some fresh whipped cream.
Makes 6 muffin- size desserts.
8.26.2011
Peach Crumb Bars
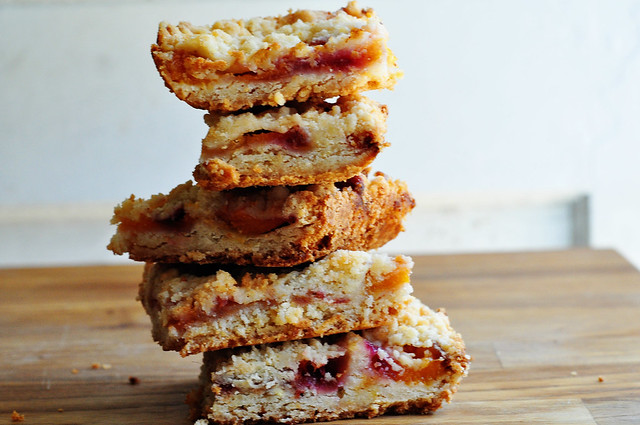
The end is near.
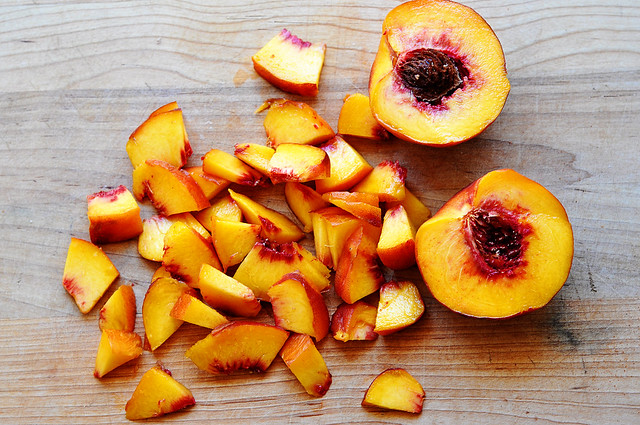
The signals are mixed. Around these parts, you could be fooled by the signs, but I feel very certain I am right... the end is near.
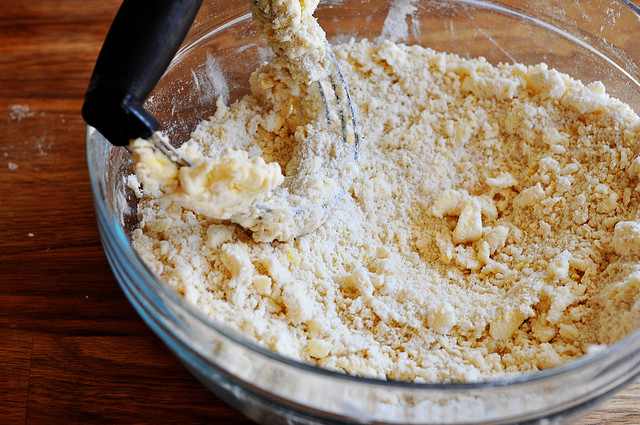
The end of amazing strawberries, peaches, blueberries, blackberries and such is coming. Pretty much the only clear sign at this point is the calendar. Because if I was going off the weather, you would think we are smack dab in the middle of it.
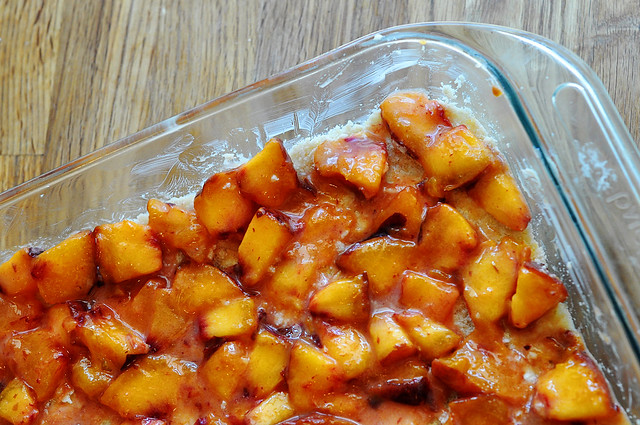
But we are not so run... don't walk.... to the grocery or farmer's market and get in on the freshness and flavor of fruit that can only be found in the summer.
Did I mention these are extremely easy? Yep, run.
From my little kitchen to yours... Enjoy.
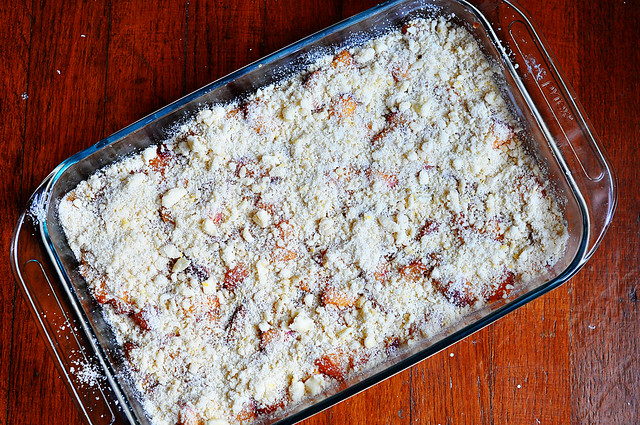
Oh, what do you know, we already have another desperate need for that fresh whipped cream. This is truly the icing on the cake... the cherry on top... whatever you want to call something that finishes out a dish in a perfectly wonderful way.
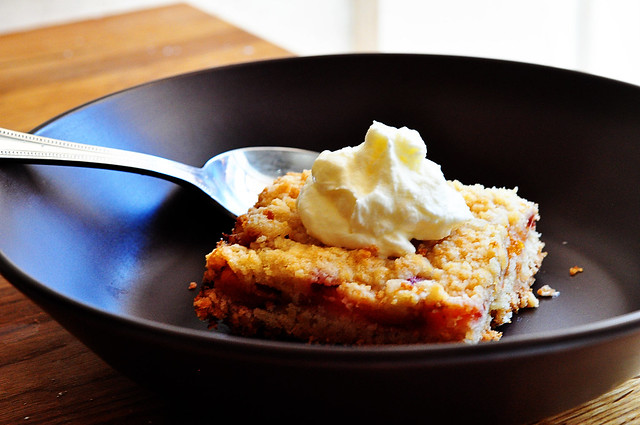
Peach Crumb Bars
Adapted from Smitten Kitchen & Allrecipes.com
Recipe Notes
Even in peak season, peaches can be extremely hit or miss. Depending on what kind of peaches you end up with, you might have to adjust a little bit. Mine were great, but not overly juicy. If you have really juicy peaches, you might want to add a tad bit more cornstarch. When I first made these bars, we used really sweetened whip cream because the crust was not overly sweet. Somehow, as the days went on, they got a little sweeter so we still put a dollop of cream on top, but I used less sugar.
Ingredients
1 cup white sugar
1 teaspoon baking powder
3 cups all-purpose flour
1 cup cold unsalted butter (2 sticks or 8 ounces)
1 egg
1/4 teaspoon salt
Zest and juice of one lemon
4 heaping cups of chopped peaches
1/2 cup white sugar
6 teaspoons cornstarch
Freshly whipped cream for topping (click here)
Preheat the oven to 375 degrees F. Grease a 9×13 inch pan.
Preheat the oven to 375 degrees F. Grease a 9×13 inch pan.
In a medium bowl, stir together 1 cup sugar, 3 cups flour, and baking powder. Mix in salt and lemon zest. Use a fork or pastry cutter to blend in the butter and egg. Dough will be very crumbly and dry. Pat half of dough into the prepared pan.
In another bowl, stir together the sugar, cornstarch and lemon juice. Gently mix in the peaches. Spread the peach mixture evenly over the crust. Crumble remaining dough over the berry layer. You might have a little crust left over.
Bake in preheated oven for 45 minutes, or until top is slightly golden brown. Cool completely before cutting into squares. Bars are easier to cut after being refrigerated. Top each bar with a dollop of fresh whipped cream.
Store in refrigerator in an airtight container for up to one week.
Makes 24 bars or 36 very small rectangles.
Makes 24 bars or 36 very small rectangles.
8.18.2011
Watermelon Margaritas
Big brothers are great.
Early in life? Not so much.
They steal your gameboy. They lock you out of their room when they are shooting sweet music videos with the home camcorder (I just wanted to be a background dancer). They make up fake rules when they are teaching you how to play ping pong. They leave your joint bathroom a nasty mess.
Later in life? Fantastic.
They pick you up from the airport. They give you advice about boys. They share new music with you. They marry someone great so you can have the sister you never had. They understand your teen problems because they have the same crazy parents you do. They have kids so you can have the greatest nephew ever.
And most importantly, they might introduce you to the best summer drink ever created.
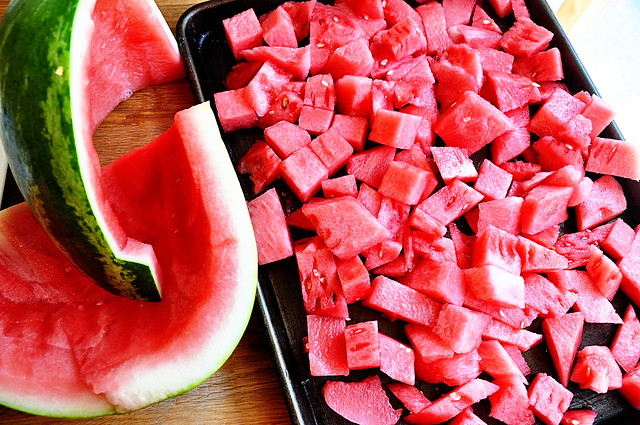
Watermelon margaritas. Ah, I feel refreshed just talking about them. They take one of the best fruits of the summer and add a boozy kick for a refreshingly wonderful cocktail.
They are the perfect cocktail to serve when friends come in town. Thanks for visiting Linds!
From my little kitchen to yours... Enjoy.
Watermelon Margaritas
Adapted from Emeril Lagasse
Recipe Notes
There are a few steps of prep work to this recipe so I've broken it up into three parts. Steps you need to make ahead, steps you can make ahead, and steps for when you are ready to have these. But make sure you freeze the watermelon at 3 hours ahead of time.
Ingredients
When ready to make margaritas...
Early in life? Not so much.
They steal your gameboy. They lock you out of their room when they are shooting sweet music videos with the home camcorder (I just wanted to be a background dancer). They make up fake rules when they are teaching you how to play ping pong. They leave your joint bathroom a nasty mess.
Later in life? Fantastic.
They pick you up from the airport. They give you advice about boys. They share new music with you. They marry someone great so you can have the sister you never had. They understand your teen problems because they have the same crazy parents you do. They have kids so you can have the greatest nephew ever.
And most importantly, they might introduce you to the best summer drink ever created.

Watermelon margaritas. Ah, I feel refreshed just talking about them. They take one of the best fruits of the summer and add a boozy kick for a refreshingly wonderful cocktail.
They are the perfect cocktail to serve when friends come in town. Thanks for visiting Linds!
Cheers to big brothers. Love you, Shua.
From my little kitchen to yours... Enjoy.
Watermelon Margaritas
Adapted from Emeril Lagasse
Recipe Notes
There are a few steps of prep work to this recipe so I've broken it up into three parts. Steps you need to make ahead, steps you can make ahead, and steps for when you are ready to have these. But make sure you freeze the watermelon at 3 hours ahead of time.
Ingredients
2 teaspoon lime zest
1 cup water
1 cup sugar
1 seedless watermelon
8 tablespoons fresh lime juice
1 cup premium 100 percent agave tequila
2 tablespoons orange-flavored liqueur (recommended: Grand
Marnier or triple sec)
1 cup ice
lime wedges for garnish
lime wedges for garnish
Step by Step
Must be made at least 3 hours ahead of time...
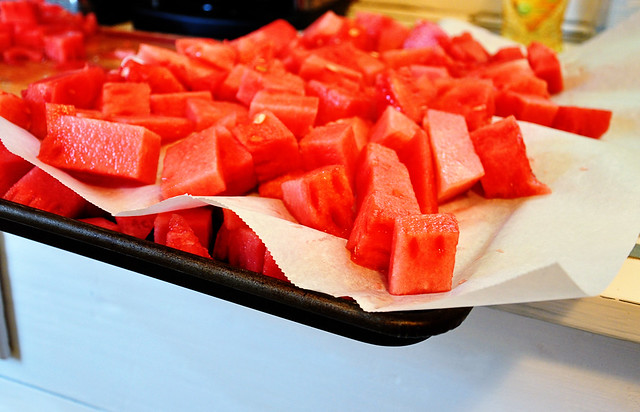
Cut up watermelon into 1 to 2 inch chunks. Spread out in a single layer on a rimmed baking sheet. Freeze for at least 3 hours until frozen through. If you only have room for one baking sheet and you have more watermelon than allowed, place a piece of parchment paper on top of watermelon chunks and add another layer (see picture below).
Can be made ahead of time...
In a medium saucepan, combine the lime zest, water, and
sugar. Bring to a boil over medium heat, and cook, stirring, until the sugar
dissolves. Remove from the heat. Cool to room temperature (Keep in a covered container in the
refrigerator until ready to use.)
Chill margarita glasses in the freezer for 30 minutes.
When ready to make margaritas...
In a blender, combine 5 cups of frozen watermelon, 8 tablespoons of the cooled
lime syrup with the lime juice, tequila, orange-flavored
liqueur, and ice. Blend until smooth.
Makes 4 drinks.
My solution for not being able to fit two trays of watermelon in my freezer...
a layer of parchment paper.

8.10.2011
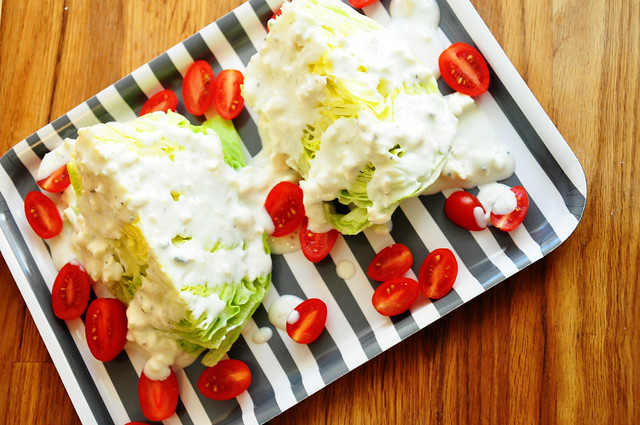
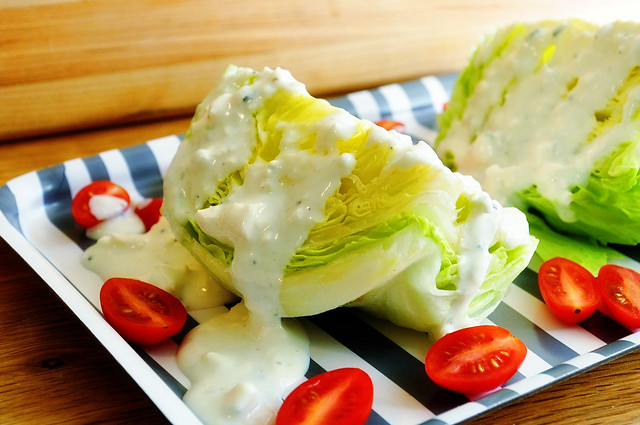
Gorgonzola Iceberg Wedge Salad
I just about never pass up an iceberg wedge salad on a restaurant menu. And I can guarantee if I do, I already know their dressing is no good. There is something so refreshing and satisfying about a good wedge and I figured if you get the dressing down, the rest would be a piece of cake.
This gorgonzola dressing is absolutely perfect. You'll never come close to matching its taste with a bottled dressing. And it's a whole lot healthier than those dressings made with mayo and sour cream. Tastes even better the next day.
From my little kitchen to yours... Enjoy.
Ingredients
2/3 cup buttermilk
1/2 cup Greek yogurt (I used fat free)
1 large garlic clove, minced
8 ounces crumbled Gorgonzola cheese
salt & fresh ground pepper
1 head iceberg lettuce, cut into 4 wedges
1 cup grape tomatoes, sliced in half
Optional: 4 pieces of cooked, crumbled bacon
Step by Step
In a medium bowl, stir the buttermilk, Greek yogurt, and garlic together. Add in 2/3 cup of the Gorgonzola to the dressing. Smash the cheese into the sauce to help it blend. Stir in a few more sprinkles of the gorgonzola and leave them chunky. Season with salt & pepper and set aside.
Arrange the lettuce wedges on individual plates. Spoon the dressing over the wedges, top with tomatoes and remaining Gorgonzola (and bacon if using). Sprinkle fresh cracked pepper on top and serve.
Refrigerate dressing in an airtight container for up to 5 days.
Makes 4 salads. Or two salads one night and two the next...
8.02.2011
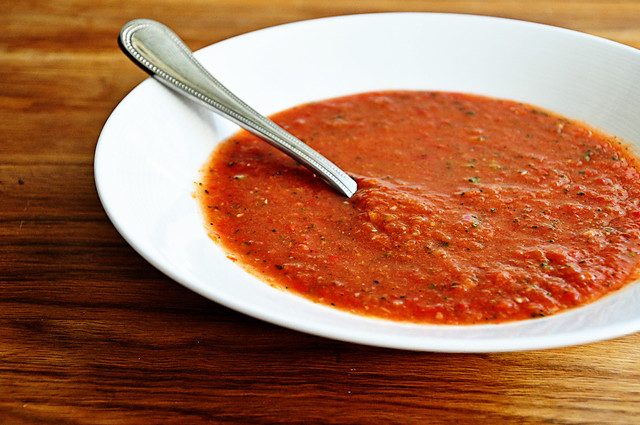
{slightly chunky} Tomato Gazpacho Soup
It's hot as blazes around here. Until further notice, my oven is closed.
Who's with me? If you're not with me, it means you live in one of those places with perfect summer weather and I would rather not hear from you right now.
But if you are in my boat... the temps are above 95 or the humidity hits you in the face like a wool blanket when you walk outside...then get ready.
This heat has even changed my taste buds. I've never been one for cold soups. Just no appeal really. I liked em hot and savory, but since this i-must-eat-only-cold-things hit, it sounded like a pretty good idea to have something both cold and savory.
Not to mention the fact that tomatoes are out of this world right now. It's amazing how good foods taste when they are actually in season.
There is a little bit of prep work here, but no heat so that's a plus. Have any favorite chilled or frozen recipes you'd like to share? Email me, please. Let's band together against this heat, shall we?
From my little kitchen to yours... Enjoy.

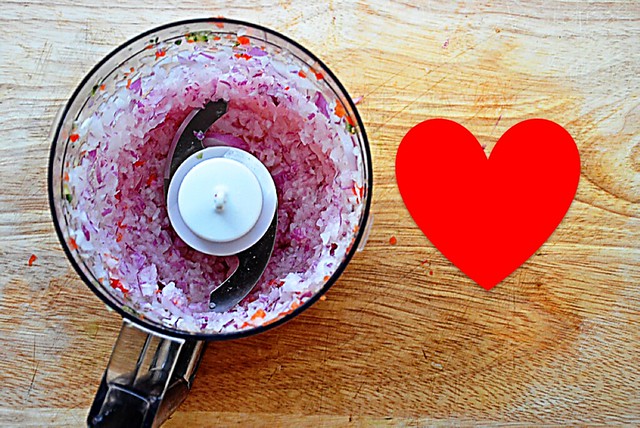
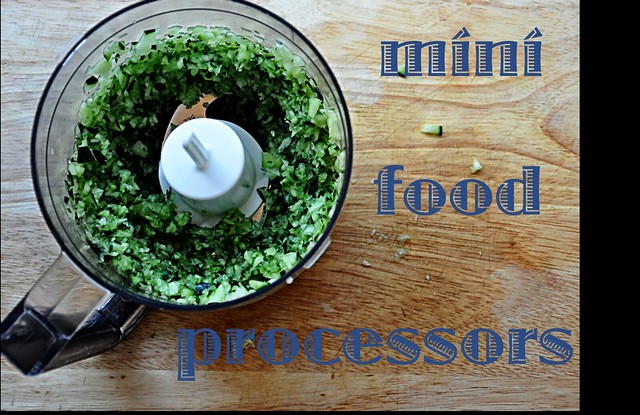
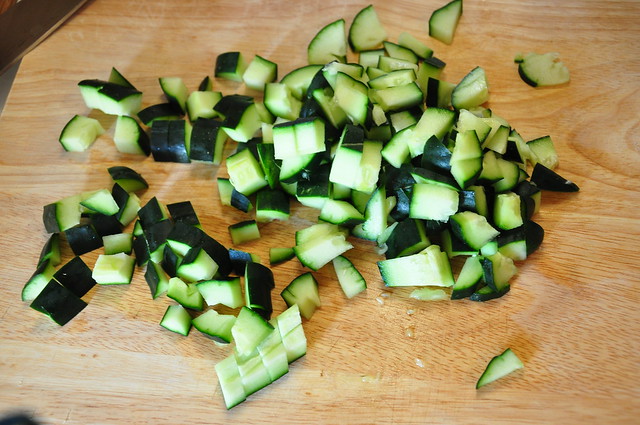
This is a good size chunk to aim for with all your veggies...
This thing is a work horse...
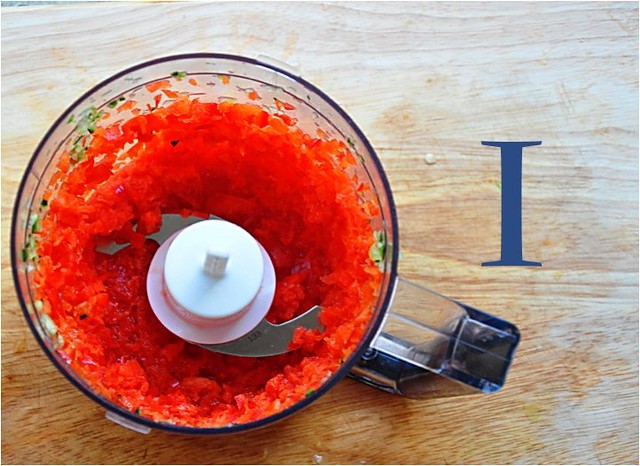
Finally got all those veggies processed. As you can see, I still had some chunks, which is why I chose the hand blender to help me out at the end.
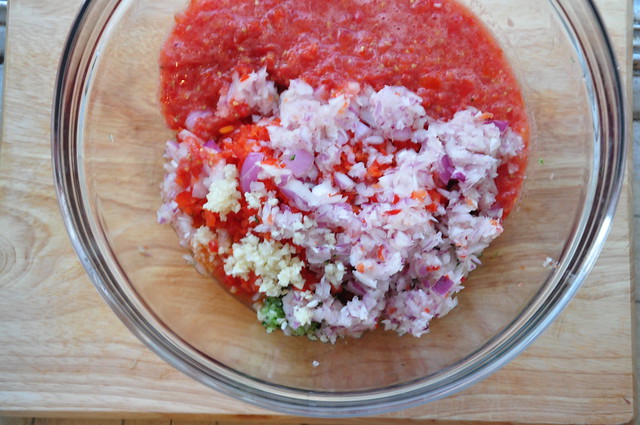
Tomato Gazpacho
Adapted from Ina Garten
Recipe Notes
I prefaced that this was slightly chunky because if you like gazpacho and you like it extremely smooth and creamy, that is not what you are going to get from this recipe, but I love the texture.
Who's with me? If you're not with me, it means you live in one of those places with perfect summer weather and I would rather not hear from you right now.
But if you are in my boat... the temps are above 95 or the humidity hits you in the face like a wool blanket when you walk outside...then get ready.
This heat has even changed my taste buds. I've never been one for cold soups. Just no appeal really. I liked em hot and savory, but since this i-must-eat-only-cold-things hit, it sounded like a pretty good idea to have something both cold and savory.
Not to mention the fact that tomatoes are out of this world right now. It's amazing how good foods taste when they are actually in season.
There is a little bit of prep work here, but no heat so that's a plus. Have any favorite chilled or frozen recipes you'd like to share? Email me, please. Let's band together against this heat, shall we?
From my little kitchen to yours... Enjoy.
Here are a few pics from the process...
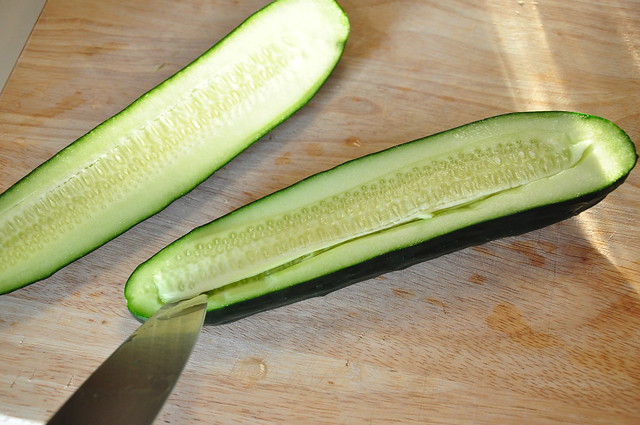
The way I like to go about getting the seeds out of a cucumber. Slice in half and then slice diagonally on both sides to remove the strip of seeds.
but as the saying goes, there's more than one way to skin a cat.

This is a good size chunk to aim for with all your veggies...

This thing is a work horse...

Finally got all those veggies processed. As you can see, I still had some chunks, which is why I chose the hand blender to help me out at the end.

Tomato Gazpacho
Adapted from Ina Garten
Recipe Notes
I prefaced that this was slightly chunky because if you like gazpacho and you like it extremely smooth and creamy, that is not what you are going to get from this recipe, but I love the texture.
Ingredients
1 cucumber, halved and seeded, but not peeled
1 red bell pepper, cored and seeded
4 plum medium sized vine ripened tomatoes
1 small red onion
3 garlic cloves, minced
3 cups tomato juice (23 ounces)
1/4 cup white wine vinegar
1/4 cup olive oil
1/2 tablespoon kosher or sea salt
1 teaspoons freshly ground black pepper
Special Equipment
Small food processor
Optional Equipment
Hand blender
Optional Equipment
Hand blender
Step by Step
Roughly chop the cucumbers, bell peppers, tomatoes, and red onions into small 1 inch chunks. Put each vegetable separately into a small food processor fitted with a steel blade and pulse until it is coarsely chopped. Leave slightly chunky; do not completely liquefy.
After each vegetable is processed, combine them in a large bowl and add the garlic, tomato juice, vinegar, olive oil, salt, and pepper. Mix well and chill before serving. Optional: If you would like a little more creaminess with small chunks, you can use a hand blender at the end to get the consistency that you like.
The longer gazpacho sits, the more the flavors develop.
Keep covered in the refrigerator for up to 3 days.
Serves 4-6.
The longer gazpacho sits, the more the flavors develop.
Keep covered in the refrigerator for up to 3 days.
Serves 4-6.
7.18.2011
Antipasto Platters
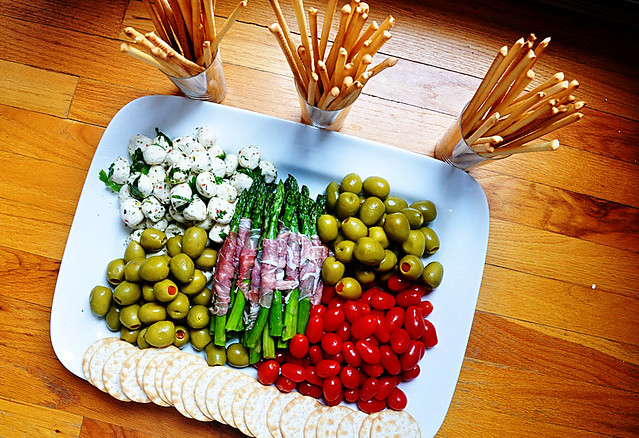
I make a mean antipasto platter.
I'm not sure that's really an accomplishment since there is little that you are actually cooking, but they are always a hit at cocktail parties. It's kind of the perfect answer to what serve at a party in the summer. You turn on your oven for .5 seconds and then you just assemble.
Granted this is another one of my non-recipe recipes, but sometimes the simpler the better. And what better for a cocktail party than savory food that you do not have to keep warm and can be assembled ahead of time? Perfection.
This is my personal version of an antipasto platter. Traditionally, they are made with a variety of meats and cheeses, but I like to spice it up a bit. I thought I'd share my favorites, but let's get real, the possibilities are endless.
So let's get started...
I always include marinated tomatoes. Click here for recipe. They have such great flavor and very addicting. You just need to think about these the night before so they can marinate, but that's about all the prep work there. Moving on...
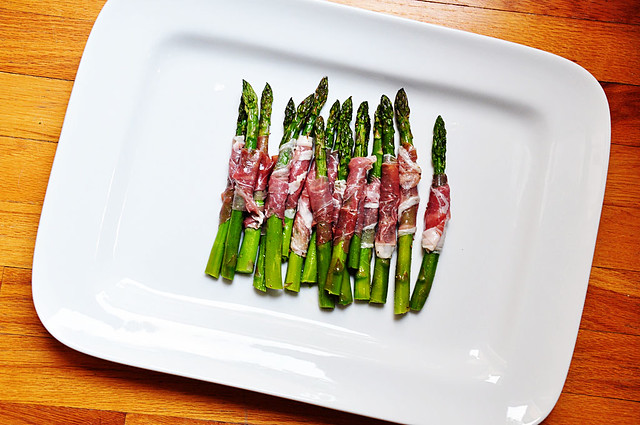
These prosciutto wrapped asparagus are what make this platter feel fancy. Check below for recipe...
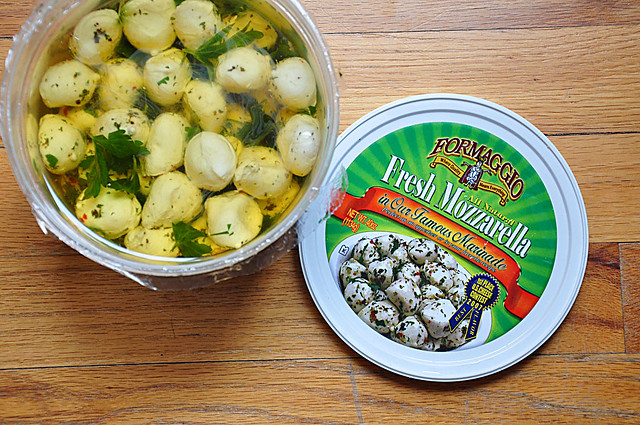
My favorite cheese to serve is this marinated mozzarella. This big tub comes from Costco and is super cheap for the quantity. I prefer this to just plain fresh mozzarella balls because these have a lot more flavor.
You need some crackers to balance all this. My two favorites are Carr's table water crackers and these Italian breadsticks that can be found at most specialty grocery stores. They also add nice height.
And then I like to pile on olives. But I'm an olive person. If you are not, let's talk about some other ideas.
Thin slices of prosciutto, cuts of salami, artichoke hearts, sliced hearts of palm, piles of nuts, dried apricots... again more of my favorites, but they all work pretty well.
Hopefully you have something to work with here. Now go ahead and invite your friends over.
From my little kitchen to yours... Enjoy.
Proscuitto Wrapped Asparagus
Recipe Notes
The key to this is having extremely thin proscuitto. If it is thick, it will be hard to bite through. Costco sells a great prepackaged very thinly sliced prosciutto at a great price. Or ask your butcher to cut it paper thin. Be careful to not overcook the asparagus. You want it slightly cooked, but still crunchy... not mushy. Asparagus size can vary dramatically so if you have very thin spears, keep your eye on them.
Ingredients
Asparagus (2 to 4 per person)
Prosciutto, about 1/2 a slice per piece of asparagus, sliced paper thin.
olive oil
kosher or sea salt
freshly ground pepper
Step by Step
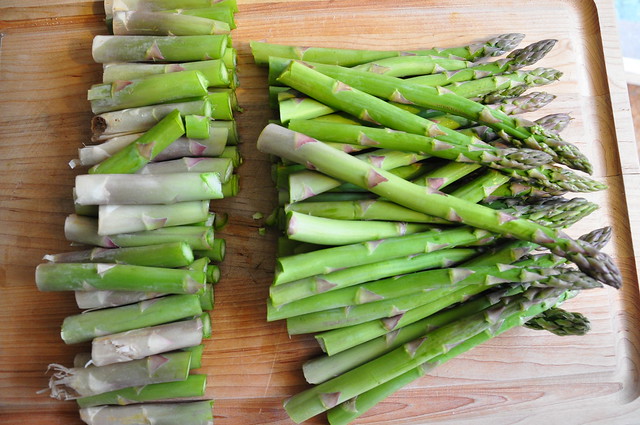
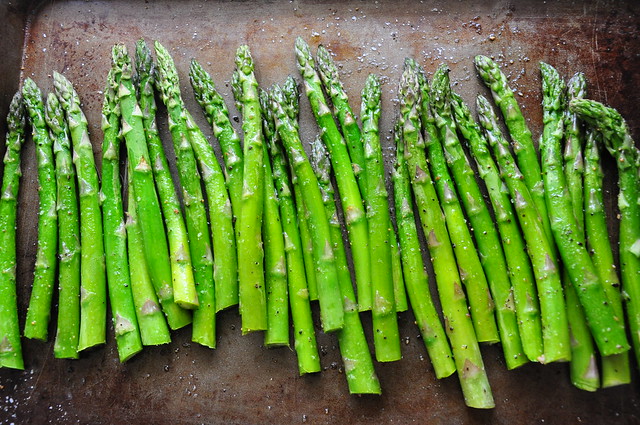
Preheat the oven to 375 degrees F. Trim the white, woody ends of Spread the asparagus in one layer on a rimmed baking sheet. Drizzle with olive oil and sprinkle with salt and pepper. Roast asparagus for about 5 minutes (see recipe note for timing). Remove from oven and allow to cool.
Cut each piece of prosciutto in half, so you have two strips. Wrap each piece of asparagus with a half piece of prosciutto. Repeat until all asparagus have been wrapped. Can be made up to 6 hours in advance and kept refrigerated. Serve at room temperature.
5.16.2011
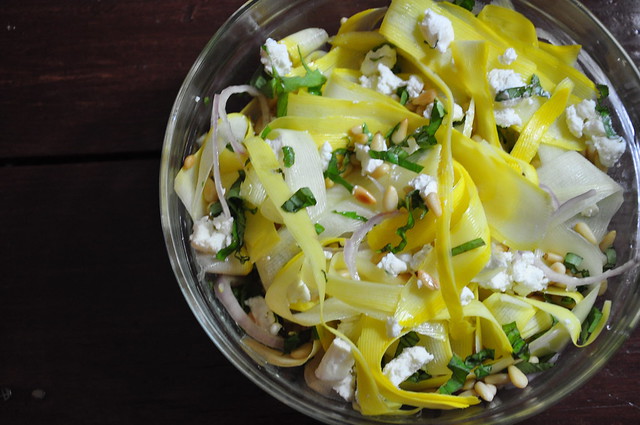
Squash Ribbon Salad
I know I don't have anyone on the edge of their seat over squash ribbons, but come on, stay with me. Seriously, stay with me... it's worth it.
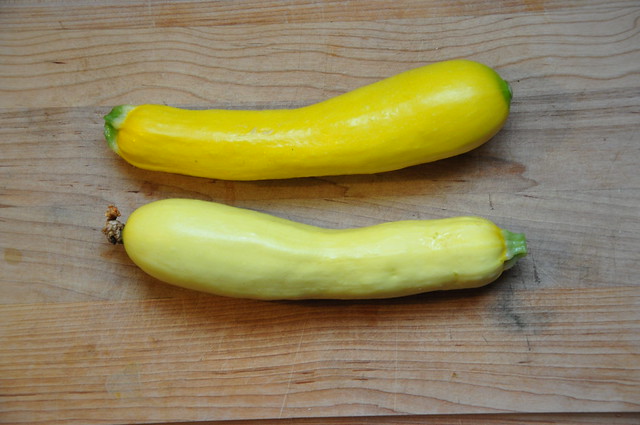
I first tried the ribbon method for this pasta and I all of a sudden became a squash fan. It turns a rather bland, sometimes boring veggie into a thin, crisp tool that can soak up great sauces without being heavy. The ribbons turn into something refreshing and crisp that taste somewhere between a fettucine noodle and leaf of lettuce. Does this make sense? Keep following...

I rarely get pumped about a big bowl of greens, but this offers more taste, and the bright pops of yellow ribbons are springier than spring itself.
So come on... just try it. Please? Thank you.
Summer Squash Ribbon Salad
Adapted from the kitchn
Ingredients
1 1/2 pounds zucchini or yellow squash
1 shallot, very thinly sliced... as thin as you can possibly get it (about 2 tablespoons)
2 tablespoons extra virgin olive oil
2 teaspoons white wine vinegar
Salt and freshly ground black pepper
1/4 cup basil chopped finely
1/4 cup toasted pine nuts
2 ounces goat cheese
Step by Step
Trim the ends off the squash and using a vegetable peeler, or knife, cut the squash lengthwise into very thin strips.
Place in a large bowl with the sliced shallot, olive oil, and vinegar, and gently toss to combine. Let stand for 10 minutes.
Season to taste with salt and pepper. Then add the basil and pine nuts and gently toss to combine.
Transfer to a serving dish and crumble goat cheese on top. Serve immediately.
Makes 4 servings (or 2 big main servings).
4.26.2011
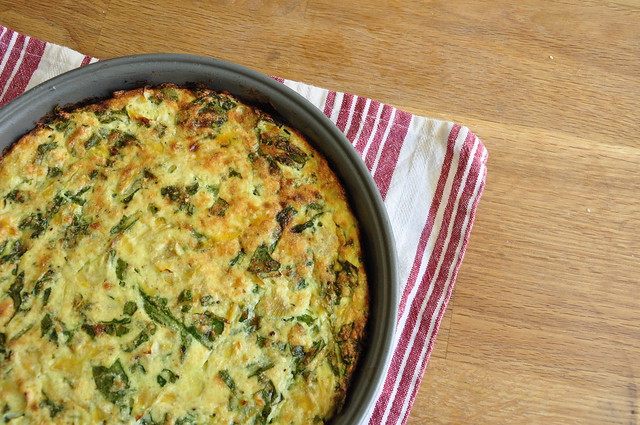
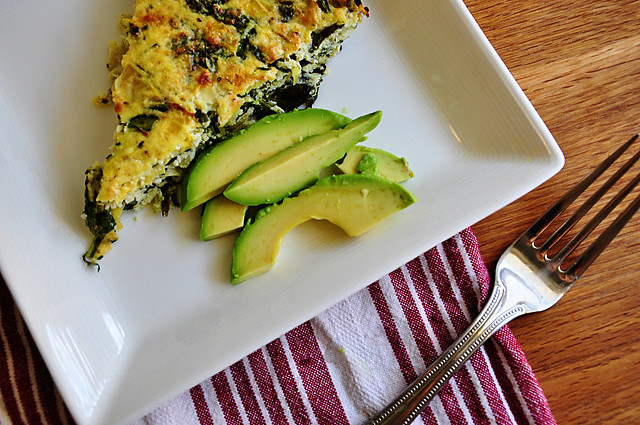
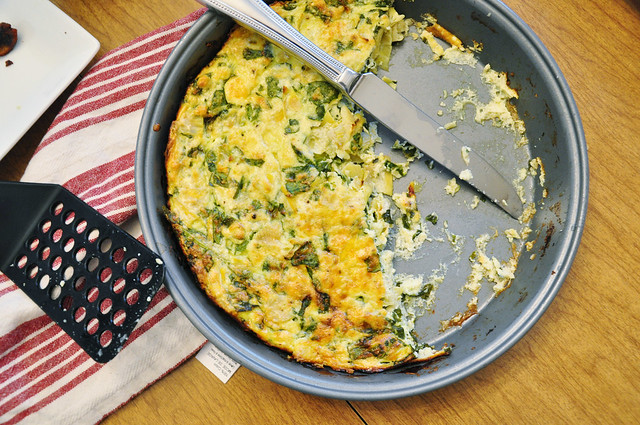
Spinach, Artichoke & Ricotta Pie
We did some serious brunching over the long weekend.
When I woke up all I wanted to do was remain in my pjs and come up with hearty new dishes to try; so that is exactly what I did. I did it for you, I did it for me... I did it for us.
No fuss, much frill; from my little kitchen to yours... Happy Brunching.
When I woke up all I wanted to do was remain in my pjs and come up with hearty new dishes to try; so that is exactly what I did. I did it for you, I did it for me... I did it for us.
No fuss, much frill; from my little kitchen to yours... Happy Brunching.
Adapted from The Kitchn
Recipe Notes
Make sure and add the avocado for serving. It is optional, but pairs perfectly with the pie. This dish also warms up really well in the oven the next day for leftover.
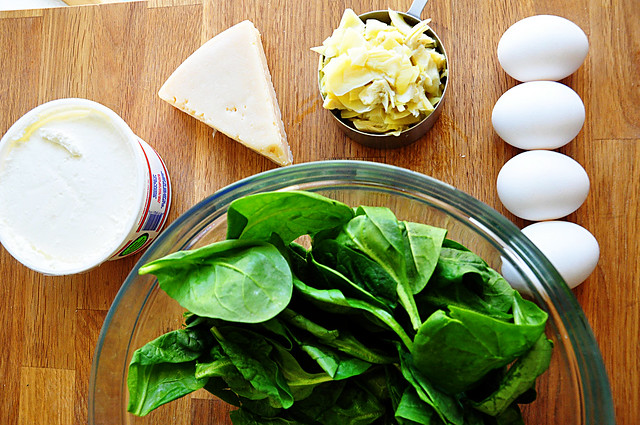
Ingredients
1 cup canned artichokes, chopped
5 ounces spinach, roughly chopped (1/2 a small bag)
8 ounces ricotta cheese
4 ounces grated or shredded Parmesan
4 extra large eggs, beaten
1 teaspoon salt
1/2 teaspoon pepper
Vegetable oil or cooking spray to coat the cake pan
1 avocado, thinly sliced (for garnish)
Step by Step
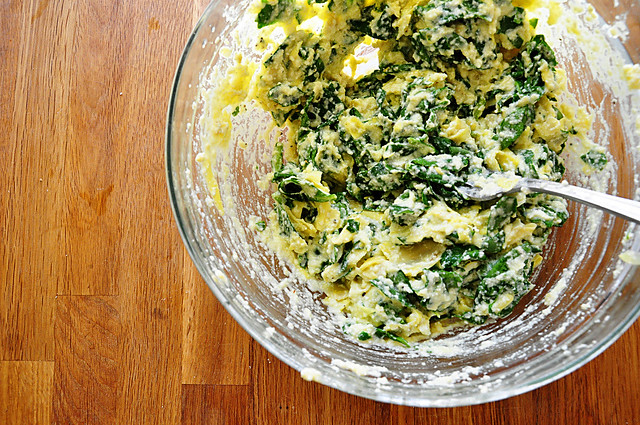
Preheat oven to 400 degrees. Grease a 9 inch cake pan lightly with olive oil. In a large bowl, combine the eggs and cheeses. Roughly chop the veggies and add to the cheese/egg mixture. Add salt and pepper. Stir until combined. Pour contents of bowl into the greased cake pan and cook until custard is set, about 40-50 minutes. Cool on a wire wrack for 5-10 minutes and serve with 3 slices of avocado per piece.
Serves 4-6
I would have said this definitely serves 6, but I added 4-6 because this was all that was left after the two of us got ahold of it.
3.29.2011
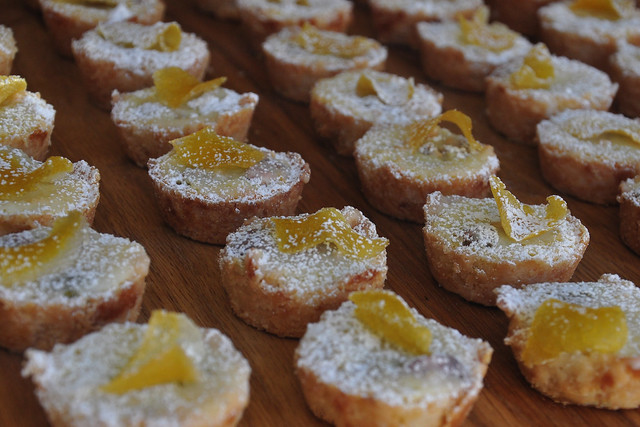
Lemon Pistachio Tartlets + a confession + some news
First the confession...
Have you heard of Food52? I have and I have been secretly holding out on you because I want to to win and I would like to keep the entries to a minimum. Okay, so I realized this was unfair of me and if you haven't, you should check it out.
It is a website that requests a certain type of recipe each week for a contest {for example: give us your best late winter tart recipe} and you have one week to turn in a recipe. If you win, you are published in a cookbook that they publish once a year... get it? 52 recipes for 52 weeks= food 52. Anyway, they upped the ante big time a couple of weeks ago and when they asked for late winter tarts, they announced that if you won, you would be flown to New York to be on the Martha Stewart Show to make your tart to help celebrate her new pie and tart cookbook.
I was beside myself. Being on the Martha Stewart show is on my bucket list and although I'm at the ripe old age of 26, you can never check things off too soon. Anyway, I went to work on lots of versions of this original recipe and came up with my lemon pistachio tartlets. By the time I finally turned it in, I really didn't have much hope of actually winning. There seem to be true professionals on this site who have been entering for years and I was up against 265 other tarts.
No I did not win, but...
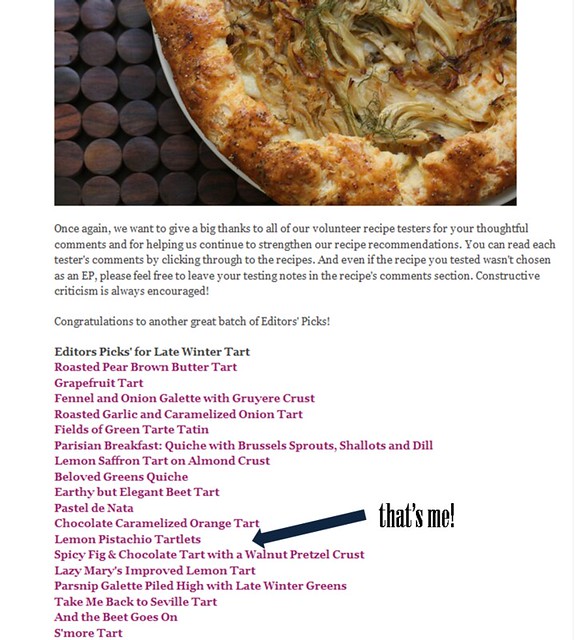
So when I found out I wasn't chosen as one of the top two to be voted on, I wasn't that surprised, but I had high hopes of being a part of the honorable mentions... aka editor's picks. Food52 puts out a few of their picks of all the entries and asks members of the community to test them out. Those that are given great reviews are picked as Editor's Picks.
So I am happy to say that I did get picked as an Editor's Pick! It was exciting for me and especially because I am still venturing into the world of making recipes my own.
So all that to say, I just wanted to share a little foodie triumph and share this recipe that would be pretty darn perfect for brunch or shower. I love easy, mini pick up food, which is why I insisted on these being mini and they turned out to be quite addictive too.
Just in case you want to check out other editor's picks, click here for a link to the blog post...
Now for the tartlets...
Lemon Pistachio Tartlets
Recipe Note: If you would rather not mess with candied lemon peels, you can leave that garnish off, but I do like the extra layer of lemon myself.
Makes 48 tartlets For the crust and candied lemon peels:
- FOR THE CANDIED LEMON PEELS
- 3 large lemons (look for ones with thick skin)
- 3 cups sugar
- FOR THE CRUST
- 3/4 cups unsalted butter
- 1/4 cup sugar
- 1 tablespoon powdered sugar
- 2 cups all purpose flour
- 2 teaspoons fresh lemon zest
- 1 teaspoon almond extract
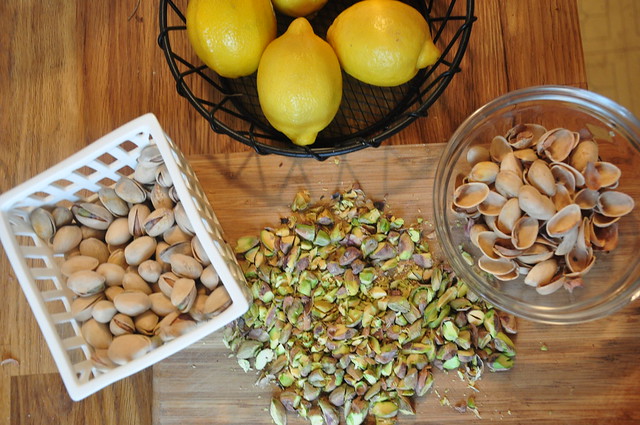
- 144 whole roasted and salted pistachios, shelled (about 2 cups unshelled)
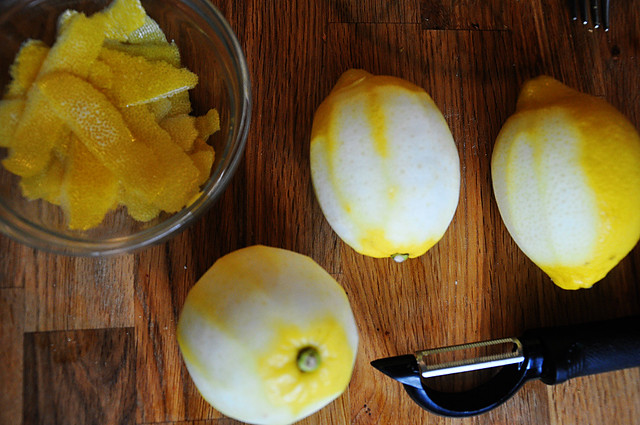
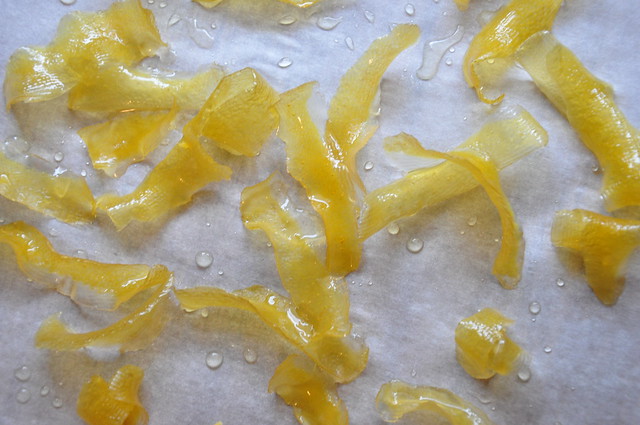
- Preheat oven to 325 degrees. Using a vegetable peeler, peel off pieces of the skin from top to bottom into long ribbons. Place peels in a saucepan and cover with water. Bring water to a boil and simmer for one minute. Drain water and repeat one more time. Dissolve 3 cups of sugar into 2 cups of cold water. Bring water to a boil and add lemons. Turn heat to low and let simmer for one hour. Ask a question about this step.
- Meanwhile, melt butter in medium sized saucepan over low heat. Remove from heat and add sugars, zest and almond extract. Stir to combine. Add flour and stir with a wooden spoon until combined and crumbly. Let crust rest for 15 minutes. Ask a question about this step.
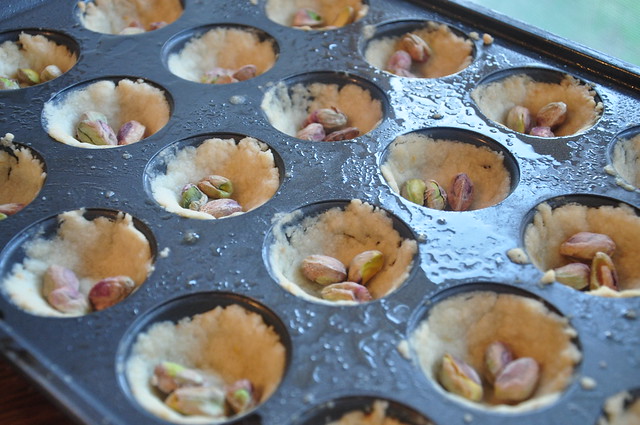
- Spray two mini muffin tins with a good coat of nonstick cooking spray. After crust has rested for 15 minutes, spoon a heaping teaspoon of crumbly dough into each cup. The goal is to get the entire cup covered with the least amount of dough. Technique: Using your thumbs, press dough into the bottom of the pan. Then, use your thumbs to spread the dough up the sides until whole cup is covered evenly. Bake crusts for 8 minutes. Allow to cool and drop 3 pistachios into each cup. Ask a question about this step.
- After lemon peels have simmered for an hour, remove from liquid and allow to cool. Cut peels into 1 inch chunks. Lemon peels will not dry out completely, but can be stored in an airtight container for up to two weeks. Ask a question about this step.
- FOR THE FILLING
- 1 1/2 cup sugar
- 3 tablespoons all purpose flour
- 3/4 teaspoons baking powder
- 3/4 teaspoons salt
- 3 XL eggs, room temperature, beaten
- 2 teaspoons grated lemon zest
- 3 tablespoons fresh lemon juice
- FOR THE GLAZE
- 1/2 cup powdered sugar, sifted
- 1 tablespoon fresh lemon juice
- 1 tablespoon butter, melted
- FOR FINAL TOUCHES
- 1/4 cup powdered sugar
- Prepare filling while crusts are baking and lemon peels are simmering. In a medium sized bowl, stir together sugar, flour, baking powder and salt. Add eggs, zest and juice and stir to combine. Using a tablespoon, fill each crust cup with lemon filling. Fill to the top of the crust line, but do not go over. (if filling floods out over crust, it will be more difficult to remove from pan). Bake for 15 minutes. Remove from oven and cool in pan. Ask a question about this step.
- Meanwhile, prepare glaze. Combine powdered sugar, lemon juice and butter in a small bowl. Using a pastry brush or small spoon, paint the top of each cooled tartlet with the glaze and place a sliver of candied lemon on top of each. Slide a small, sharp pairing knife in between the crust and pan until each tartlet pops out. When ready to serve, dust heavily with powdered sugar. Ask a question about this step.
- Can be stored in an airtight container up to one week.
Subscribe to:
Posts (Atom)


