Showing posts with label quick and easy. Show all posts

6.21.2013

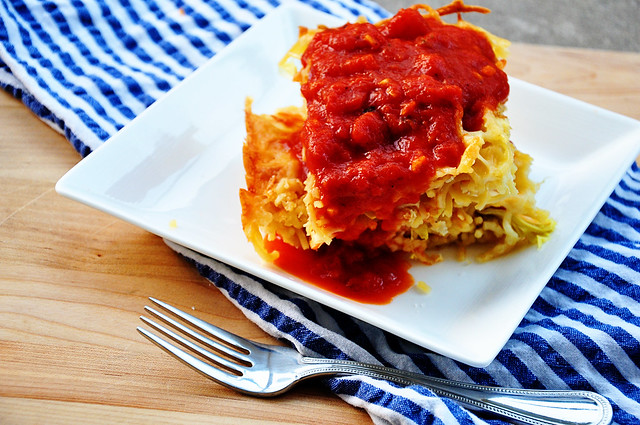
Spaghetti Pie

spaghetti pie
If you happened to have visited this little kitchen in the early days, you were subjected to dark and yellowy pics and you were assaulted by too many exclamation points. I still have a ways to go on my photography and I'm still excited about food... however, I've picked up a trick or two to make this food look as good as it tastes, and I've found other ways to express my enthusiasm.

11.21.2012

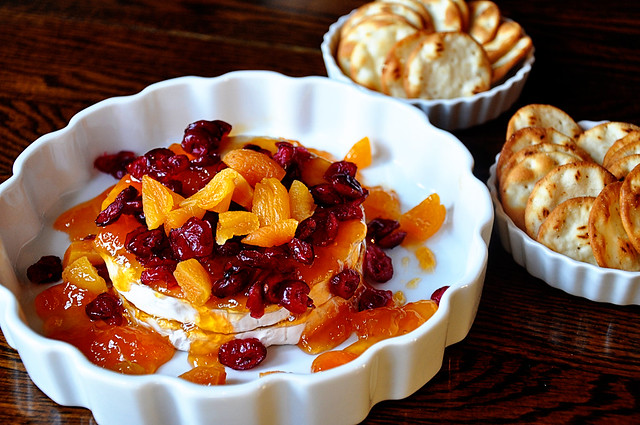
Cranberry Apricot Brie

cranberry apricot brie There are two situations that you could in find yourself in on this Thanksgiving Eve that could make this recipe quite worth your while.

4.03.2012

Peanut Butter Patty Oreo Balls

pb oreo balls4
I found myself hopping out of bed feeling super refreshed after about 5 hours of sleep.

I took one look in the mirror and thought wow, my hair stayed perfectly put together during my slumber.  I slipped on a pair of jeans and had to grab a belt.  I seem to be shrinking.

I walked past my beautiful lawn and sat on a little chair next to all of the sun flowers that had sprouted in my backyard while I picked my perfectly ripened tomatoes to throw in a sauce that I would be simmering all day. 

And then I woke up. 
pb orebo balls2
Oh yeah, that was totally a dream.  Gosh, it was good.  

My dream world consists of...

Cooking all day long with no clean up involved.  

A hair dresser that pops by every morning to style my hair and make it look pretty. 

Gardens that seem to weed and re plant themselves. Birds that find something else to eat besides my homegrown tomatoes.  

Hours in the day to keep everything nice and tidy (and these hours cannot be used for anything else so you will never feel like your missing out while you are reorganizing your bathroom closet).
pb oreo balls
My reality consists of...

A foot of bush like hair... wavy as all get out... with no morning hair dresser.  

Christmas trees that just cannot seem to figure out heavy trash day. 

Full days of work with precious minutes left to get dinner on the table. 

Gardens that so desperately need a re haul.  


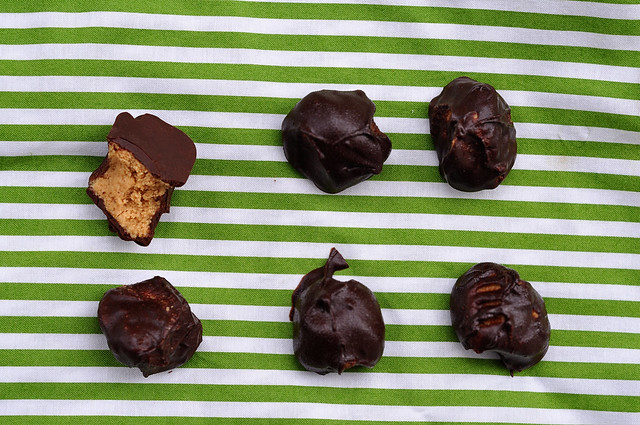
But most importantly, my reality consists of Peanut Butter Patty Oreo Balls that give you that Girl Scout Peanut Butter Patty taste any time of the year.  
pb oreo balls
Reality just got a little bit sweeter.

Wow, these totally blew me away. 

Never underestimate the power of chocolate and peanut butter combined. 

Today, you should totally drop the task you deem to be way important.  Getting rid of that Christmas tree?  What's another week? Doing laundry?  Put on some old clothes that never see the light of day. Doing your taxes?  Okay, that is important but tomorrow is not April 15th, so what's another day?

Take a quick trip to the grocery store, buy just three ingredients and get to work.

From my little kitchen to yours... Enjoy.

Mr. Hungry's Thoughts...
And so it is, a house divided.  I loved everything about these.  Mr. Hungry's taste buds did not agree.  To him?  Too mushy.  But that's life, right?  Perfection to him is a coconut cream pie and I would rather skip dessert if that is my only option.  So let's just see where you land.

Here's to hoping you are equipped with a developed and refined set of taste buds like mine.

Peanut Butter Patty Oreo Balls

Recipe Notes
Now don't completely hold me to this being a replica of a Peanut Butter Patty.  You are missing one key ingredient.  In the real thing, there are two layers when you bite in... a crunchy one and grainier peanut butter one.  There is no crunchy cookie layer in this one, but I didn't miss it for one second. 

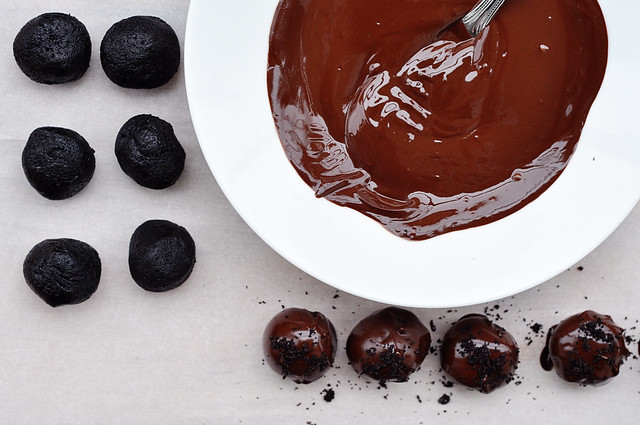
You use the whole cookie for this recipe.  Leave the icing in the middle when you place them in the food processor.  Dipping in chocolate can be a little tricky.  The method I prefer is to dunk the oreo ball in the chocolate, roll around to coat and then using a fork in one hand and your fingers, scoop the ball out and place on parchment paper. You will probably have a little bit of chocolate left over so melt only half a box at a time. 
Ingredients
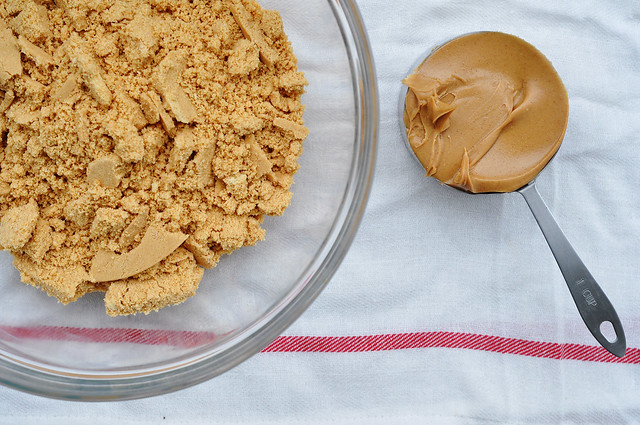
1 (16 ounce) package Oreo Golden Sandwich Cookies
1 cup creamy peanut butter
2 (8 ounce) packages Semi-Sweet Baking Chocolate (I like Baker's brand)
Directions
In a food processor, crush all of the cookies into a fine crumb mixture; place in medium bowl. Add peanut butter; mix until well blended. Roll cookie mixture into one inch balls. 

Cover a baking sheet with wax paper or parchment paper.  Heat chocolate according to directions on packaging.  Dip balls in chocolate and place on lined baking sheet to harden.  (Any leftover chocolate can be stored at room temperature for another use.) 

Refrigerate until firm, about 1 hour. Store leftover oreo balls, covered, in refrigerator.

Makes about 42 oreo balls. 

3.08.2012

Oreo Truffles

all done
Do you eat cake balls/ cake pops? 

I don't. 
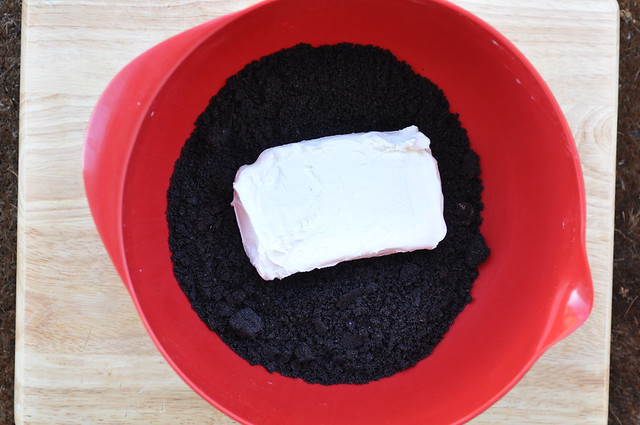
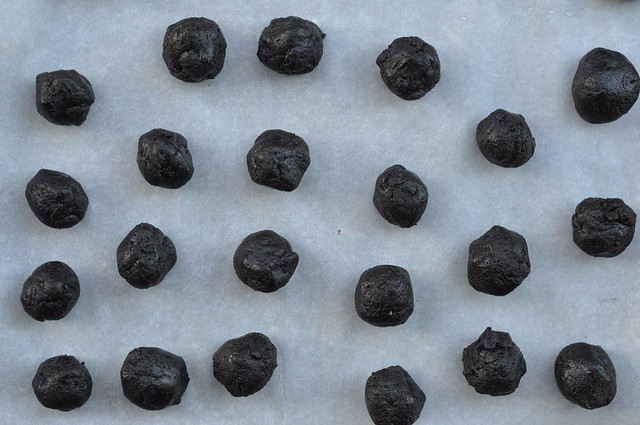
oreo crushingFrom the moment of their conception, I have never been interested.  The texture sounded weird and the process in which people smash cake and icing and roll it in a ball  simply grossed me out.  And what about the effort?  You bake a wonderful cake, but then mash it with icing and dip it in coating? Blew my mind. 

Naturally I wasn't thrilled when oreo balls were requested for a party I was catering.  Might as well have ordered cake balls in my book. But hey, I wasn't going to eat them so it didn't totally rock my world. 
2 ingredients insideI wasn't happy about it, but I felt like I needed to take a wee bite of one just to make sure I wasn't serving a disaster.  To my absolute shock and surprise, they were amazing.  Seriously, so good.  You get a nice little crunch from the semi-sweet chocolate and then you are met with a velvety chocolatey ball of goodness.

Cake ball people, I know you are out there and I know they are all the rage, but here's the deal...whirling up oreo crumbs is a thousand times faster than baking a cake  so get on the band wagon and let's do this. 
all balled upThese went fast... lightning fast.  They were served on a dessert bar with Sprinkles cupcakes and other tried and true favorites and they were gone first. 

That's statistics.  You can't argue with statistics. 

From my little kitchen to yours... Enjoy.
the dipping process
Oreo Truffles
Adapted from allrecipes.com
Recipe Notes
You use the whole cookie for this recipe.  Leave the icing in the middle when you place them in the food processor.  Dipping in chocolate can be a little tricky.  The method I prefer is to dunk the oreo ball in the chocolate, roll around to coat and then using a fork in one hand and your fingers, scoop the ball out and place on baking sheet.  
Ingredients
1 (16 ounce) package Oreo Chocolate Sandwich Cookies
1 (8 ounce) package Cream Cheese, softened
2 (8 ounce) packages Semi-Sweet Baking Chocolate (I like Baker's brand)
Directions
Crush 9 of the cookies to fine crumbs in food processor; reserve for later use. (Cookies can also be finely crushed in a resealable plastic bag using a rolling pin.) Crush remaining 36 cookies to fine crumbs; place in medium bowl. Add cream cheese; mix until well blended. Roll cookie mixture into one inch balls. 

Cover a baking sheet with wax paper or parchment paper.  Heat chocolate according to directions on packaging.  Dip balls in chocolate and place on lined baking sheet to harden.  (Any leftover chocolate can be stored at room temperature for another use.) Sprinkle with reserved cookie crumbs.
Refrigerate until firm, about 1 hour. Store leftover truffles, covered, in refrigerator.

Makes about 42 truffles.  

1.20.2012

Buffalo Chicken Meatballs w/ blue cheese dressing

buffalo chicken meatballs

You've got two opportunities in the very near future to kill it with these meatballs.

This is the ultimately perfect football watching food.  Superbowl... check.

And if you are looking for someone to fall in love with you on Valentine's (or stay in love with you) these will do it.  They are that serious.  Perfect appetizer.
buffalo chicken meatballs 2
Back in my high school days, I had a short run of being really into wings.  I loved the taste of the barely spicy tangy chicken wing dipped in cool blue cheese dressing.  And then one day, I stared right at that wing and imagined the little chicken I was gnawing on.  It was over, right then and there.  Couldn't do it anymore.
buffalo chicken meatballs 3 
And let's get real, if you can get past the idea of gnawing between those bones, you still don't look pretty doing it.  Enter these mini buffalo chicken meatballs that have all that good flavor without the carnage.
buffalo chicken meatballs 4 
FYI... Mr. Hungry has updated his favorite thing I have ever ever made to this right here... I told you it was serious.

From my little kitchen to yours... Enjoy.

Buffalo Chicken Meatballs
Adapted from Glamour Magazine February 2012
Recipe Notes
I used nonfat greek yogurt in place of the sour cream because I had it on hand.  It makes for a healthier dressing, but if want the full richness of a blue cheese dressing, use sour cream.  If you plan on doubling or tripling a recipe for a big party, you do not need to double the dressing.  One batch is plenty.  Use leftover dressing on a wedge salad.  If you are unfamiliar with ground chicken, it can be found in most grocery stores near the ground turkey or ground beef.  You could also have a butcher freshly grind a few boneless, skinless chicken breasts if you cannot find it anywhere.  Leftover meatballs can be stored in the refrigerator and reheated in the oven or microwave.
Ingredients
1/2 stick (4 tbsp.) butter
1/4 cup Frank's RedHot hot sauce
1 lb. ground chicken
1 tsp. salt
1/2 stalk celery, minced
1 large egg
3/4 cup panko bread crumbs
For the dressing
1 cup sour cream (or nonfat greek yogurt)
1/2 cup milk
1/2 cup crumbled blue cheese
1/2 cup mayonnaise
1 teaspoon salt
1 tablespoon red wine vinegar or balsamic vinegar
(makes 2 1/2 cups of dressing)
Step by Step
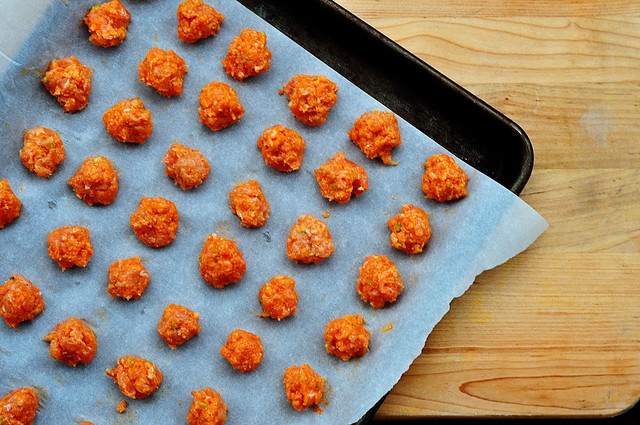
Preheat oven to 450 degrees F.  In a small pot, combine butter and hot sauce over low heat, whisking until butter is melted.  Set aside to cool for 10 minutes.  Cover a baking sheet with parchment paper.  Place remaining chicken meatball ingredients in a bowl and mix by hand, adding the hot sauce butter mixture as well.  Make sure the ingredients are combined throughout.  Using a teaspoon, roll the meatball mixture into marble sized balls.  Place balls in rows on the parchment paper.  Roast until firm and cooked through, about 15 minutes.  Allow the meatballs to cool for 5 minutes.

To make dressing, combine all ingredients in a medium sized bowl and whisk until blended.   Refrigerate until ready to use.

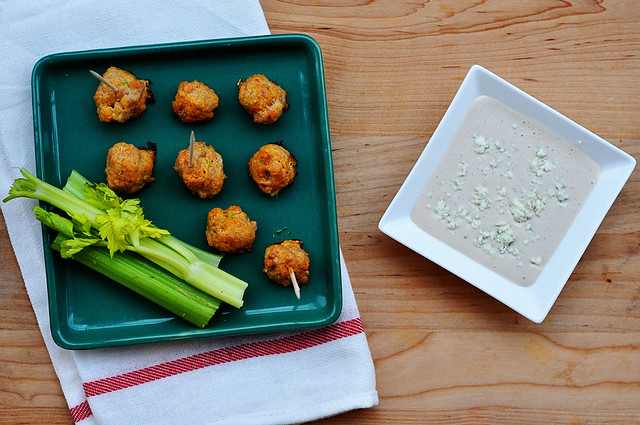
For an extra kick, drizzle extra hot sauce onto meatballs.  Serve with dressing and extra celery.

Makes 65 mini meatballs.

1.17.2012

Veggie Shooters


hummus5
There is really no room for extras in this kitchen.  Our everyday dishes already have to be housed in the dining area and cabinet space is precious all over this little home. 
hummusSo if something is going to make its way in that is not essential, it is going to have to be extremely versatile.  Enter these 3 oz. glasses.  If you throw a party even once every couple of months, these are worth the investment.  The options are endless. 

I can't wait to try these darling milkshakes.  What a perfect way to pass milk and cookies.  The soup options are endless.  Yep, I'm in love and now own two boxes, which comes to a total of 72. 

hummus2
If you are interested, here is where I got mine and my favorite part is the thin bottom of the glass. They look less like shot glasses and they could go modern or rustic.   If you are not quite ready to make the investment, you could use small clear plastic glasses as well.

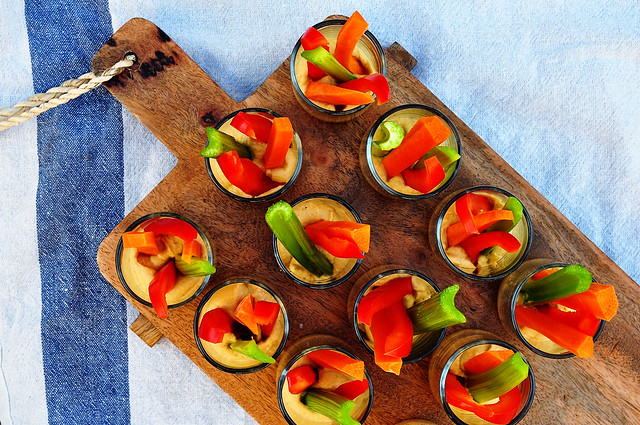
Goodbye to the days of camping out over the veggie tray. 
hummus 4From my little kitchen to yours... Enjoy.

Veggie Shooters with Hummus
Recipe Notes
You can really choose any dip you want for the bottom.  I have found hummus to be the most popular, but ranch dressing works great too.  Plan on about 2 oz. of hummus per glass.  You might have a little leftover, but this will help you not run out. 
Ingredients
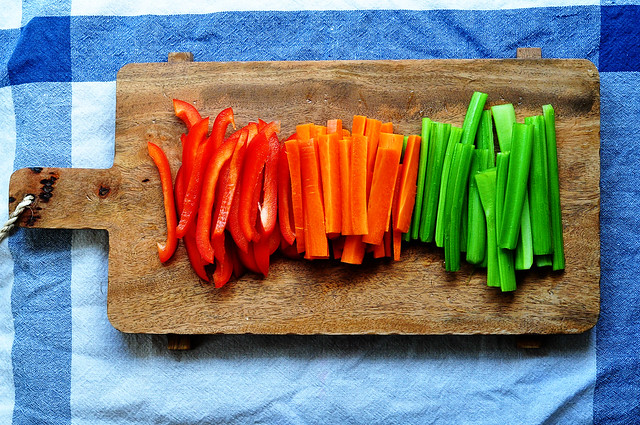
Assortment of vegetables, cut into 3-inch skinny strips (bell peppers, celery, carrots, cucumbers)
Hummus, about 2 oz. per glass
Step by Step
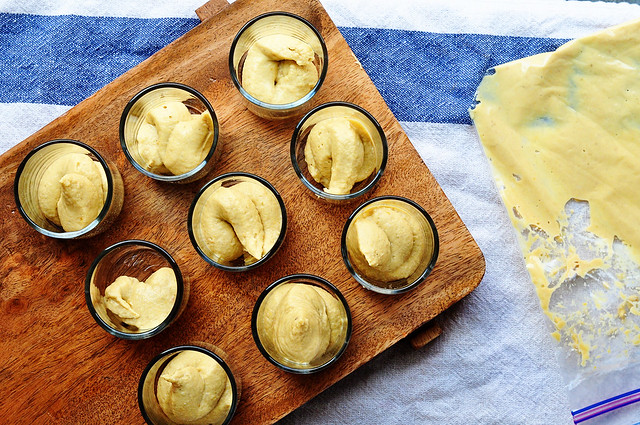
Fill a small ziploc bag with hummus and seal.  Cut a small hole in the corner of the bag.  Be careful to not make the hole too big.  Start small... you can always cut more off in you need.  Fill each glass 2/3 full with hummus.  Stick 3 or 4 vegetable strips in each glass.  Keep refrigerated until ready to serve.

1.13.2012

Honey Comb Goat Cheese Spread

honey 7 True story. 

The first time I served this to a crowd was for a ladies tea/ luncheon/ get together sort of thing that I catered in the fall.  I spent quite a bit of time preparing all kinds of tea sandwiches, making a few dips and mini appetizers.  When I got to the party, I threw together this dish in about 5 minutes. 

About 30 minutes into the party, the honey comb goat cheese had been utterly devoured and the other dishes were just starting to show signs of being nibbled on. 

Moral of  the story:  Preparation time does not equal the amount of goodness or popularity of a dish.
honey comb collage
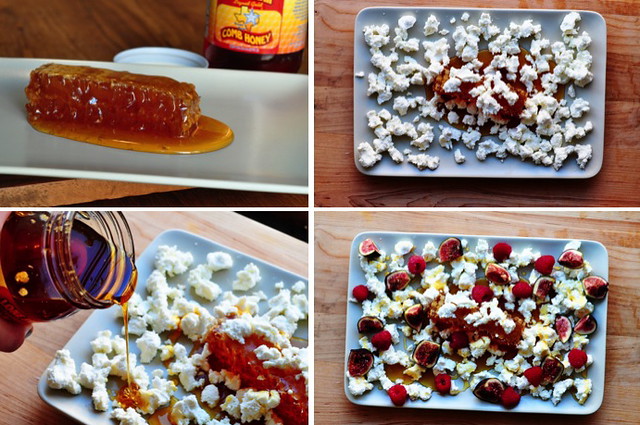
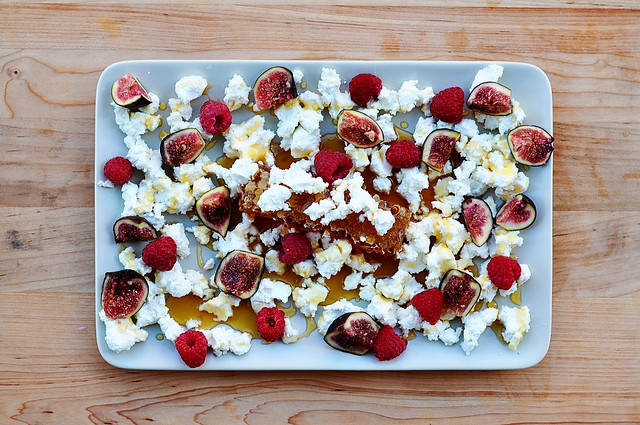
Okay, so that is not brain science, but listen up... you are totally going to to need to serve this at your next get together.  A tiny bit of extra sweet honey comb with a bite of tangy goat cheese topped off with the burst of a fresh berry or a fig is the definition of a party in your mouth.
honey 8This is just what January needs.  Fresh flavors that are a tad funky.  This is so 2012. 
honey collage 2
Honeycomb honey is great.  The honeycomb is insanely sweet so a little goes a long way.  I'm sure it is quite helicopter momish of me, but I feel like I must instruct people on how to eat this.  If I'm leaving the party, I make sure to instruct folks and also urge them to pass on the word to other guests who might not have shown up yet.  It's just that if you get the perfect bite, it is pure bliss.  

So my instructions include: Grab a cracker, slice off a tiny piece of the honeycomb... like 4th of a marble size tiny... scoop a little goat cheese honey mixture and top with a berry.  Perfection.

From my little kitchen to yours... Enjoy.

Honey Comb Goat Cheese Spread
Recipe Notes
Honey with a honey comb can be bought at specialty grocery stores and some of the larger stores as well.  If you are in Texas, HEB carries the brand pictured below. It will be on the shelf with the rest of the honey selection, but look closely and you will see a honey comb floating in the middle of a few varieties.  Use berries depending on the season.  I love fresh figs this time of year, but raspberries and blueberries (or a mix) are also great choices. If using figs, cut off stems and quarter them.    I also like to serve this with two types of crackers.  Wheat Thins ( I like the "BIG" ones that are a little bit larger of a square than the regular) and Wafer thin crackers that seem to be popping up in most grocery stores.  There are a lot of brands, but this is what they look like.
Ingredients
1 jar of honey with a honey comb (see recipe note)
1 large log of goat cheese (10 or 11 ounces), or the same amount of pre crumbled goat cheese
1 to 2 cups of figs, raspberries, blackberries, blueberries
Your favorite plain crackers and Wheat Thins, for serving
Step by Step
Remove honey comb from jar of honey and place in the middle of a large serving platter.  Drizzle a little bit of honey on the rest of the plate.  Crumble goat cheese all over the plate and honey comb.  Drizzle a little more honey on top.  Sprinkle berries on top. 

Serve with crackers.

Serves 8 to 12.

12.30.2011

Truffle Butter Popcorn

truffle butter popcorn

Ah, these days.

I love 'em.  Christmas was fantastic... I love the fresh start of a new year...and here we are in the in between. It's totally perfect.  It's like these days don't count.  It feels right to sleep absurdly late.  It seems perfectly acceptable to see two movies during the day.

It's the perfect afternoon to throw away every sock that doesn't match and try to find matching lids to tupperware.  Yep, I'm totally ignoring my rotting Christmas tree and opting to organize the kitchen and my closet.  By the time 2012 rolls around, I'll be moving at the speed of light because everything will be so organized.  It's my vision...I'm goin for it.

In the meantime, we must ring in the New Year.  Make it fun.  Keep it simple.  Ignore the hype.

Make this fancy popcorn that is exactly that... fun and fancy and ridiculously simple.

Truffle popcorn and champagne is all you need to say goodbye to 2011 and hello to 2012.

Hope you have a smashing New Year's and I'll catch ya in 2012.

Truffle Butter Popcorn
Recipe Notes
Truffle oil is expensive, but totally worth it. I have a tiny bottle that cost about $12, but has lasted years.  You only need a smidge so make the investment and you will have a sprinkle whenever you need it.
Ingredients
1 bag unsalted, unflavored popcorn (8 to 10 cups popped)
2 tablespoons butter
1/2 teaspoon truffle oil
1 to 2 tablespoons freshly grated parmesan cheese, to taste
kosher or fine sea salt
Step by Step
Melt butter in a small microwave safe bowl.  Mix truffle oil into butter.  Pop popcorn.  As soon as popcorn is finished pour in a medium sized bowl.  Drizzle butter mixture over popcorn, making sure to turn the popcorn and evenly coat.  Sprinkle parmesan evenly over popcorn while still warm.  Taste popcorn and add salt to taste.  Serve immediately or reheat in a 350 degree oven for about 5 minutes.

10.25.2011

The Best Biscuits

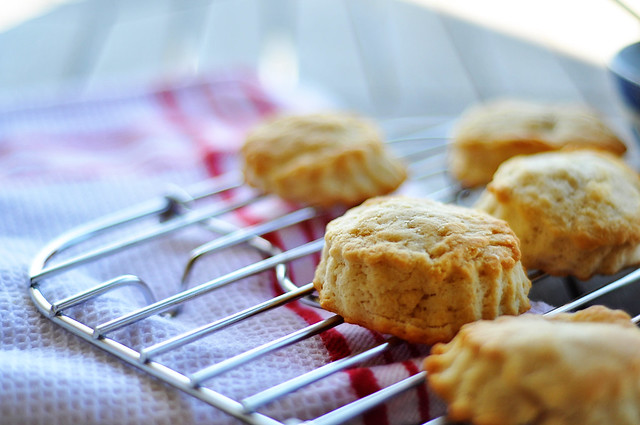
cream biscuits
Oh, good morning.

You look like you could use a biscuit.
creambiscuits2

Not just any old biscuit... the best darn biscuit I have ever had.  
creambiscuits3
Now I know it's only Tuesday, but lets start planning a weekend brunch, shall we?
Let me start by telling you these will take you maybe seven minutes longer than busting open one of the cans of biscuits from the grocery.  Seven minutes of extra work for the most amazing homemade goodness you could imagine on a Saturday or Sunday morning.
creambiscuits4
Why wait?  Let's make your Thursday one to remember.

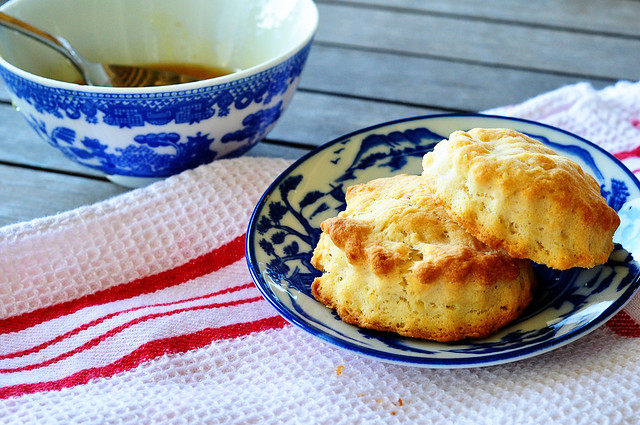
I am pretty convinced cream is essential to the best baked goods.  I had a hunch when these scones turned out so well and it was definitely confirmed with these biscuits.  A little bit flaky, a little bit creamy... a little bit perfect.

My preferred way of eating... doused in honey.
creambiscuits&honey

From my little kitchen to yours... Enjoy. 

The Best Biscuits
Recipe Notes
To make these especially quick in the morning, pre-measure all ingredients into a ziploc bag.  When ready to make, dump dry ingredients in a bowl and add the cream.  
Ingredients
3 tablespoons salted butter, melted
2 cups all-purpose flour, plus more for dusting the surface
1 tablespoon baking powder
1/2 teaspoon salt
1 tablespoon sugar (optional)
1 1/4 cups heavy cream
parchment paper
honey, jam or butter for serving (optional)

Preheat the oven to 425°F. Line a baking sheet with parchment paper. Melt butter and set aside. In a large bowl, combing two cups flour, baking powder, salt and sugar. Fold in 1 1/4 cups cream. Mix until cream and dry ingredients are just combined.  If the dough is not soft or easily handled, fold in a little bit more cream.

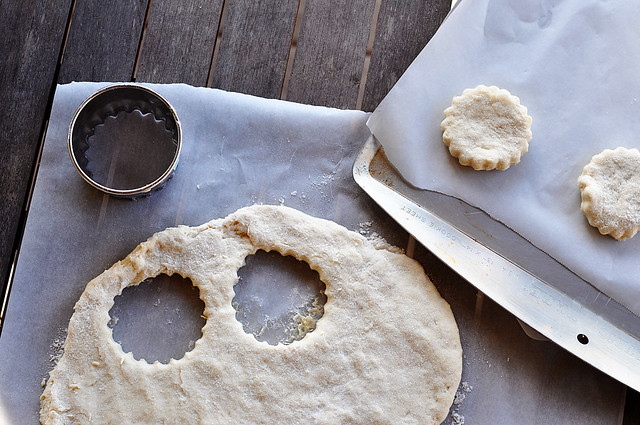
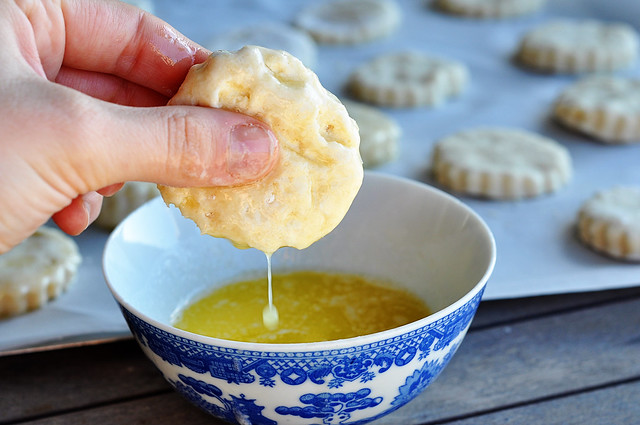
Turn dough onto a floured surface, mound it into a ball and, using your hands, press it to a thickness of about 3/4 inch. Cut into rounds, 2 1/2 inches in diameter. Gather dough scraps and continue to make rounds. Dip entire biscuit into melted butter and arrange on the baking sheet about an inch apart. Bake until edges are golden brown, 12 to 15 minutes. 

To Freeze:  Freeze unbaked, un-dipped biscuits for up to one month.  When ready to bake, dip in melted butter and bake straight from frozen on a parchment paper lined baking sheet.  Add a few additional minutes for baking. 

Makes 10 to 12 biscuits. 

10.09.2011

Apple Crumb

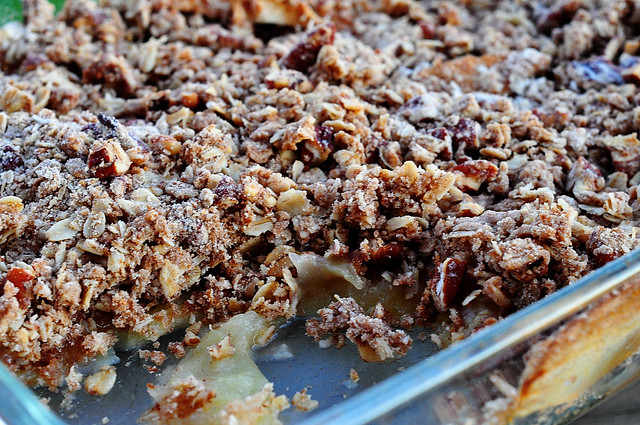
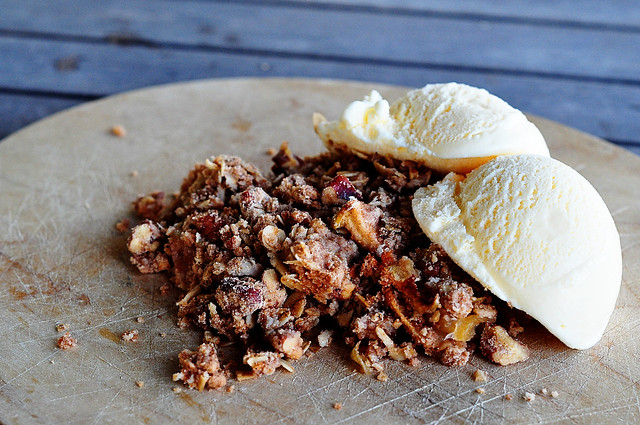
apple crisp
Happy fall y'all.
apple crisp 3
We are getting a tinge of cool breeze down here in Houston, but after the summer we have had, it feels so right to not be sweating when you walk to your car.
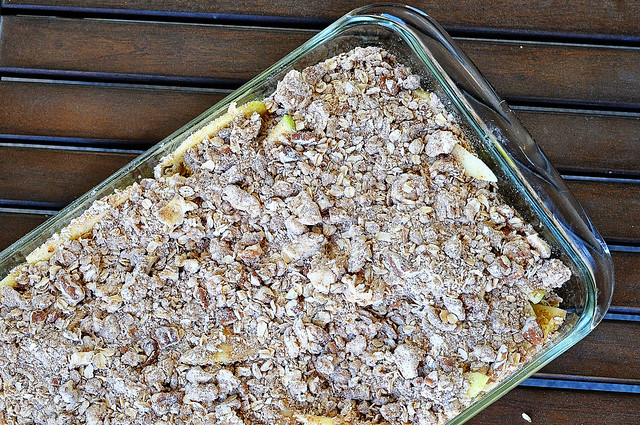
applecrisp 4
We are not exactly in the throws of fall, but this apple crisp seems to do double duty for being a fallish dessert, but still a bit light if you are still in the midst of some 80 degree days.
apple crisp 2
A layer of soft warm apples topped with an oat, pecan spiced filled topping.  Yes, please.

So good, so easy.  Just do it.  Here's to fall... cheers.  

It would pretty much be a tragedy to not top this sucker with a couple of scoops of vanilla ice cream.

From my little kitchen to yours...Enjoy.

Apple Crisp
Adapted from Dave Lieberman
Filling
4 large Golden Delicious apples (about 3 pounds)
1/4 cup sugar
1 medium sized lemon, juiced
2 tablespoons all purpose flour
1/2 teaspoon ground cinnamon
Topping
1 cup pecans, roughly chopped
1 cup all-purpose flour
1 1/4 cups rolled oats
1/2 cup packed dark brown sugar
1 teaspoon ground cinnamon
Pinch of kosher or sea salt
8 tablespoons (1 stick) unsalted cold butter, cut into small pieces
Vanilla ice cream (optional for serving)
Step by Step
Position an oven rack in the center of the oven and preheat to 350 degrees F.

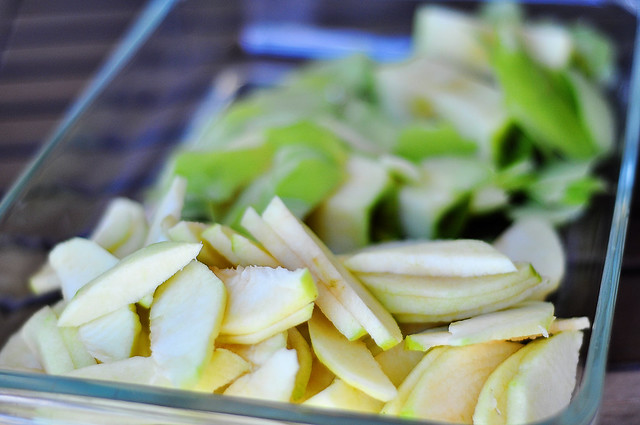
Lightly grease a 9x13-inch baking dish with cooking spray or butter; set aside. Peel, core, and slice apples into 1/4-inch slices. Place apples in a large mixing bowl and toss with sugar, lemon juice, flour, and cinnamon.  Pour into prepared baking dish, and spread out into an even layer. Set aside.

In another large bowl, mix together the nuts, flour, oats, sugar, cinnamon, and salt for the topping. Using a large fork or your fingers, gently work in the cold butter until pea-sized lumps are formed.

Top apples evenly with mixture and bake until apples are bubbly and topping is golden brown, about 45 minutes, rotating once halfway through cooking. 

This can be made up to a day ahead.  Store tightly wrapped in the refrigerator and bring to room temperature or reheat in the oven for 5 minutes.

Top with vanilla ice cream to serve.

Makes 8 to 10 servings. 

9.20.2011

Shredded Pork Tacos

Shredded Pork Tacos
It's September.  It's back to school time.  And whether a real school schedule plays into your life at all or not, September still signifies that summer is coming to an end.  Long summer meals have come to a close and it seems like September is time to get into a routine and buckle down a bit.

It's time to get some things streamlined.

It's time to have dinner magically appear for you when you get home from a long day of work.

It's time to break out the slow cooker.

Sorry...talking about crock pots just doesn't sounds nearly as jazzy as slow cookers. 

And we don't have to go into the fact that I don't have a new fancy schmancy slow cooker.  I have my grandmother's crock pot with all the paisley flowers and delicate riboons strewn about that just screams "I was trendy and cool in 1982." The point is... old timey or brand new, sleek chrome or ridiculously retro, you need a crock pot.  Splurge if you want or pick up a rockin one from a garage sale... they all do the same thing... cook slowly.

This thing is a life saver.

I feel a slow cooker is as close as the modern world has gotten to having that maid, Rosie, from the Jetson's.  Consider this jewel your dinner robot.

I'm feeling the need to really put mine to work this fall and winter so bust yours out and let's have dinner with none of the work and just one dish to clean.

These shredded pork tacos are a good place to start.

Tons of flavor and very few ingredients.   I thought this recipe was outrageous when I first saw it.  Cocoa powder and salsa?? Huh? But you won't believe the deep flavor you get from mixing these two. It's dynamite.


From my little kitchen to yours... Enjoy.
Shredded Pork Tacos
Shredded Pork Tacos
Adapted from Real Simple
Recipe Notes
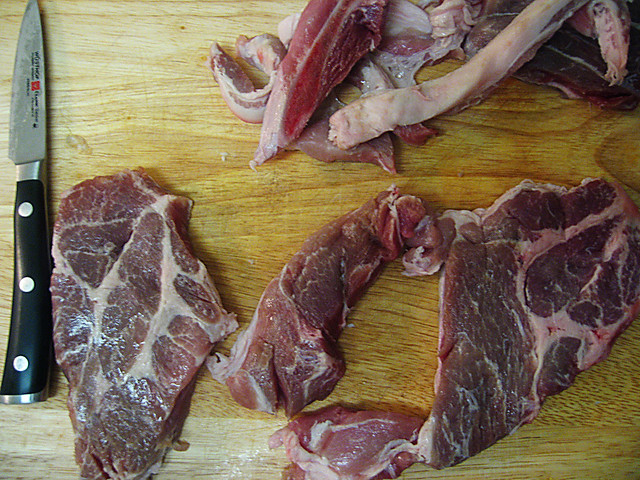
If you are not use to buying pork, just branch out and do it.  I avoided recipes like this for a long time because I knew nothing about pork, but for the most part, you cannot mess it up.  If in doubt, tell the butcher what you are making and he will steer you in the right direction.  You can find slices of boneless pork butt in most grocery stores.  I chose boneless pork butt steaks because they cook faster and are available in smaller portions than a whole pork butt.  You can easily double or triple this recipe.  Whatever your slow cooker allows.  There should be enough sauce to add a pound or more of pork without having to double the sauce.  I cooked the meat for 7 hours on low.  You could cook for about 5 hours on high or up to 8 hours on low.  See picture below for how to prepare the meat for cooking.  See picture for trimming pork butt.
For a healthier option, you can use boneless pork loin.  Cut into slices to make sure all is covered by sauce. If you are using boneless pork loin, you will have a lot more meat because you have no fat to trim off.
Ingredients
2 cups store bought salsa
2 tablespoons chili powder
2 tablespoons dried oregano
2 tablespoons unsweetened cocoa powder
kosher salt
1 1/2 lbs. boneless pork, either pork butt or boneless pork loin (see recipe notes for options)
Corn tortillas
1/4 cup fresh cilantro sprigs
1/2 cup sour cream
1 lime
shredded cheddar cheese (optional), for serving
Step by Step
In a crock pot, combine the salsa, chili powder, oregano, cocoa powder and 1 teaspoon of salt.  Remove any large strips of fat from pork (see pictures below).  Add meat and coat to cover.  Cover with lid.  Cook on high for 4 to 5 hours or on low for 7 to 8 hours until meat is tender and pulls apart easily.

Twenty minutes before meat is done, heat oven to 350 degrees.  Wrap corn tortillas in foil and bake until warm, about 15 minutes.  While tortillas are warming, remove pork from slow cooker and set on medium sized plate.  Using two forks, shred pork and smother with sauce from slow cooker.

Build tacos starting with pork and add a few sprigs of cilantro, and a dollop of sour cream to each taco.  Add shredded cheddar cheese if you would like.  Squeeze lime juice over the top of the tacos and serve.

Makes 4-8 servings.  Check recipe notes to see how using different cuts of meats gives different amounts of servings.


If you are using a pork butt or pork shoulder, remove any large strips of fat from pork before adding to the crock pot.  This will not be necessary with a boneless pork loin or other types of lean cuts. 
trimming the pork

9.12.2011

Crostinis... the best thing since sliced bread.

crostini copy
So technically crostinis are sliced bread, but the kicker is the slight toasting and the drizzle of olive oil that turns sliced bread into a sophisticated crostini.

However, it is the endless options and possibilities of what goes on top of these suckers that really gets me hyped up.  Sauteed mushrooms, tomato bruschetta, cheese and a drizzle of honey, olive tapenade... the possibilities are literally endless.  
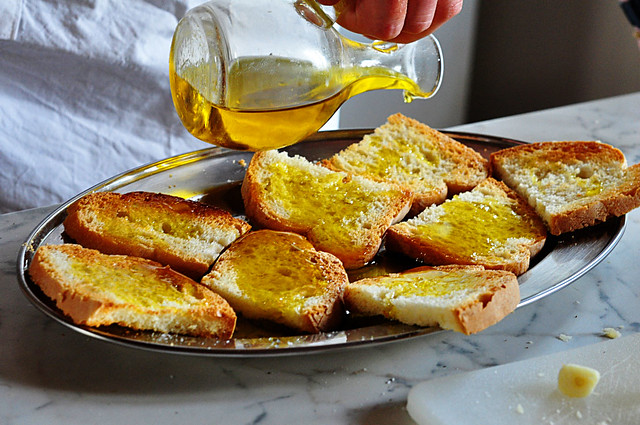
The Italians have it right.  Make one thing... say a mushroom sauce, and eat it on pasta today and leftovers can become a mushroom crostini tomorrow.  Reason #682 my soul feels most at home in the Tuscan hills.
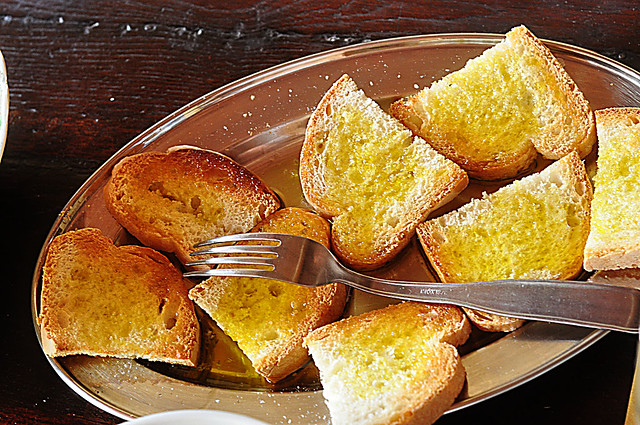
So this is barely a recipe, but getting this down now will make your future very bright.

From my little kitchen to yours... Enjoy.


A classic Italian way of eating crostini is to toast the bread and slice a garlic clove in half.  Rub the garlic on one side of the bread and then drench it in really good olive oil right before serving.   
crostini 3 copy
Crostinis
Recipe Notes
You can pretty much use any type of bread for crostinis, but I have two favorites... either a baguette or ciabatta bread.  You just want a nice sturdy loaf... not sandwich bread.  
Ingredients
Baguette or country-style Italian bread, sliced about 1/2 inch thick. 
Olive oil
Step by Step
Preheat oven to 375 degrees.  Lightly brush each side of the bread with olive oil and place in a single layer on a baking sheet.  Bake them until golden, about 12 to 15 minutes.  Check halfway through and if bottoms are browned but tops are not, flip each piece over and finish toasting. 

To serve plain, drizzle with extra olive oil and sprinkle with kosher salt.  

Topping Ideas:
Fresh mozzarella cheese and a thin slice of prosciutto
Marinated tomatoes to make Tomato Bruschetta
Olive tapenade
Drizzled with balsamic vinegar
Goat cheese and thinly slice roasted red peppers

8.26.2011

Peach Crumb Bars

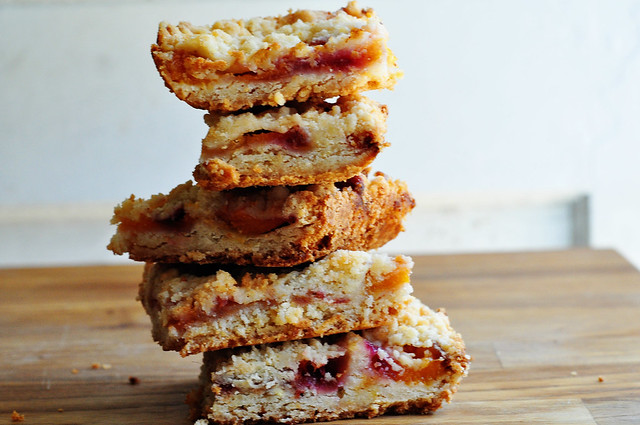
peach crumb 1
The end is near.
peachcrumb2
The signals are mixed.  Around these parts, you could be fooled by the signs, but I feel very certain I am right... the end is near.peachcrumb3
The end of amazing strawberries, peaches, blueberries, blackberries and such is coming.  Pretty much the only clear sign at this point is the calendar.  Because if I was going off the weather, you would think we are smack dab in the middle of it.peachcrumb4
But we are not so run... don't walk.... to the grocery or farmer's market and get in on the freshness and flavor of fruit that can only be found in the summer.

Did I mention these are extremely easy?  Yep, run.

From my little kitchen to yours... Enjoy.
peachcrumb5
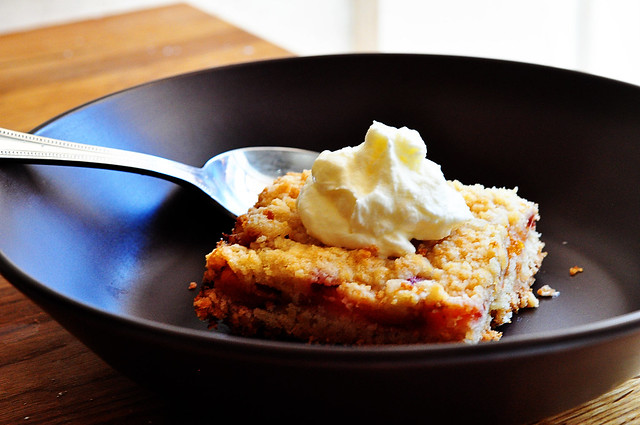
Oh, what do you know, we already have another desperate need for that fresh whipped cream.  This is truly the icing on the cake... the cherry on top... whatever you want to call something that finishes out a dish in a perfectly wonderful way.
peachcrumb6
Peach Crumb Bars
Adapted from Smitten Kitchen & Allrecipes.com
Recipe Notes
Even in peak season, peaches can be extremely hit or miss.  Depending on what kind of peaches you end up with, you might have to adjust a little bit.  Mine were great, but not overly juicy.  If you have really juicy peaches, you might want to add a tad bit more cornstarch.  When I first made these bars, we used really sweetened whip cream because the crust was not overly sweet.  Somehow, as the days went on, they got a little sweeter so we still put a dollop of cream on top, but I used less sugar.
Ingredients
1 cup white sugar
1 teaspoon baking powder
3 cups all-purpose flour
1 cup cold unsalted butter (2 sticks or 8 ounces)
1 egg
1/4 teaspoon salt
Zest and juice of one lemon
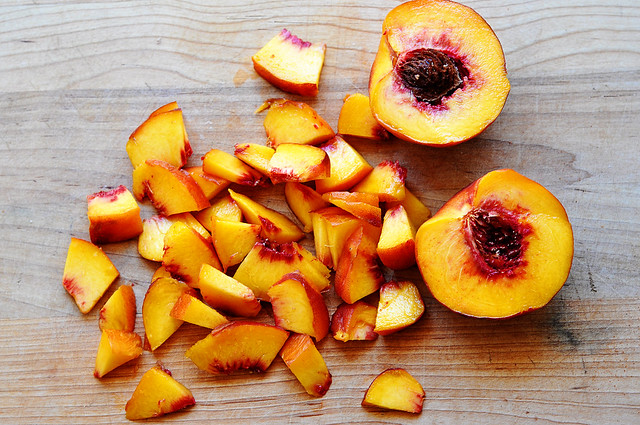
4 heaping cups of chopped peaches
1/2 cup white sugar
6 teaspoons cornstarch
Freshly whipped cream for topping (click here)

Preheat the oven to 375 degrees F.  Grease a 9×13 inch pan.

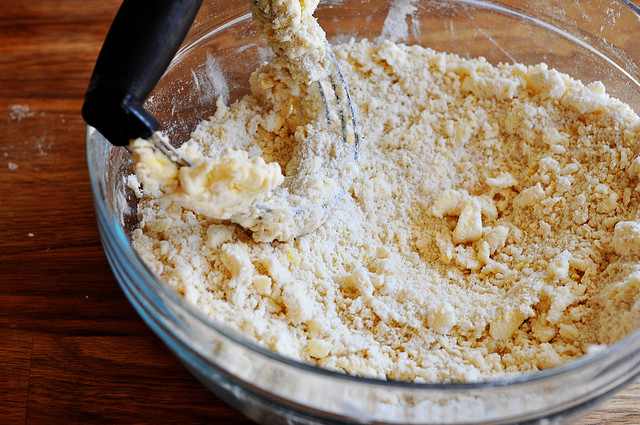
In a medium bowl, stir together 1 cup sugar, 3 cups flour, and baking powder.  Mix in salt and lemon zest.  Use a fork or pastry cutter to blend in the butter and egg.  Dough will be very crumbly and dry. Pat half of dough into the prepared pan.

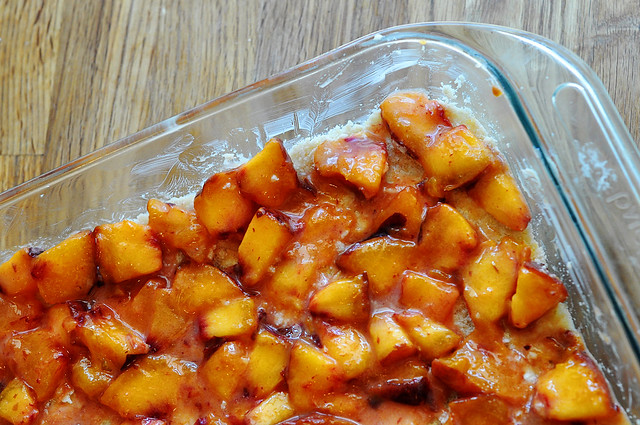
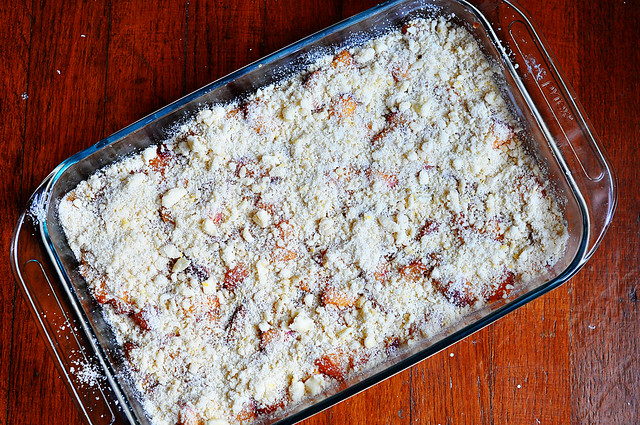
In another bowl, stir together the sugar, cornstarch and lemon juice.  Gently mix in the peaches. Spread the peach mixture evenly over the crust.  Crumble remaining dough over the berry layer.  You might have a little crust left over.

Bake in preheated oven for 45 minutes, or until top is slightly golden brown.   Cool completely before cutting into squares. Bars are easier to cut after being refrigerated.  Top each bar with a dollop of fresh whipped cream. 

Store in refrigerator in an airtight container for up to one week.

Makes 24 bars or 36 very small rectangles.

8.23.2011

Fresh Whipped Cream

Untitled
It's Tuesday.

You look like you could use a magic trick.  Nothin spices up a Tuesday like a little magic.

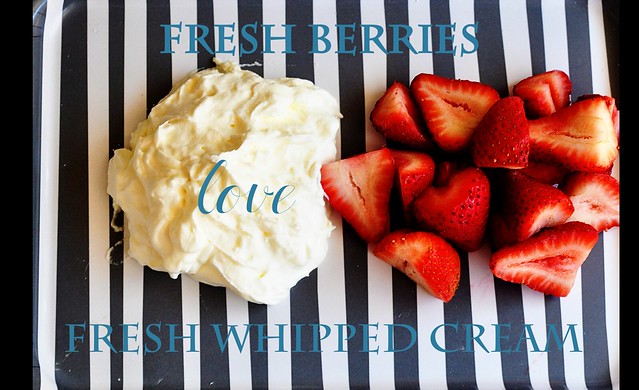
And I bet you this might be the tastiest magic trick you've ever seen. You also need this right now because it's the best {and easiest} dessert for this time of the year.  All you need is a little fresh whipped cream to make a bowl of fresh summer berries seem like a refreshing and fancy dessert.

And no, canned whip cream does not even come close to what this tastes like.  Sorry, but no.

Mr. Hungry was a little floored when he saw me whisk this up out of what he thought was liquid cream that only seemed to be useful for his coffee.

You just need a few dollops for small batches of berries so grab a whisk and this will be ready in minutes.

For bigger jobs, you might want to pull out the hand mixer or you could be whisking for quite awhile.

Summer berries are still at their prime so go ahead and put this at the top of your to do list before berries go back to being expensive and out of season.  Seriously... hurry.

From my little kitchen to yours... Enjoy.

Recipe Notes
The exact way you make this will depend on what you are making it for.  With fruit, I like to add a pretty good amount of sugar to make it sweet.  If you are adding a dollop to a pie or cake, you might want to only add a little bit of sugar because you already have so much sweetness.
If you are trying this for the first time, start with very little cream.  Watch how the process works and then add more.  If you are making more than one cup of cream, I would probably use a hand mixer (unless you have lots of time to whisk).
* Regular sugar or powdered sugar will work.  If you have powdered, use it.  If you don't, you do not need to buy any.  The only different is that you  need to add the regular sugar early in the process so that it has time dissolve into the cream.  Powdered sugar is preferable because after whipping, you can add more at the end to get to the exact sweetness you would like.
** A little vanilla goes a long way, but once again, the exact amount will depend on what you are making.  I always add a dash, but if I am putting cream on something that would be great with a vanilla flavor I add a little bit more.

What you need...
Heavy Whipping Cream
*Powdered Sugar or regular sugar
**Vanilla (optional)
Large bowl
Whisk

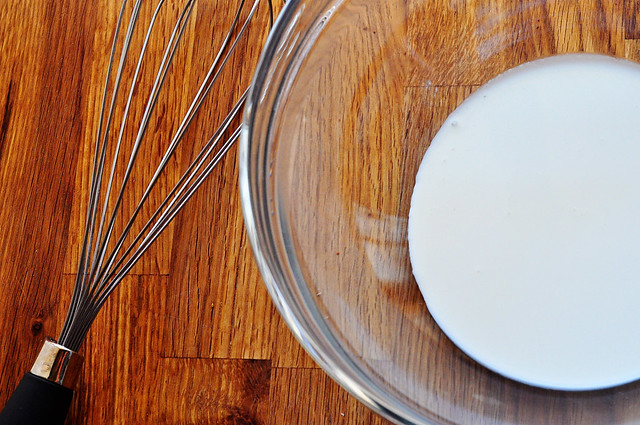
1.  Start with cold cream in a large bowl.  The colder the cream, the easier and faster it will whip.  Having a large bowl will also help quite a bit.
cream
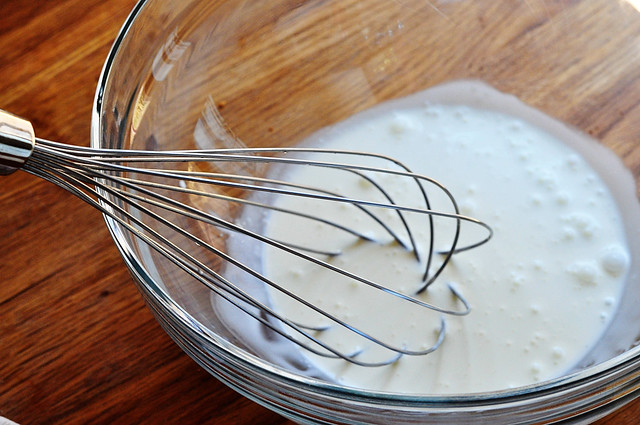
2.  Time to start whipping.  Make wide strokes with a whisk, changing direction every so often.  This will help get air into the cream faster.  Bubbles will start to form.
cream2
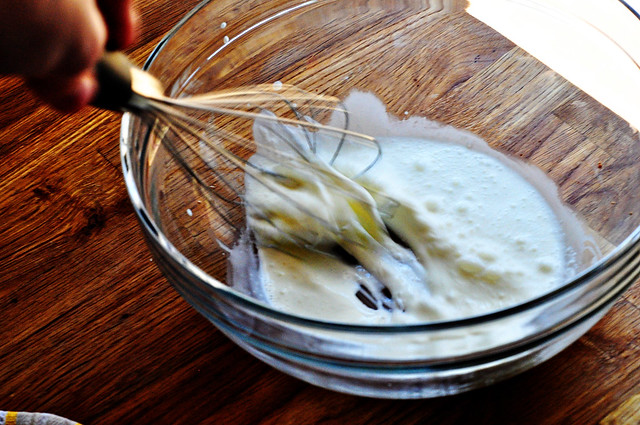
3.  Now it's time put some muscle into it.
Exercising and making dessert at the same time?  This is just the best.
When the cream starts to thicken, add sugar and vanilla (if using).

Tip:  A good rule of thumb is two teaspoons of sugar for every cup of cream.  Adjust sweetness according to tasate.  Optional:  Add about a teaspoon of vanilla per cup of cream
cream3
And before you know it, you will have peaks that look like this.

Done! Seriously, we are done.  What was that, like 1 minute worth of work?  And you have great looking arms.

Ah, I love magic.
cream4

Keep in the refrigerator and serve within an hour of making.

Add a dollop to a bowl of mixed berries, perhaps a freshly sliced peach, or maybe on top of a piece of pie or chocolate cake.  But that means you cannot sit there and eat the whole bowl.  But no one's watching... maybe just the first batch... no one has to know.

8.10.2011

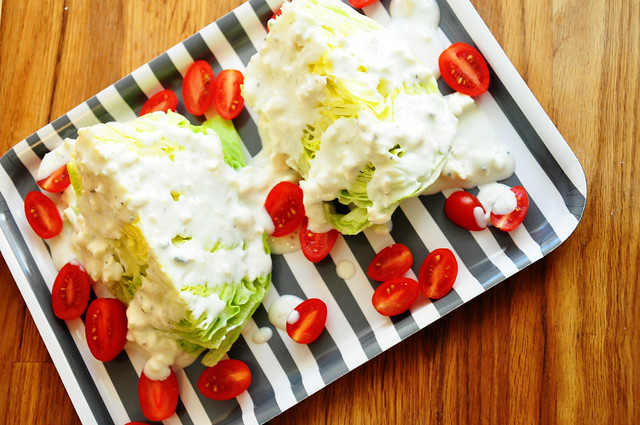
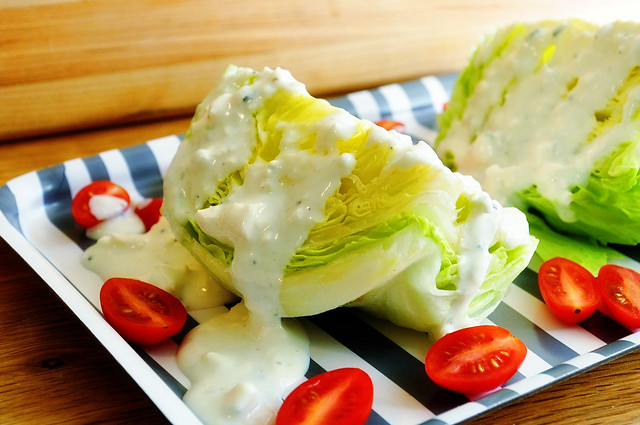
Gorgonzola Iceberg Wedge Salad

wedge 2 
I just about never pass up an iceberg wedge salad on a restaurant menu.  And I can guarantee if I do, I already know their dressing is no good.  There is something so refreshing and satisfying about a good wedge  and I figured if you get the dressing down, the rest would be a piece of cake.

This gorgonzola dressing is absolutely perfect.  You'll never come close to matching its taste with a  bottled dressing.  And it's a whole lot healthier than those dressings made with mayo and sour cream.  Tastes even better the next day.


From my little kitchen to yours... Enjoy.
wedge

Gorgonzola Iceberg Wedge Salad
Ingredients
2/3 cup buttermilk
1/2 cup Greek yogurt (I used fat free)
1 large garlic clove, minced
8 ounces crumbled Gorgonzola cheese
salt & fresh ground pepper
1 head iceberg lettuce, cut into 4 wedges
1 cup grape tomatoes, sliced in half
Optional: 4 pieces of cooked, crumbled bacon
Step by Step
In a medium bowl, stir the buttermilk, Greek yogurt, and garlic together. Add in 2/3 cup of the Gorgonzola to the dressing. Smash the cheese into the sauce to help it blend.  Stir in a few more sprinkles of the gorgonzola and leave them chunky.  Season with salt & pepper and set aside.

Arrange the lettuce wedges on individual plates. Spoon the dressing over the wedges, top with tomatoes and remaining Gorgonzola (and bacon if using). Sprinkle fresh cracked pepper on top and serve.

Refrigerate dressing in an airtight container for up to 5 days.

Makes 4 salads.  Or two salads one night and two the next...