Showing posts with label seasonal cooking: spring. Show all posts

5.16.2011

Squash Ribbon Salad

DSC_0029

I know I don't have anyone on the edge of their seat over squash ribbons, but come on, stay with me. Seriously, stay with me... it's worth it.
DSC_0001
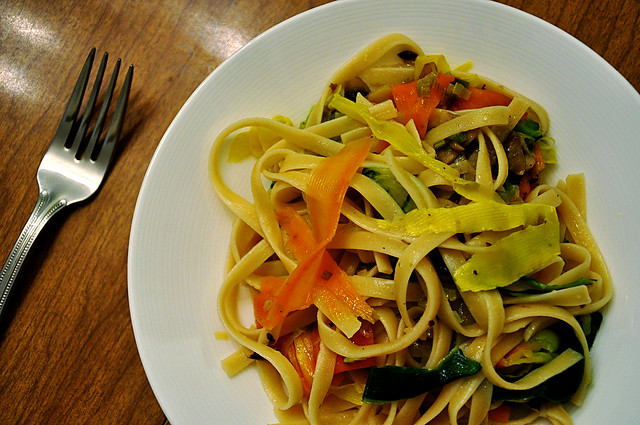
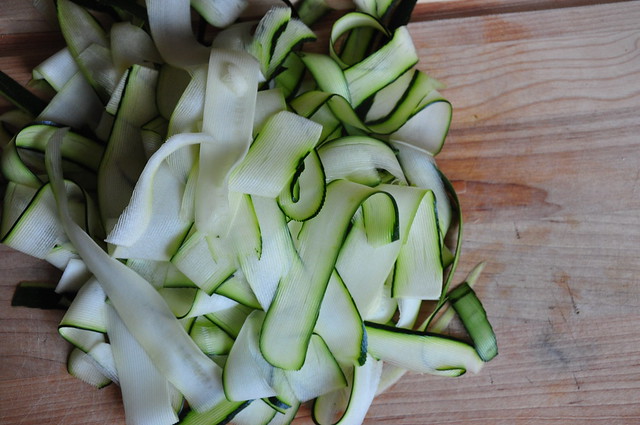
I first tried the ribbon method for this pasta and I all of a sudden became a squash fan.  It turns a rather bland, sometimes boring veggie into a thin, crisp tool that can soak up great sauces without being heavy.  The ribbons turn into something refreshing and crisp that taste somewhere between a fettucine noodle and leaf of lettuce.  Does this make sense?  Keep following...
DSC_0004
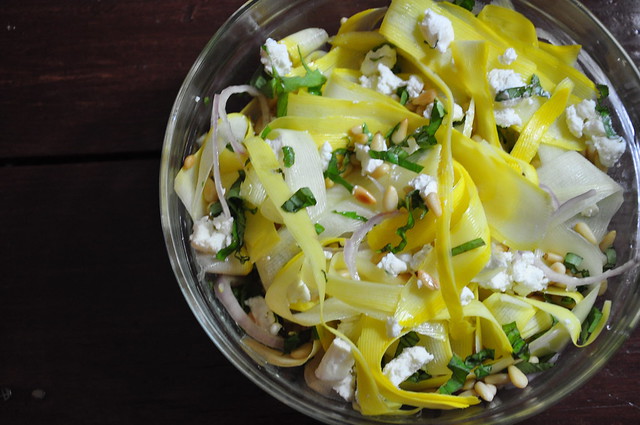
I rarely get pumped about a big bowl of greens, but this offers more taste,  and the bright pops of yellow ribbons are springier than spring itself.

So come on... just try it. Please?  Thank you.

Summer Squash Ribbon Salad
Adapted from the kitchn
Ingredients
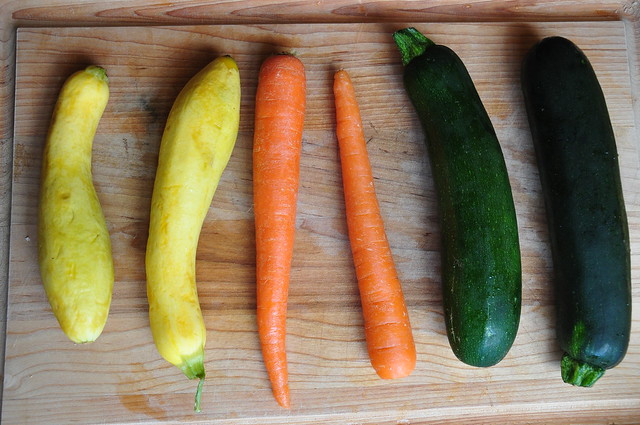
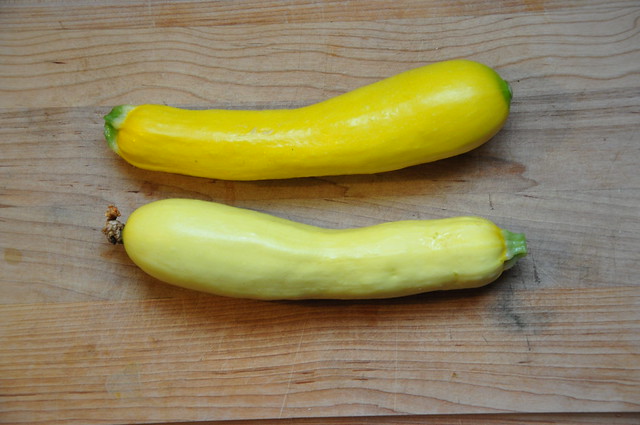
1 1/2 pounds zucchini or yellow squash
1 shallot, very thinly sliced... as thin as you can possibly get it (about 2 tablespoons)
2 tablespoons extra virgin olive oil
2 teaspoons white wine vinegar
Salt and freshly ground black pepper
1/4 cup basil chopped finely
1/4 cup toasted pine nuts
2 ounces goat cheese
Step by Step
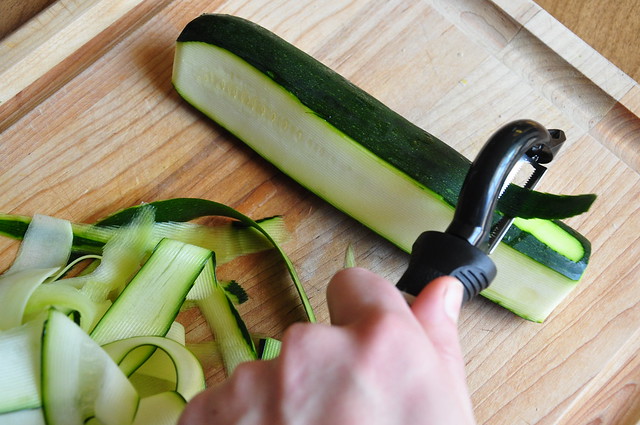
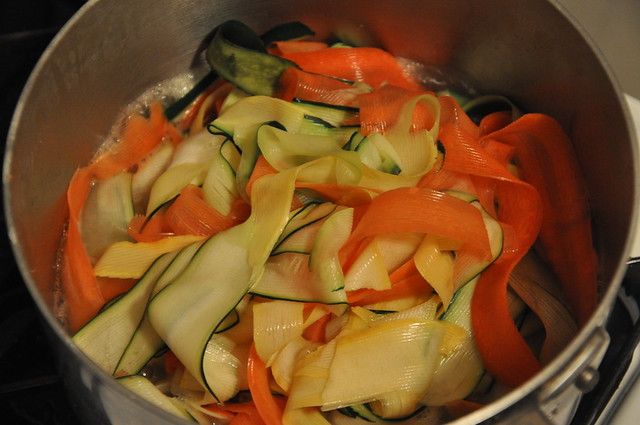
Trim the ends off the squash and using a  vegetable peeler, or knife, cut the squash lengthwise into very thin strips.

Place in a large bowl with the sliced shallot, olive oil, and vinegar, and gently toss to combine. Let stand for 10 minutes.

Season to taste with salt and pepper. Then add the basil and pine nuts and gently toss to combine.

Transfer to a serving dish and crumble goat cheese on top. Serve immediately.

Makes 4 servings (or 2 big main servings).

5.03.2011

Mother's Day Brunch

Did you know Mother's Day is soon? 
  I repeat MOTHER'S DAY is soon.
DSC_0909

May 8 to be exact. 

Never underestimate the importance of Mother's Day.  You will probably be cursed for the rest of your life if you don't go out of your way to thank your mother for dealing with you all those years. 

DSC_0920
If you are old enough to read, it means you've given your mother some trouble so be sweet.
IMG_6769

What better way to celebrate the woman who will probably cook for you more in your lifetime than any other person in the world than to cook her a feast.  Sure, you can go out and celebrate at a restaurant, but what do moms really like?  You...in the kitchen, putting a little love into a brunch... AND doing the dishes after.
IMG_6943


It's no secret I've been on a brunch kick, but here are a few of the reasons that back the obsession.  I could never throw a breakfast... too early for me, but lunch time just doesn't sound as jazzy..  By brunch, you can serve hearty breakfast foods mixed with sweet breads and muffins and top it off with a mimosa or bloody mary.   Below are some menu ideas from the archives.  Still working on what I will actually serve this year, but these have all worked well at brunches in the past.


p.s. if you no longer have a mom around, you can always celebrate another mother in your life, or someone who has been like a mom to you.  Guaranteed, there will be tears.  Thanking someone for being a "great mom" to you?  Yes, there will be tears, tears of joy.


{Mother's Day Brunch Menu}

Mixed Berry Fruit Salad

If you are like me, and like a little dessert with brunch...
or 


Keys to hosting a brunch:
Cook only one stove top item.  The last thing you want to do is spend all your time over the stove trying to cook items that are all last minute so they are nice and hot.  This menu is perfect for that because you can cook the bacon and pie in the oven at the same time.

Make everything in advance. I would consider this the golden rule, but maybe that's just because I'm not a morning person.  I would rather wake up and stick a few things in the oven while I get ready than think about waking up at the crack of dawn for prep work.  With these two main dishes, the prep is so minimal it's okay to leave it till the morning, but you could always cook the pie and just reheat in the morning if you wish.   Even fruit salad can be tossed together the night before.

Another reason this menu works well together... you can put the pie and bacon in at the same time.  
DSC_0908

4.26.2011

Spinach, Artichoke & Ricotta Pie

DSC_0909
We did some serious brunching over the long weekend.

When I woke up all I wanted to do was remain in my pjs and come up with hearty new dishes to try; so that is exactly what I did.  I did it for you, I did it for me... I did it for us. 

No fuss, much frill;  from my little kitchen to yours... Happy Brunching.
pie ingredients
pie mix


DSC_0917
pie with avocado
Spinach, Artichoke and Ricotta Pie
Adapted from The Kitchn
Recipe Notes
Make sure and add the avocado for serving.  It is optional, but pairs perfectly with the pie.  This dish also warms up really well in the oven the next day for leftover.  
Ingredients
1 cup canned artichokes, chopped
5 ounces spinach, roughly chopped (1/2 a small bag)
8 ounces ricotta cheese
4 ounces grated or shredded Parmesan
4 extra large eggs, beaten
1 teaspoon salt
1/2 teaspoon pepper
Vegetable oil or cooking spray to coat the cake pan
1 avocado, thinly sliced (for garnish)
Step by Step
Preheat oven to 400 degrees. Grease a 9 inch cake pan lightly with olive oil. In a large bowl, combine the eggs and cheeses. Roughly chop the veggies and add to the cheese/egg mixture.  Add salt and pepper.  Stir until combined. Pour contents of bowl into the greased cake pan and cook until custard is set, about 40-50 minutes. Cool on a wire wrack for 5-10 minutes and serve with 3 slices of avocado per piece. 

Serves 4-6


I would have said this definitely serves 6, but I added 4-6 because this was all that was left after the two of us got ahold of it. 
pie eaten

4.17.2011

Lemony Green Beans with Mushrooms

lgb 2
I have not always had the best relationship with green beans.  For the longest time, I thought of green beans in one way... short, a lifeless shade of green and extremely mushy, served along side mystery meat and mashed potatoes.  They only seemed to show up in cafeterias for me and they just seemed sad.  It really wasn't until I spotted this recipe in my favorite cookbook that I thought I should give them a shot.  Sure glad I was able to move on because this is a keeper.  Bright and crisp beans mixed with mushrooms in a light and lemony sauce is just wonderful.  Just a few ingredients, healthy and quick... what more could you ask for?

From my little kitchen to yours... Enjoy.
lgb1
Lemony Green Beans with Mushrooms
Adapted from Peace Meals, Junior League of Houston
Recipe Notes
Cremini mushrooms look a lot like white button mushrooms.  The outsides are just a little darker and they have a heartier taste.  I recommend using these, but if you can't find them, substitute white button mushrooms.  For the green beans, "trimmed" simply means to cut off both ends.  For a how to on blanching the beans, click here.  Remember, you want them to stay crisp so cook just until they turn bright green. 
Ingredients
3/4 pound fresh green beans, washed and trimmed
2 tablespoons butter
8 ounces cremini mushrooms, cleaned and sliced about a 1/4 inch thick
coarse salt and freshly ground pepper
zest and juice of one lemon
Step by Step
Blanch the beans in boiling water and cook for about 4 minutes until tender and bright green.  Cool the beans under cold running water, drain and set aside.  Heat the butter in a medium saute pan over medium- low heat.  Add mushrooms and cook for 2 minutes over medium heat.  Do not stir.  Season well with salt and pepper.  Mix in seasonings and continue to cook for 2 minutes.  Add beans, lemon zest and juice.  Cover pan and cook for 3 minutes.  Serve immediately. 

3.29.2011

Lemon Pistachio Tartlets + a confession + some news

tartlet pic
First the confession...
Have you heard of Food52?  I have and I have been secretly holding out on you because I want to to win and I would like to keep the entries to a minimum.  Okay, so I realized this was unfair of me and if you haven't, you should check it out.

It is a website that requests a certain type of recipe each week for a contest {for example: give us your best late winter tart recipe} and you have one week to turn in a recipe.  If you win, you are published in a cookbook that they publish once a year... get it? 52 recipes for 52 weeks= food 52.  Anyway, they upped the ante big time a couple of weeks ago and when they asked for late winter tarts, they announced that if you won, you would be flown to New York to be on the Martha Stewart Show to make your tart to help celebrate her new pie and tart cookbook.

I was beside myself. Being on the Martha Stewart show is on my bucket list and although I'm at the ripe old age of 26, you can never check things off too soon.  Anyway, I went to work on lots of versions of this original recipe and came up with my lemon pistachio tartlets.  By the time I finally turned it in, I really didn't have much hope of actually winning.  There seem to be true professionals on this site who have been entering for years and I was up against 265 other tarts.

No I did not win, but...
So when I found out I wasn't chosen as one of the top two to be voted on, I wasn't that surprised, but I had high hopes of being a part of the honorable mentions... aka editor's picks.  Food52 puts out a few of their picks of all the entries and asks members of the community to test them out.  Those that are given great reviews are picked as Editor's Picks.

So I am happy to say that I did get picked as an Editor's Pick! It was exciting for me and especially because I am still venturing into the world of making recipes my own.
tart pic

So all that to say, I just wanted to share a little foodie triumph and share this recipe that would be pretty darn perfect for brunch or shower.  I love easy, mini pick up food, which is why I insisted on these being mini and they turned out to be quite addictive too.

Just in case you want to check out other editor's picks, click here for a link to the blog post... 


Now for the tartlets...
lemon pistachio 2

peeled lemons


candied peels

crusts


Lemon Pistachio Tartlets
Recipe Note: If you would rather not mess with candied lemon peels, you can leave that garnish off, but I do like the extra layer of lemon myself. 
Makes 48 tartlets
For the crust and candied lemon peels:
  • FOR THE CANDIED LEMON PEELS
  • 3 large lemons (look for ones with thick skin)
  • 3 cups sugar
  • FOR THE CRUST
  • 3/4 cups unsalted butter
  • 1/4 cup sugar
  • 1 tablespoon powdered sugar
  • 2 cups all purpose flour
  • 2 teaspoons fresh lemon zest
  • 1 teaspoon almond extract
  • 144 whole roasted and salted pistachios, shelled (about 2 cups unshelled)
  1. Preheat oven to 325 degrees. Using a vegetable peeler, peel off pieces of the skin from top to bottom into long ribbons. Place peels in a saucepan and cover with water. Bring water to a boil and simmer for one minute. Drain water and repeat one more time. Dissolve 3 cups of sugar into 2 cups of cold water. Bring water to a boil and add lemons. Turn heat to low and let simmer for one hour.
  2. Meanwhile, melt butter in medium sized saucepan over low heat. Remove from heat and add sugars, zest and almond extract. Stir to combine. Add flour and stir with a wooden spoon until combined and crumbly. Let crust rest for 15 minutes.
  3. Spray two mini muffin tins with a good coat of nonstick cooking spray. After crust has rested for 15 minutes, spoon a heaping teaspoon of crumbly dough into each cup. The goal is to get the entire cup covered with the least amount of dough. Technique: Using your thumbs, press dough into the bottom of the pan. Then, use your thumbs to spread the dough up the sides until whole cup is covered evenly. Bake crusts for 8 minutes. Allow to cool and drop 3 pistachios into each cup.
  4. After lemon peels have simmered for an hour, remove from liquid and allow to cool. Cut peels into 1 inch chunks. Lemon peels will not dry out completely, but can be stored in an airtight container for up to two weeks.
For the filling, glaze and finishing touches:
  • FOR THE FILLING
  • 1 1/2 cup sugar
  • 3 tablespoons all purpose flour
  • 3/4 teaspoons baking powder
  • 3/4 teaspoons salt
  • 3 XL eggs, room temperature, beaten
  • 2 teaspoons grated lemon zest
  • 3 tablespoons fresh lemon juice
  • FOR THE GLAZE
  • 1/2 cup powdered sugar, sifted
  • 1 tablespoon fresh lemon juice
  • 1 tablespoon butter, melted
  • FOR FINAL TOUCHES
  • 1/4 cup powdered sugar
  1. Prepare filling while crusts are baking and lemon peels are simmering. In a medium sized bowl, stir together sugar, flour, baking powder and salt. Add eggs, zest and juice and stir to combine. Using a tablespoon, fill each crust cup with lemon filling. Fill to the top of the crust line, but do not go over. (if filling floods out over crust, it will be more difficult to remove from pan). Bake for 15 minutes. Remove from oven and cool in pan.
  2. Meanwhile, prepare glaze. Combine powdered sugar, lemon juice and butter in a small bowl. Using a pastry brush or small spoon, paint the top of each cooled tartlet with the glaze and place a sliver of candied lemon on top of each. Slide a small, sharp pairing knife in between the crust and pan until each tartlet pops out. When ready to serve, dust heavily with powdered sugar.
  3. Can be stored in an airtight container up to one week.

3.04.2011

Tomato & Asparagus Salad with Champagne Vinaigrette

DSC_0416
Spring is still in my air here in Houston and I continue to find vegetable dishes that are packed with flavor. This is such a great salad with so many fresh flavors.  If you make the vinaigrette ahead, you could have this on a weeknight, but I think it is special enough to serve at a luncheon or a dinner party. I just love all those colors.
DSC_0398
That's all I have to say about this... it's just good.  Today, I'm working on putting together a few menus for a catering job so I'm looking for inspiration for what to serve at a baby shower.  Have any bite size favorites you would like to share?

DSC_0406
 From my little kitchen to yours... Enjoy.

Tomato & Asparagus Salad with Champagne Vinaigrette
Adapted from Peace Meals, Junior League Houston
Recipe Notes
You might gasp a little when you see the price tag on champagne vinaigrette.  There seem to be varieties that are expensive.  I bought the most inexpensive jar and it has lasted me a long time so it turned out to be a good investment.  Unless you like your salads drowning in dressing, you will also have plenty left over to use for another salad or to make this again.  Blanching is simply cooking a vegetable in boiling water for a few minutes to bring out it's color and then shocking it with cold ice water so that the cooking stops.  If you would like an in depth refresher, click here.
Ingredients
1 clove garlic, peeled
1/2 cup Champagne vinegar
1/4 teaspoon freshly ground pepper
coarse salt
1 teaspoon Dijon mustard
dash of sugar
1 cup extra virgin olive oil
for the salad:
1 bunch asparagus, ends trimmed and cut on the diagonal into 1-inch pieces
1 pint cherry or grape tomatoes, any color, halved
4 ounces crumbled feta cheese
coarse salt and freshly ground pepper
Step by Step
Crush the garlic clove with the side of a knife blade.  The the clove (leaving it in one piece) to a mixing bowl.  Add the vinegar, pepper, and a dash of salt; allow to sit for 30 minutes.  Remove and discard the garlic.  Whisk in the mustard and sugar; slowly add the olive oil, whisking constantly to emulsify.
Bring water to a boil in a medium saucepan.  Blanch (see note above) the asparagus for 1 to 2 minutes.  Drain and rinse under cold water.  Combing the asparagus and tomatoes in a medium bowl.  Add the cheese and toss with desired amount of the vinaigrette; season with salt and pepper.  Cover and refrigerate for up to four hours.  Toss again before serving and adjust the seasonings as needed.  

Store extra vinaigrette in an airtight container in the refrigerator for up to one month.

Serves 6-8.

2.28.2011

Spring Vegetable Pasta with Mushroom Butter Sauce

pasta2
To the best I can tell, it is pretty much spring around these here parts.  We have had beautiful weather and I sure hope it stays that way.  This is pretty much one of the freshest pastas I have ever made with so much flavor.  A co-worker shared this recipe with me (thank you, Christy!) after going to a cooking class and I just had to try it.
DSC_0682
I usually do not like my pasta to be bothered with any sort of vegetable, but the long ribbons that you make out of carrots, zucchini, and squash intrigued me.  The ribbons were so delicate and soaked up the mushroom butter sauce to just melt in your mouth.

From my little kitchen to yours... Enjoy.
DSC_0693

DSC_0694

DSC_0686

DSC_0695

DSC_0696

DSC_0698

DSC_0702

DSC_0708
Spring Vegetable Pasta with Mushroom Butter Sauce
Recipe Notes
The original recipe called for pappardelle pasta.  This is basically a skinny version of lasagna noodles, but I could not find it so I used fettucine.  Use whatever you can find.  If you are unfamiliar with leeks, they are really just a larger version of a green onion.  Wash them well and slice just the white part.  See picture above. 
Ingredients
1 lb. fettucine or pappardelle pasta *see recipe note
2 zucchini
2 yellow squash
2 carrots 
1 cup chopped white button mushrooms
2 leeks, washed and sliced *see recipe note
2 cloves garlic, minced
6 tablespoons butter
1/2 cup white wine
1/2 lemon, zested and juice
Step by Step
Peel carrot with vegetable peeler and throw away outer layer.  Continue to peel long ribbons of carrots and set aside.  Peel squash and zucchini into long ribbon pieces, stopping at seeds.  Make long strands one side of squash until you hit seed.  Then, rotate to another side and repeat until all sides have been peeled; set aside.
Saute leeks with butter on medium heat, 4-5 minutes until translucent.  Add garlic and continue to cook until fragrant, 2-3 minutes.  Add mushrooms and wine and cook an additional 10 minutes.  Season with salt and pepper.  Mushroom butter sauce can be covered and stored in the refrigerator up to one week.  Boil pasta according to directions on packaging in a large pot of salted water.  When pasta has 3 minutes left, add ribbons of vegetables to pasta and cook together.  
Drain pasta and vegetables and place in a large bowl.  Pour butter sauce on top and mix to combine.  Serve immediately. 

Makes 6 servings.