Showing posts with label cooking for two. Show all posts

9.20.2011

Shredded Pork Tacos

Shredded Pork Tacos
It's September.  It's back to school time.  And whether a real school schedule plays into your life at all or not, September still signifies that summer is coming to an end.  Long summer meals have come to a close and it seems like September is time to get into a routine and buckle down a bit.

It's time to get some things streamlined.

It's time to have dinner magically appear for you when you get home from a long day of work.

It's time to break out the slow cooker.

Sorry...talking about crock pots just doesn't sounds nearly as jazzy as slow cookers. 

And we don't have to go into the fact that I don't have a new fancy schmancy slow cooker.  I have my grandmother's crock pot with all the paisley flowers and delicate riboons strewn about that just screams "I was trendy and cool in 1982." The point is... old timey or brand new, sleek chrome or ridiculously retro, you need a crock pot.  Splurge if you want or pick up a rockin one from a garage sale... they all do the same thing... cook slowly.

This thing is a life saver.

I feel a slow cooker is as close as the modern world has gotten to having that maid, Rosie, from the Jetson's.  Consider this jewel your dinner robot.

I'm feeling the need to really put mine to work this fall and winter so bust yours out and let's have dinner with none of the work and just one dish to clean.

These shredded pork tacos are a good place to start.

Tons of flavor and very few ingredients.   I thought this recipe was outrageous when I first saw it.  Cocoa powder and salsa?? Huh? But you won't believe the deep flavor you get from mixing these two. It's dynamite.


From my little kitchen to yours... Enjoy.
Shredded Pork Tacos
Shredded Pork Tacos
Adapted from Real Simple
Recipe Notes
If you are not use to buying pork, just branch out and do it.  I avoided recipes like this for a long time because I knew nothing about pork, but for the most part, you cannot mess it up.  If in doubt, tell the butcher what you are making and he will steer you in the right direction.  You can find slices of boneless pork butt in most grocery stores.  I chose boneless pork butt steaks because they cook faster and are available in smaller portions than a whole pork butt.  You can easily double or triple this recipe.  Whatever your slow cooker allows.  There should be enough sauce to add a pound or more of pork without having to double the sauce.  I cooked the meat for 7 hours on low.  You could cook for about 5 hours on high or up to 8 hours on low.  See picture below for how to prepare the meat for cooking.  See picture for trimming pork butt.
For a healthier option, you can use boneless pork loin.  Cut into slices to make sure all is covered by sauce. If you are using boneless pork loin, you will have a lot more meat because you have no fat to trim off.
Ingredients
2 cups store bought salsa
2 tablespoons chili powder
2 tablespoons dried oregano
2 tablespoons unsweetened cocoa powder
kosher salt
1 1/2 lbs. boneless pork, either pork butt or boneless pork loin (see recipe notes for options)
Corn tortillas
1/4 cup fresh cilantro sprigs
1/2 cup sour cream
1 lime
shredded cheddar cheese (optional), for serving
Step by Step
In a crock pot, combine the salsa, chili powder, oregano, cocoa powder and 1 teaspoon of salt.  Remove any large strips of fat from pork (see pictures below).  Add meat and coat to cover.  Cover with lid.  Cook on high for 4 to 5 hours or on low for 7 to 8 hours until meat is tender and pulls apart easily.

Twenty minutes before meat is done, heat oven to 350 degrees.  Wrap corn tortillas in foil and bake until warm, about 15 minutes.  While tortillas are warming, remove pork from slow cooker and set on medium sized plate.  Using two forks, shred pork and smother with sauce from slow cooker.

Build tacos starting with pork and add a few sprigs of cilantro, and a dollop of sour cream to each taco.  Add shredded cheddar cheese if you would like.  Squeeze lime juice over the top of the tacos and serve.

Makes 4-8 servings.  Check recipe notes to see how using different cuts of meats gives different amounts of servings.


If you are using a pork butt or pork shoulder, remove any large strips of fat from pork before adding to the crock pot.  This will not be necessary with a boneless pork loin or other types of lean cuts. 
trimming the pork

9.25.2009

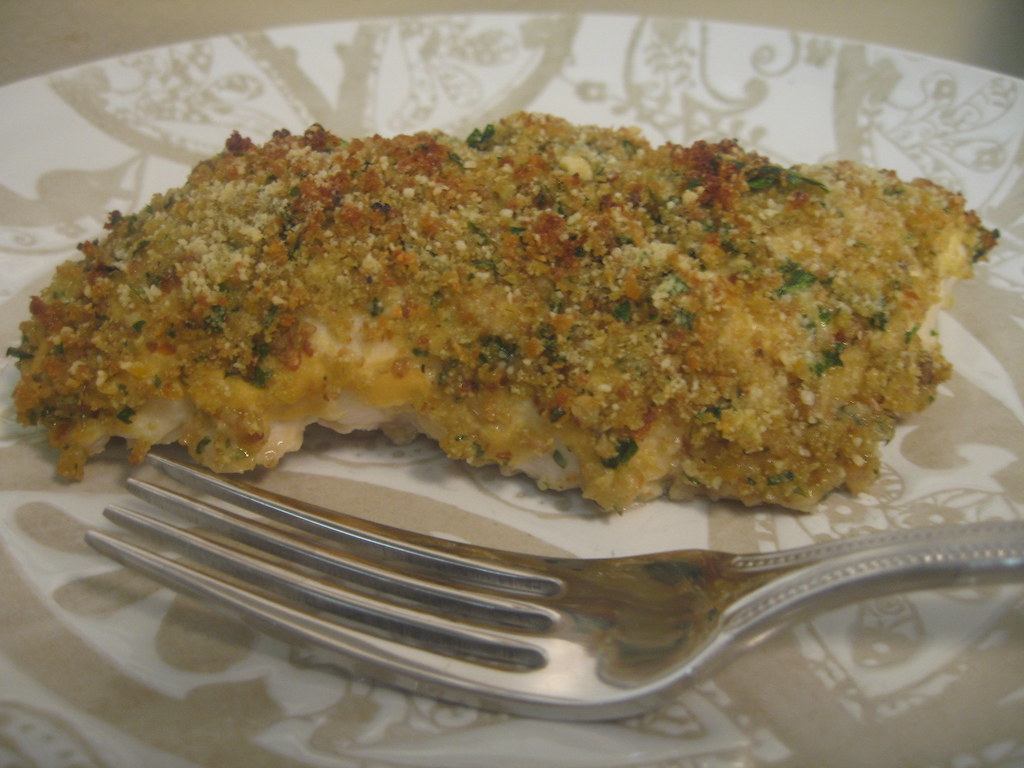
Parmesan & Herb Crusted Chicken

I continue my week of healthy dinners with a favorite I have made many times. Not only is it quick, but healthy as well.  The crust of the chicken can be made so quickly in a mini food processor and produces so much flavor.  It is special enough to serve for company, but easy enough for any night of the week!  It is one of my favorite alternatives to plain grilled chicken, but does not pack on tons of calories. Enjoy!
Parmesan & Herb Crusted Chicken
Serves 2
Adapted from Realsimple.com
Recipe Notes
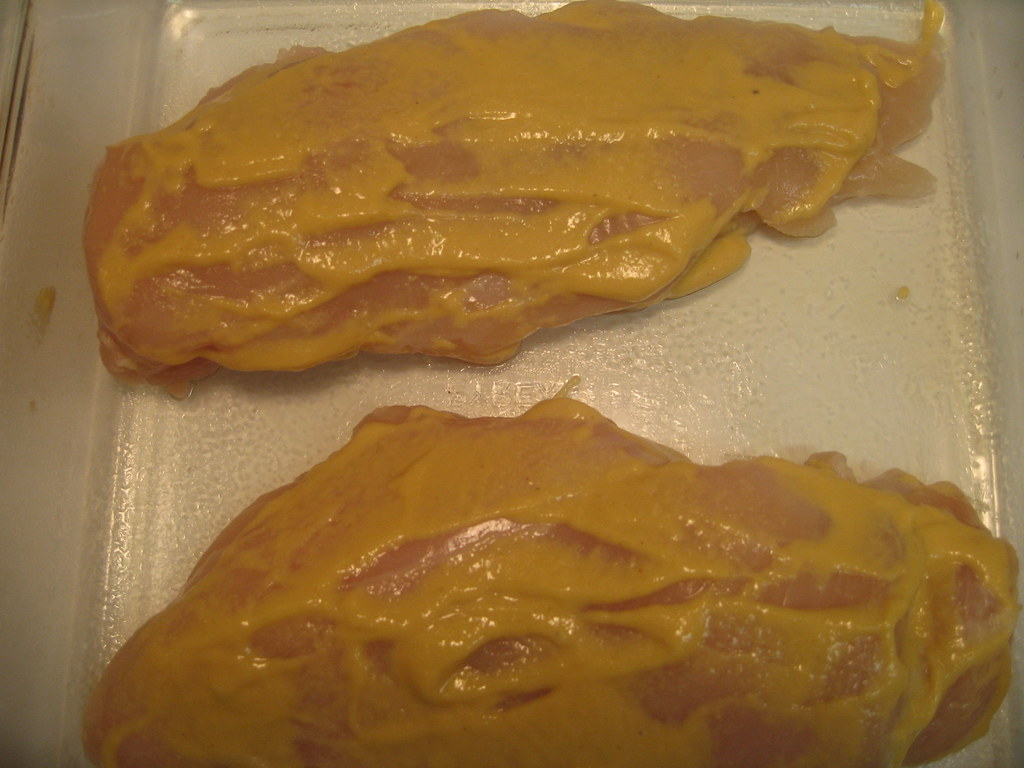
The breading mixture makes enough for two large chicken breasts (with a little extra) or it is enough for four small breasts.  If cooking for four and want to make sure you have enough bread crumbs, I would suggest making 1 1/2 times the recipe... you won't need to double it unless cooking for six.  Make sure you spread the dijon in a very thin layer.  It can get a little mustardy if you do not spread it thinly.
Ingredients
1 garlic clove, peeled
1/4 cup fresh parsley leaves
2 slices whole wheat bread
1/4 cup grated parmesan cheese
2 tablespoons olive oil
1/4 teaspoon freshly ground pepper
2 boneless, skinless chicken breasts
2 teaspoons dijon mustard
Step by Step
1.  Heat oven to 400 degrees.
2.  Lightly coat a glass baking dish with cooking spray.
3.  In a mini food processor,  mince garlic.  Then add parsley and pulse until combined.  Add the bread, Parmesan, oil, salt and a few dashes of pepper.  Pulse until all ingredients are well combined.
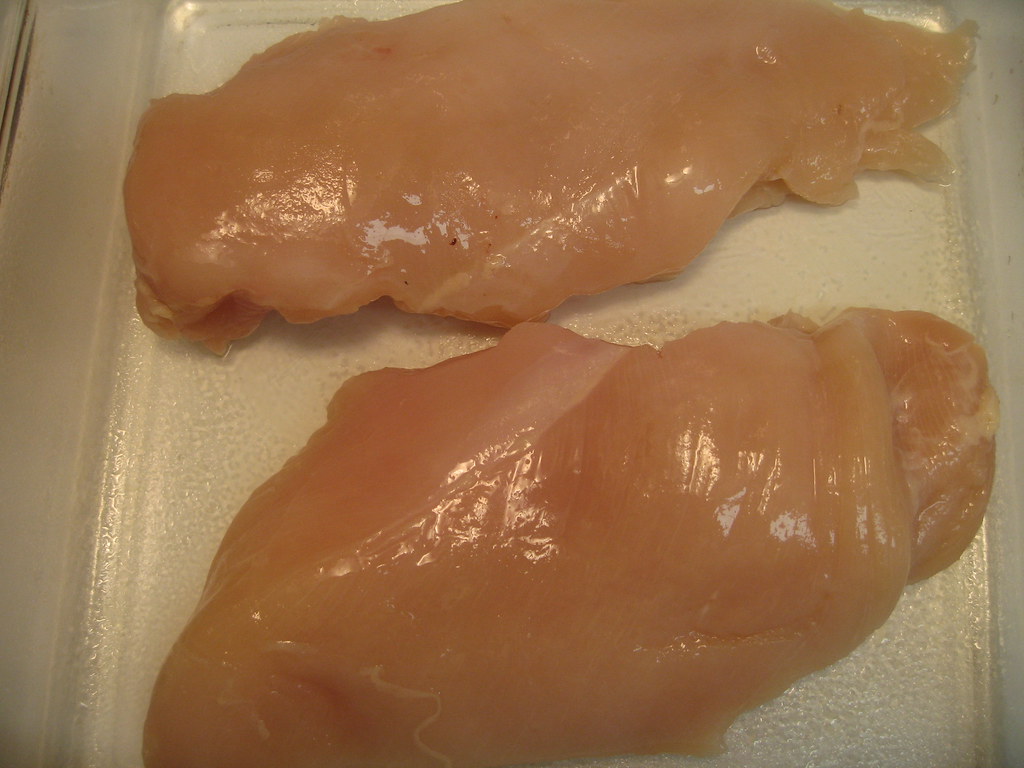
4.  Arrange chicken breasts on baking dish.  Spread mustard in a very thin layer on breasts and then pack  herb mixture on top to coat entire chicken breast.  Optional:  Sprinkle with a little extra cheese if desired.
5.  Bake until cooked through, which is about 20 to 25 minutes.
6.  Season with salt and pepper and serve.

9.24.2009

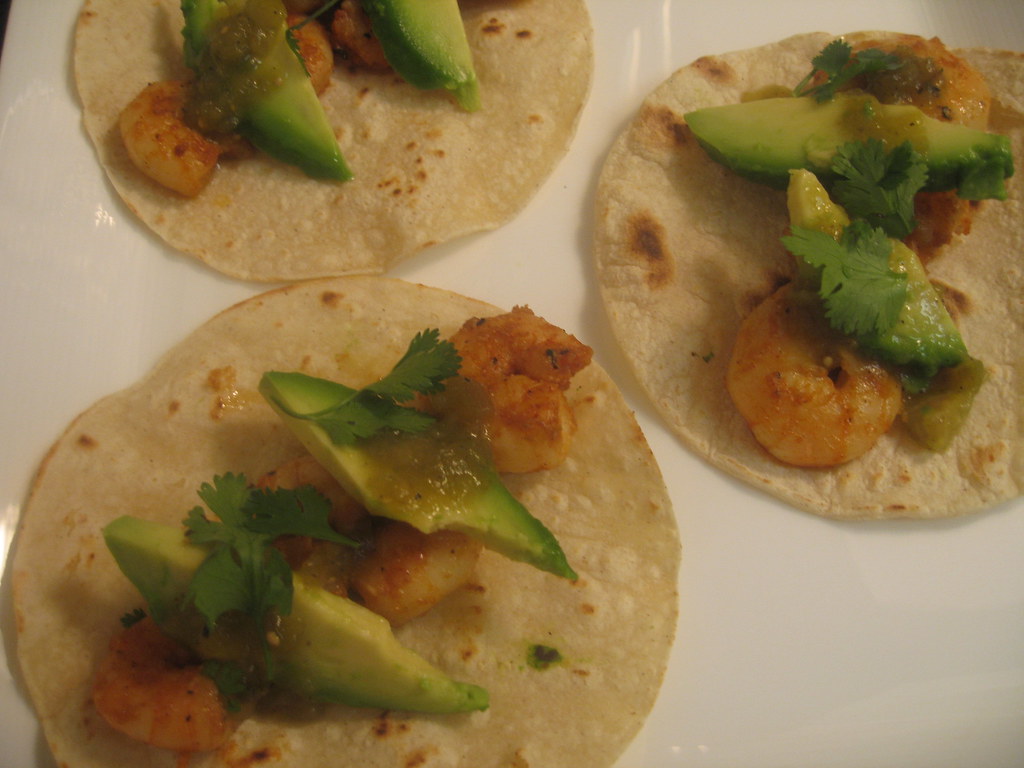
Shrimp Tacos

These have become an instant favorite.  And I have to say I am extra excited to post this because it is a quick and easy recipe I came up with myself! I still get such a kick out of creating a dish that is delicious that I didn't follow a specific recipe.  You can easily throw this together for a weeknight dinner and it is very budget friendly.  Another great perk is that this is a very healthy dinner as well especially if you are craving Mexican food.  We loved these so much that I made them two nights in a row.  The shrimp have so much flavor and the tacos taste like they could have come from your local taqueria.  Enjoy!
Shrimp Tacos
Serves 2
Recipe Notes
This recipe calls for jarred tomatillo sauce.  This is simply a Mexican green salsa that can be found at any grocery store.  It is usually found near other salsas and dips.
Ingredients
6 corn tortillas
1 1/2- 2 cups uncooked, peeled and deveined shrimp (about 25 medium sized shrimp)
1 teaspoon salt
1 teaspoon chili powder
1/2 teaspoon garlic powder
1/2 teaspoon freshly ground pepper
1 lime
1 tablespoon olive oil
1/2 an avocado, sliced
3 tablespoons fresh cilantro, roughly chopped
1/2 cup store bought tomatillo sauce (also known as mexican green sauce)
Step by Step
1.  In a medium sized bowl, toss shrimp with salt, chili powder, garlic powder and pepper.  Toss to coat shrimp.  Squeeze 3/4 of a lime over shrimp.
2.  Heat olive oil over medium heat in a  nonstick skillet.
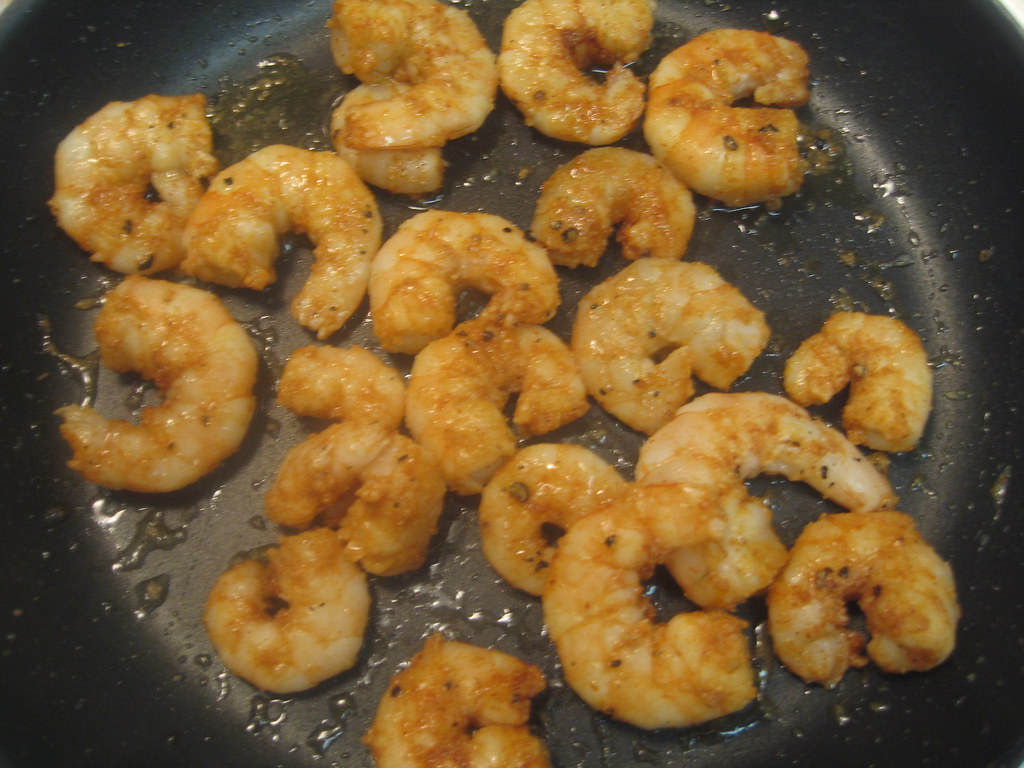
3.  Add shrimp and cook for 5-10 minutes until shrimp are opaque and cooked through.  Toss a few times to let shrimp cook evenly.  Squeeze the last 1/4 of the lime onto the shrimp.
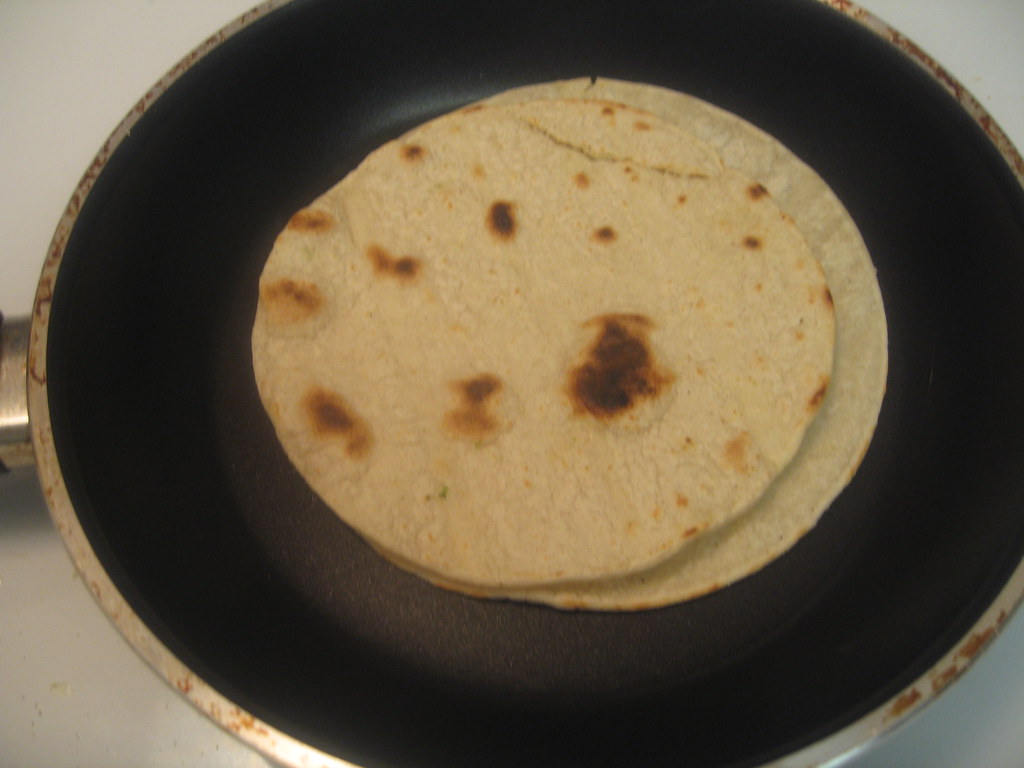
4.  While shrimp are cooking, heat a large skillet over medium to high heat. Place corn tortillas on dry pan one at a time until lightly browned.  Turn and brown the other side.  Keep warm in foil until all tortillas have been heated.
5.  Add 3-4 shrimp to each corn tortilla.  Top with 1-2 teaspoons of tomatillo sauce followed by avocado slices and cilantro. Serve Immediately.

7.20.2009

Mediteranean Salad + Lemon Caper Vinaigrette

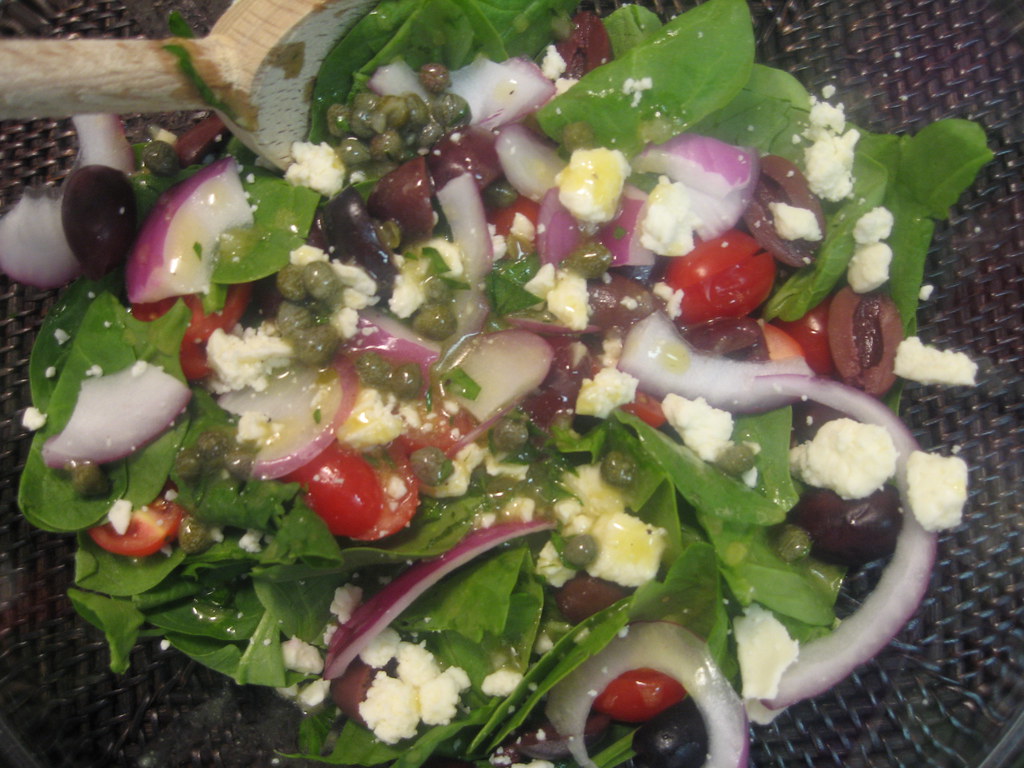
So another challenge came my way, and I just had to take it on.  At lunch in the office one day, my coworker Frances had a salad with a yummy lemon caper vinaigrette from a restaurant called the Picnic. It was light and a refreshing and we decided we just had to figure out what was in it.  I did a little research and found a great recipe that came out very similar and found a great salad to go with it as well. It would pair perfectly with any grilled meat or fish. You could also use the dressing on all sorts of salads.  Enjoy!
Lemon Caper Vinaigrette
Adapted from recipezaar.com 
Serves 2
Ingredients
1 teaspoon minced shallot
1/4 teaspoon minced garlic
1 teaspoon Dijon mustard
1/2 teaspoon honey
1 1/2 tablespoons capers, with their liquid
1 tablespoon fresh lemon juice
1 tablespoon red wine vinegar
1 teaspoon fresh parsley, chopped
1/4 teaspoon black pepper
Step by Step
1.  Combine all ingredients in a jar or bowl.  
2.  Shake well to combine ingredients.
3.  Refrigerate until ready to use.
Mediterranean Salad 
Ingredients
1/2 bag mixed greens (I like the bag of baby mixed greens, but you could also use spinach or romaine)
grape tomatoes, halved
1/4 cup kalamata olive, pitted
1/4 cup feta cheese, crumbles
1/4 red onion, sliced thin
Step by Step
1.  Mix all salad ingredients in the bowl.
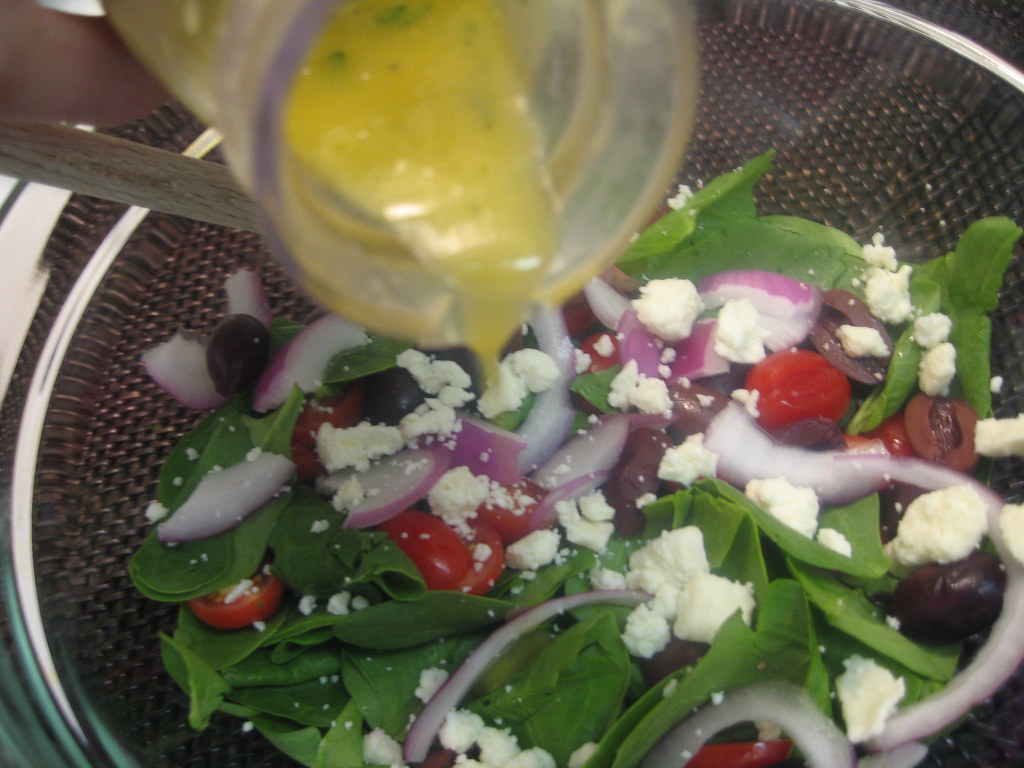
2.  Toss with dressing before serving.

7.16.2009

Pesto Grilled Chicken

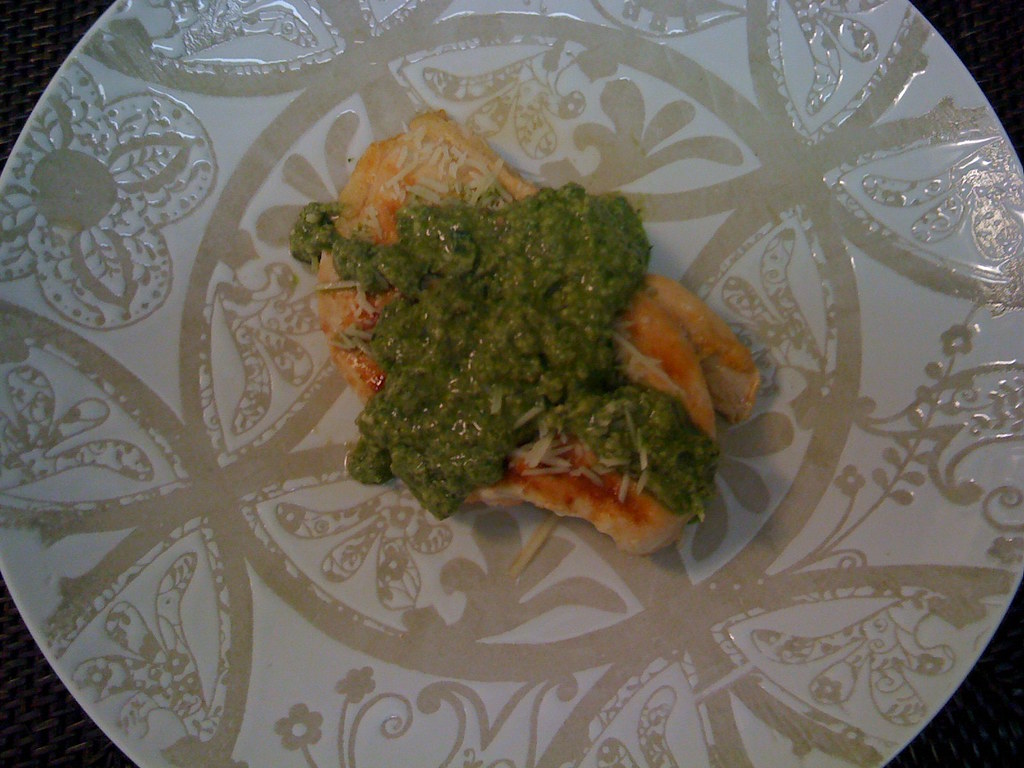
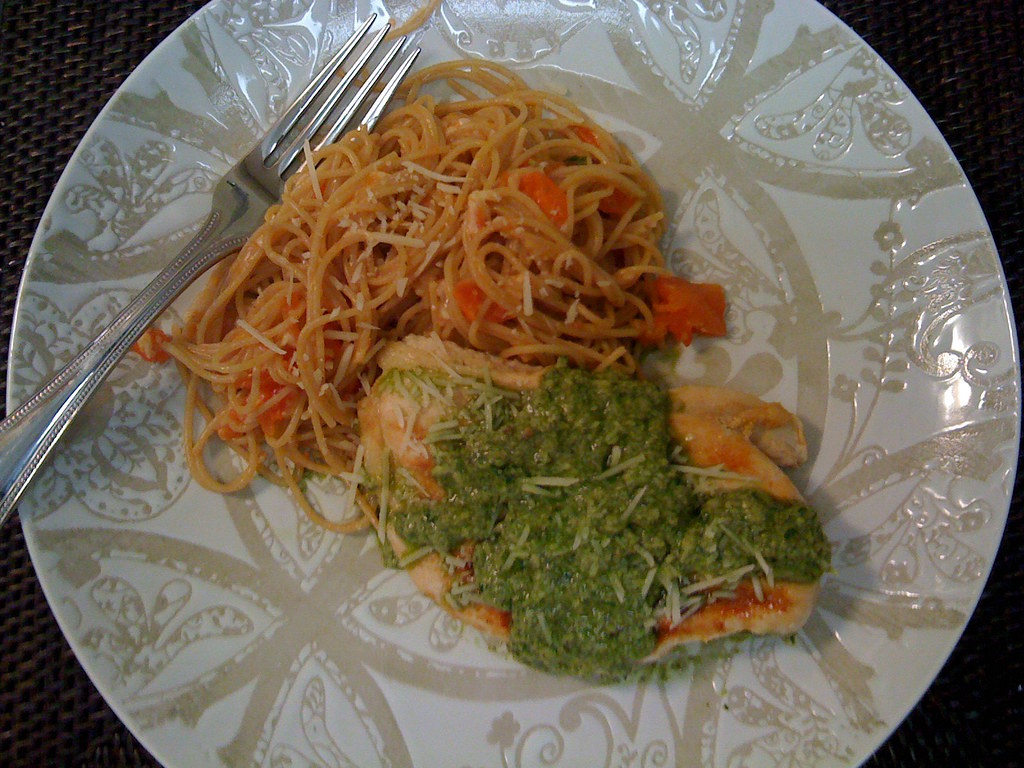
When you have grilled chicken ten thousand times, it's time to spice things up!  As I usually chant on this  site, it's not about complicated meals, but using everyday ingredients in a new way.  This time it was simply adding leftover pesto to grilled chicken to give it a whole new twist.  This is a great weeknight meal and can be ready in less than 20 minutes.  Enjoy!
Pesto Grilled Chicken
Serves 2
Recipe Notes
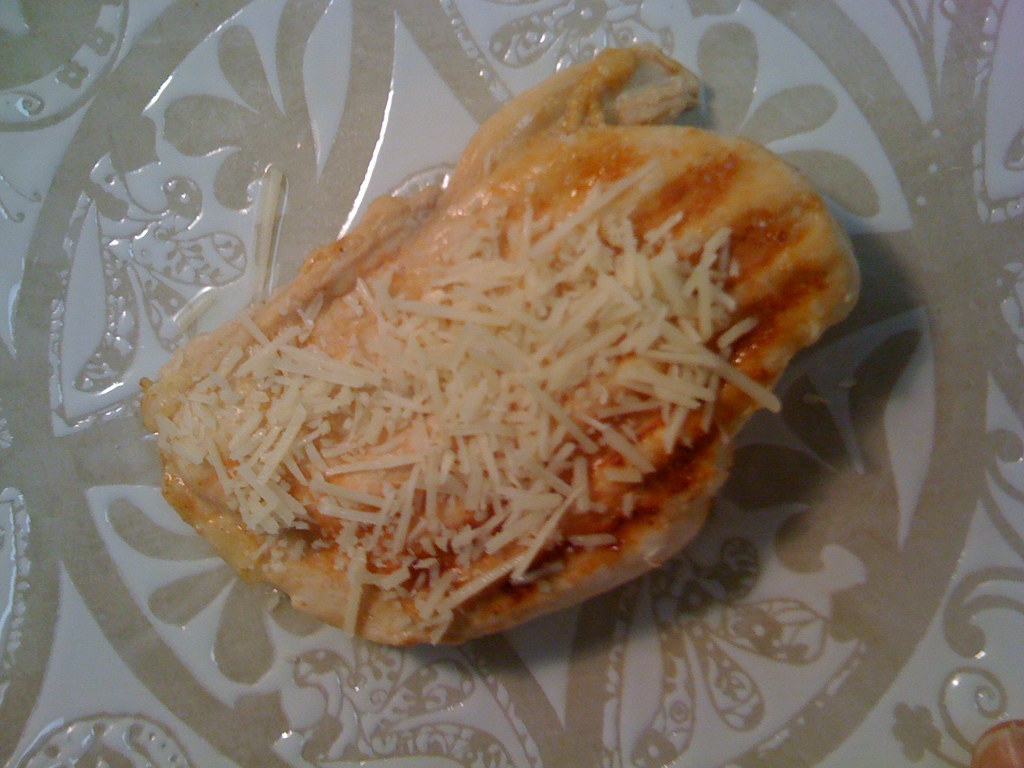
I sprinkled parmesan cheese on the chicken and then a little on top of the chicken.  This is a great addition, but really not necessary to buy unless you have it on hand.  The chicken will still be good with just the pesto.  I used store bought pesto for quick preparation.  You can either buy a whole tub or some grocery stores like Central Market have pesto where you can measure out exactly how much you need.   You do not need to do anything to the pesto.  I took mine out of the refrigerator and set it on the counter while I made the chicken so that it could come to room temperature.  There is no need to heat it separately.
Ingredients
2 boneless skinless chicken breasts
Seasoning salt (I like McCormick's)
3 to 4 tablespoons pesto (make with this recipe or use store bought)
2 tablespoons shredded parmesan cheese
Step by Step
1.  Heat grill or grill pan to medium heat and coat with cooking spray.
2.  Heavily season chicken on both sides with seasoning salt and pepper.
3.  Grill chicken until no longer pink in the middle.
4.  Remove chicken from grill and sprinkle each breast with one tablespoon
5.  Remove from heat and sprinkle each breast with one tablespoon of parmesan cheese.
6.  Top the cheese with 1 to 11/2 tablespoons of pesto on each breast.
7.  Serve while warm.


7.01.2009

Pesto Mozzarella Melt


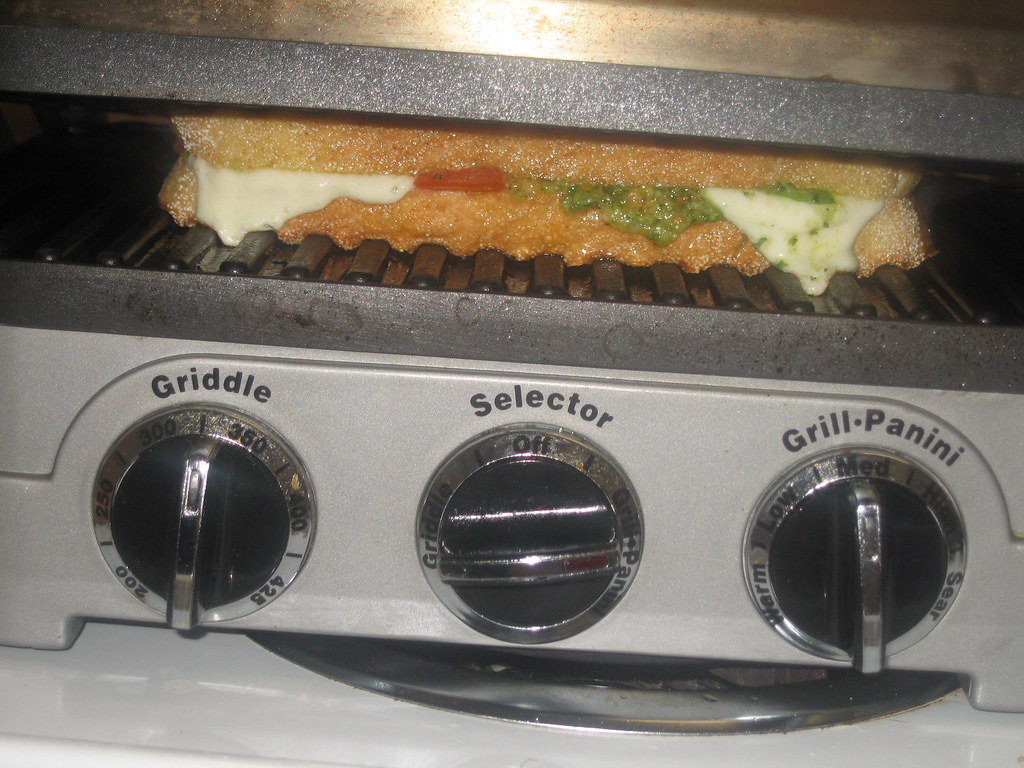
I have yet to find a recipe that involves pesto, mozzarella and tomatoes that I am not in love with.  Whether on a pizza or stirred into pasta, the Italians had it right when they combined these three.  I love using our griddler to make quick paninis and this is one I make the most.  If you do not have a griddler or panini press, you can use a nonstick skillet to get a sammie toasty and melted.
Pesto Mozzarella Melt
makes 2 sandwiches
Ingredients
4 thick slices of sourdough
3 tablespoons fresh basil pesto 
1 tomato, sliced 
slices of fresh mozzarella, about 1/4 inch thick
olive oil
Step by Step
1.  Heat griddler to medium heat and lightly coat plates with cooking spray
2.  Lightly coat one side of each piece of bread with olive oil. Spread pesto on the other side of both slices.
3.  Layer pesto side of bread with tomatoes and cheese and place other piece of bread on top so that the sides brushed with oil are both facing out.
4.  Lay sandwich on griddler and close lid.  Allow sandwich to toast and mozzarella to melt.  
5.  Continue to cook until bread is to desired crispiness.
6.  Remove from griddler and serve.


6.26.2009

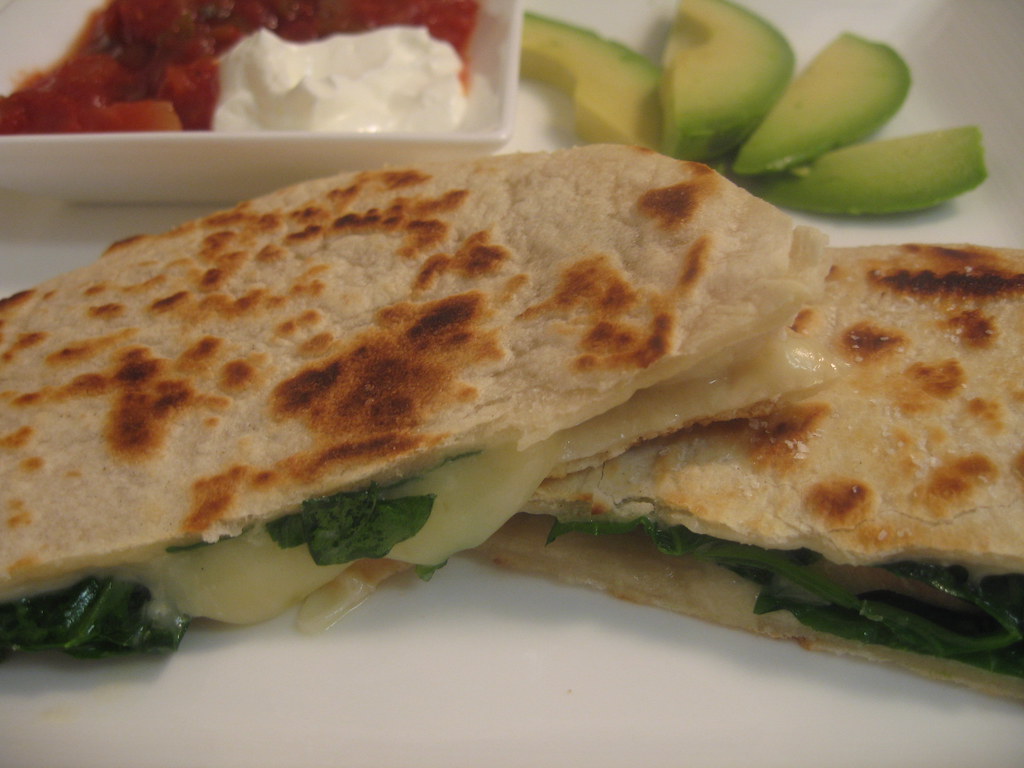
Chicken and Spinach Quesadillas

One of my cooking goals is to have a long list of quick and easy weeknight meals that are delicious.  These quesadillas are adapted from Real Simple, which does a great job at producing quick and tasty recipes.  If you caught yesterday's post, you saw the steak fajitas I made to go with my roasted corn and avocado topping.  To make tonight's meal even faster, I grilled a chicken breast after I finished up my steak for the fajitas last night.  The less times we have to clean that darn griddler the better!  However, I have to say the griddler is one of my favorite kitchen appliances and no little kitchen should be without one!  
Okay, back to the dillas.  I was able to pull my freshly seasoned and grilled chicken breast out of the refrigerator and slice it up in minutes.  Another option if you don't feel like grilling is a precooked rotisserie chicken, shredded.  Feel free to throw in different cheeses and vegetables depending on what you have on hand.  You really can't mess these up!
Chicken and Spinach Quesadillas
Adapted from Real Simple
Serves 2
Recipe Notes
If you are going to grill your chicken, heavily season it with a standard season salt or salt and pepper.  You can grill a piece of chicken for this meal up to 3 days before and refrigerate until ready to use.  So if you are doing some grilling earlier in the week, still a boneless, skinless chicken breast on there to have on hand when you are ready to make this.
Ingredients
4 tortillas
1 cup shredded rotisserie chicken or 1 cup thinly sliced grilled chicken
1 cup shredded monterey jack cheese (more if you like things really cheesy)
1 cup fresh baby spinach
Cooking spray or butter
to serve
sour cream
salsa
avocado
Step by Step
1. Heat a nonstick skillet over medium heat.
2.  Cover with cooking spray and add tortilla.
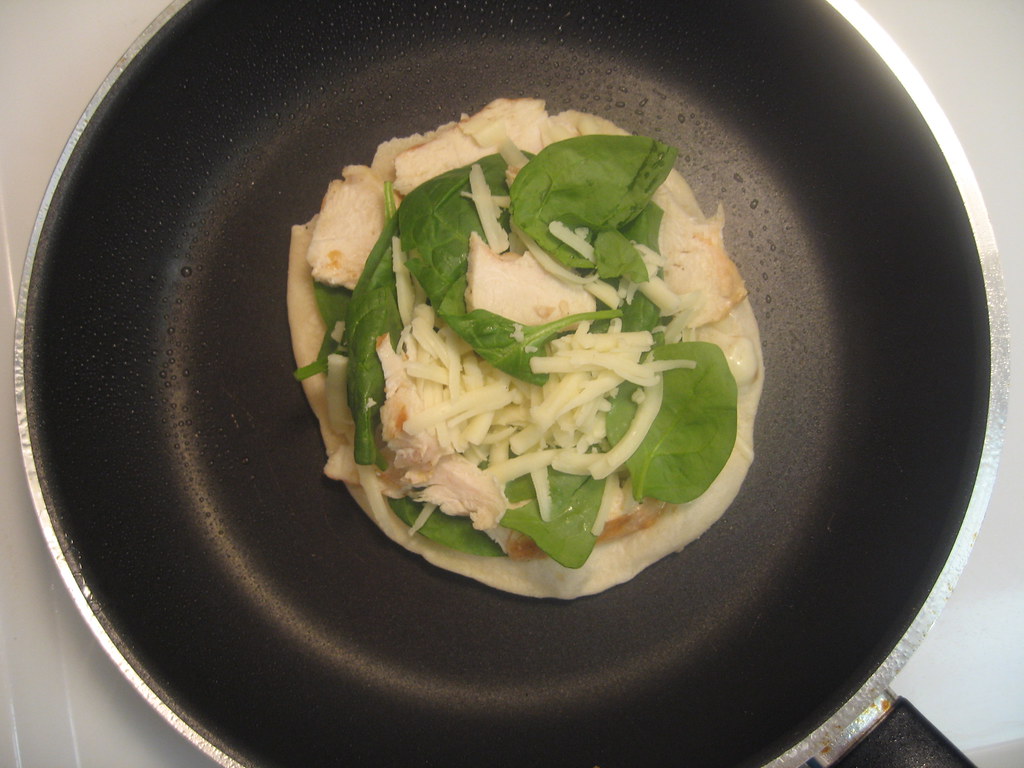
3.  Layer half of the spinach, cheese and chicken on the tortilla.  Allow cheese to slightly melt and once the tortilla has started to brown on the bottom, add tortilla on top of chicken, cheese and spinach. 
Optional: Add a pinch of salt over chicken, cheese and spinach. 
4.  Press down with spatula to allow ingredients to melt together.
5.  Flip over so that the other tortilla can brown.
6.  Once both sides are slightly crispy and cheese is melted, remove from heat and repeat steps for other quesadilla.
7.  Cut in quarter and serve with sour cream, salsa and avocado.

6.11.2009

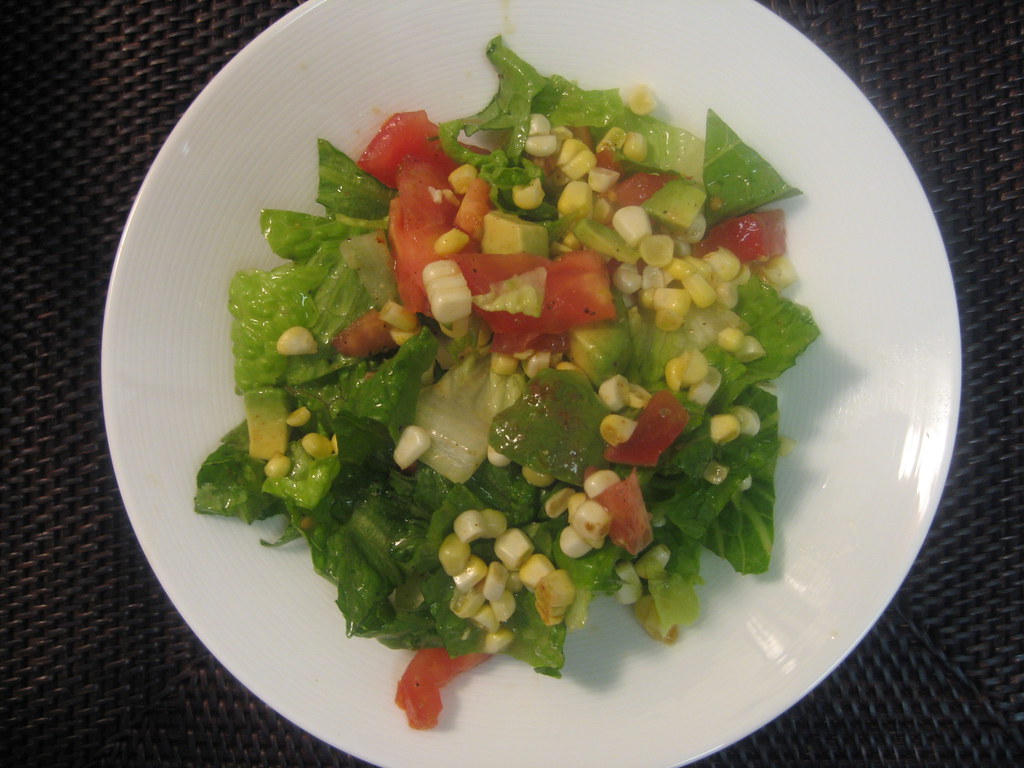
Corn, Tomato & Avocado Salad

 
This is such a lovely summer salad.  The sweet fresh corn goes perfectly with the creamy avocado and chunks of fresh tomato.  You can put this together in seconds and goes great with pretty much anything.  You could serve it with grilled meat, a sandwich or Mexican food.  I found this lovely recipe years ago from Food Everyday and love bringing it out in the summer when all these ingredients are at their prime.  Enjoy!

Corn, Avocado & Tomato Salad
Serves 2

Recipe Notes
I try to use just a little romaine lettuce because the other ingredients are what make it so delicious.  And like I do with a lot of recipes, I have paired it down for two, but you can easily double it if you are feeding more.  
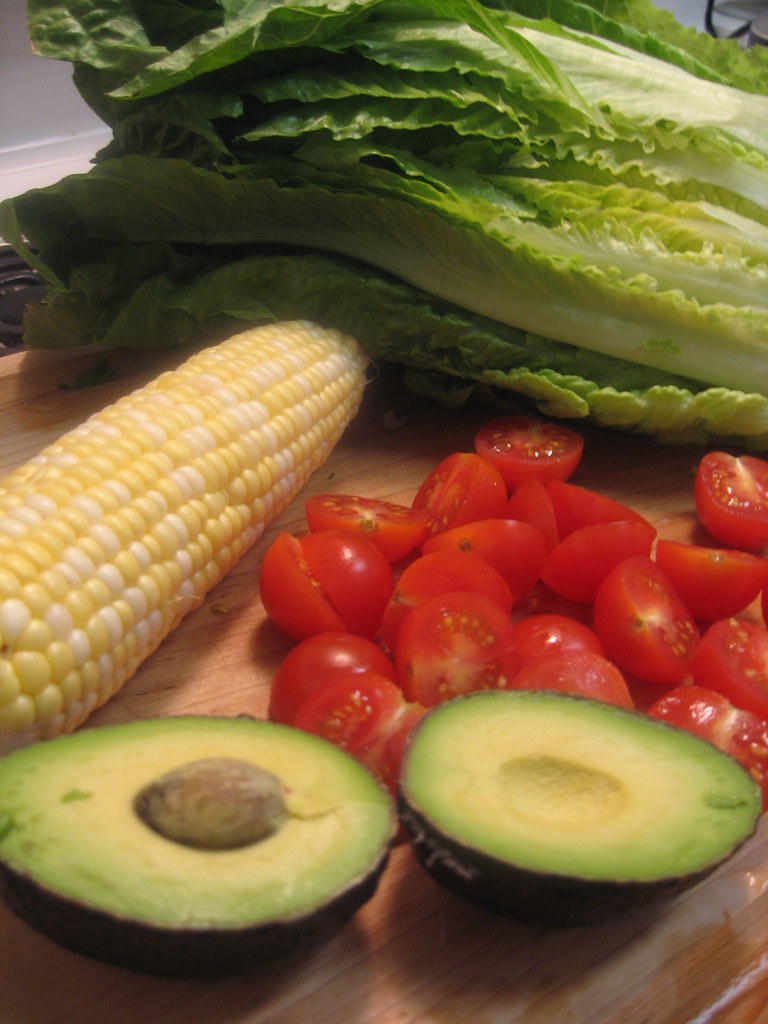
Ingredients
1 cup (approximate) romaine lettuce, cut into 1/2 inch strips
1 cup fresh con kernels
1 cup cherry tomatoes, halved (a vine ripened tomato cut into chunks will work as well)
1 large avocado, peeled, pitted and cubed (or two small)
1 to 2 tablespoons fresh lime juice
1/4 teaspoon of chili powder
Coarse salt & ground pepper
Step by Step
1.  Combine torn lettuce, corn kernels, tomatoes
2.  Separate out 1/4 cup of the avocado cubes.
3.  Take the 1/4 cup of avocado and combine with 1/3 cup water, 1 to 2 tablespoons fresh lime juice and 1/4 teaspoon chili powder.  Season dressing to taste with coarse salt and pepper.
4.  Add the rest of the avocado cubes to the lettuce, corn and tomato.  Toss salad with dressing and serve.

5.22.2009

Introducing Mr. Hungry and his favorite meal.


How can I possibly be sharing my kitchen and recipes and not ever address my biggest taste tester, my husband, Mr. Hungry.  Whether it's the fact that he will eat anything I put in front of him (at least once), or the countless times he has walked in the kitchen and said, "What do you think you could whip up in here for me to eat?"... the name just fits.  
And what better addition to his introduction than his favorite meal: Steak Sammies.  I have to say this is one of those times where my picture just doesn't do the recipe justice.  I'm sure someone could take a more glorious picture of these, but you should trust me and try them! These sandwiches are perfect for so many reasons and especially because they only have 5 ingredients.  The combination of the havarti cheese and seasoned steak and onions pairs perfectly.  I feel like you can't go wrong feeding this sandwich to any man in your life.
Steak Sammies
Serves 2
Recipe Notes
I have tried these sandwiches with both new york strip steak and ribeye.  I personally go for whatever is on sale and I am sure they would be just as delicious with another type of steak.  If you have a thin piece of steak, you can even skip the slicing step and use a whole piece of steak on your sammies.  It is important to let the onions cook in the balsamic vinegar for awhile, but if the edges start to turn black, turn down the heat.   Make sure you let the steak come to room temperature before grilling for best cooking results.
Ingredients
Olive Oil
1 white onion thinly sliced
2 tablespoons balsamic vinegar
4 slices havarti cheese
2 portions of boneless ribeye or ny strip steak
French Baguette

Directions
1. Heat 1/2 tablespoon of olive oil over medium heat.
2.  Add onions and balsamic vinegar and cook for about 15 minutes, stirring occasionally.
3.  Heavily salt and pepper steak and grill until steak is cooked medium.
4.  Allow steak to cool and slice into 1 inch thick slices.
5.  Slice baguette in half horizontally and cut two 6 inch sections.
6.  Lightly brush with olive oil and toast in the oven for 5 to 10 minutes.
7.  Remove bread and stack steak, onions and then cheese on top.  Top with other side of bread and serve immediately. 


5.17.2009

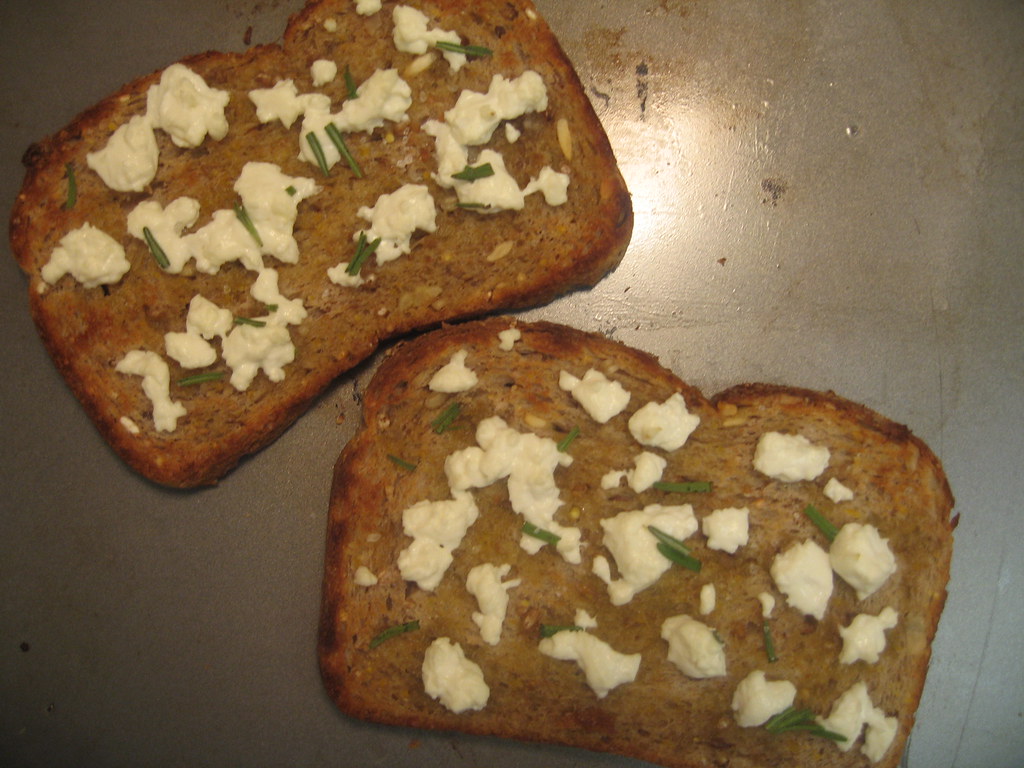
Herbed Goat Cheese Toasts

When you have extra fresh ingredients left over from other meals, it's nice to spice something up like bread to accompany a meal. In this case, it was goat cheese left over from a salad and some whole grain bread I hated to see go bad. I have a slight obsession with cheese, which will be more apparent in the future, so in my eyes, anything sprinkled with goat cheese, could never do you wrong. If you feel the same, I invite you to make these light & delicious toasts. 
Herbed Goat Cheese Toasts
ingredients 
whole grain sandwich bread
crumbled goat cheese
fresh rosemary
olive oil

step by step
1. Preheat oven to 350 degrees.
2. Drizzle bread with olive oil.
3. Sprinkle crumbled goat cheese & rosemary on bread.
4. Finish off with a little kosher salt or coarse sea salt.
5. Place on preferably a rack with slits in it or straight on to the wire rack in the oven
(allowing air to circulate under the bread helps it to get a tad crispy)
6. After 5 to 10 minutes, check bread and when cheese is melted,
put on broil for a couple of minutes to brown the cheese.
7. Watch carefully to not burn while on broil.
8. Remove from oven & enjoy.


5.14.2009

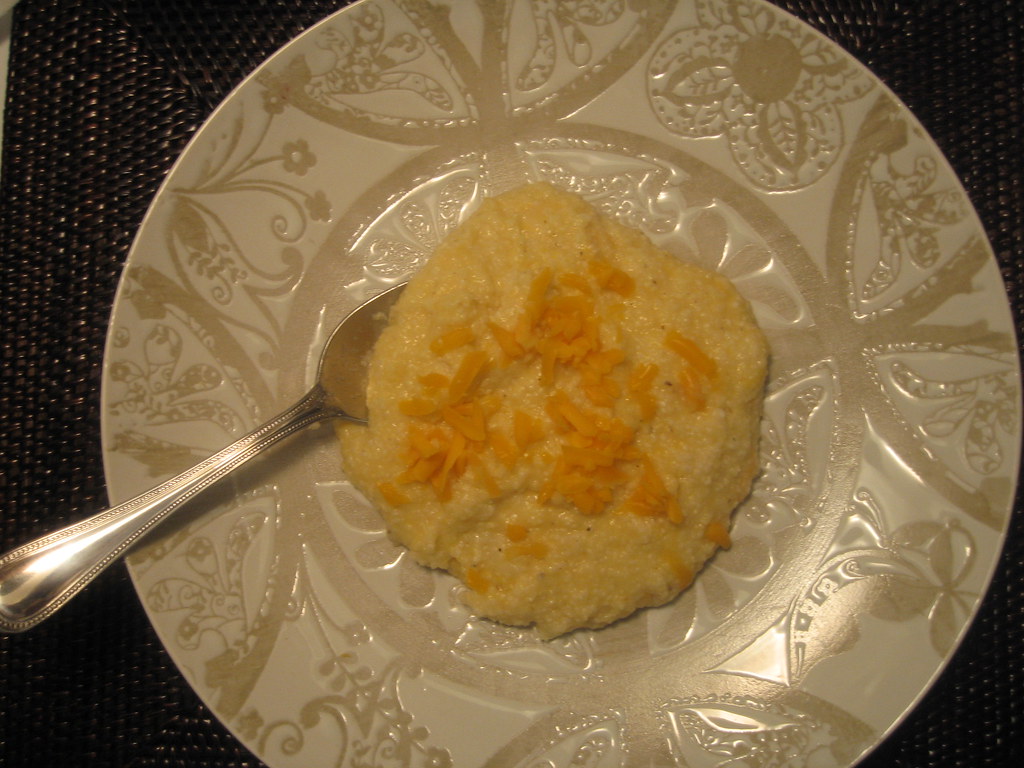
Quick Cheese Grits

After making the same old steamed rice or pasta as a side, I was ready for something new.  These quick cheese grits are delicious and can almost always be on hand.  By simply combining the packets of instant grits I sometimes eat for breakfast, and leftover cheese, I have a whole new side.  They have worked great for me using all sorts of cheeses...whatever you have leftover.  Now of course nothing beats my mom's baked garlic cheese grits (which I hope to feature at some point), but these are perfect for a quick and easy weeknight side.  Even if you have not been a fan of grits in the past, I would encourage you to try these because they come out thick and creamy.  I used them as a side for Lemon Olive Chicken and they paired perfectly.   
Quick Cheese Grits
Recipe Notes
On this particular evening, I used shredded colby cheddar cheese because that is what I had on hand.  However I have used cheddar, parmesan and gruyere before as well.  Cheddar is my favorite!
Ingredients
2 packets of Instant Grits (you may also use two servings of grits from a cylinder of instant grits)
1/2 cup of shredded cheddar cheese + a sprinkle of cheese to serve
1 cup water
Directions
1. Combine all ingredients in a microwave safe bowl and stir to combine.
2. Microwave on high for 1 minute.
3.  Stir to ensure it is heated through.
4.  Remove from the microwave and divide into two servings.
5.  Sprinkle with cheese and serve immediately.


5.12.2009

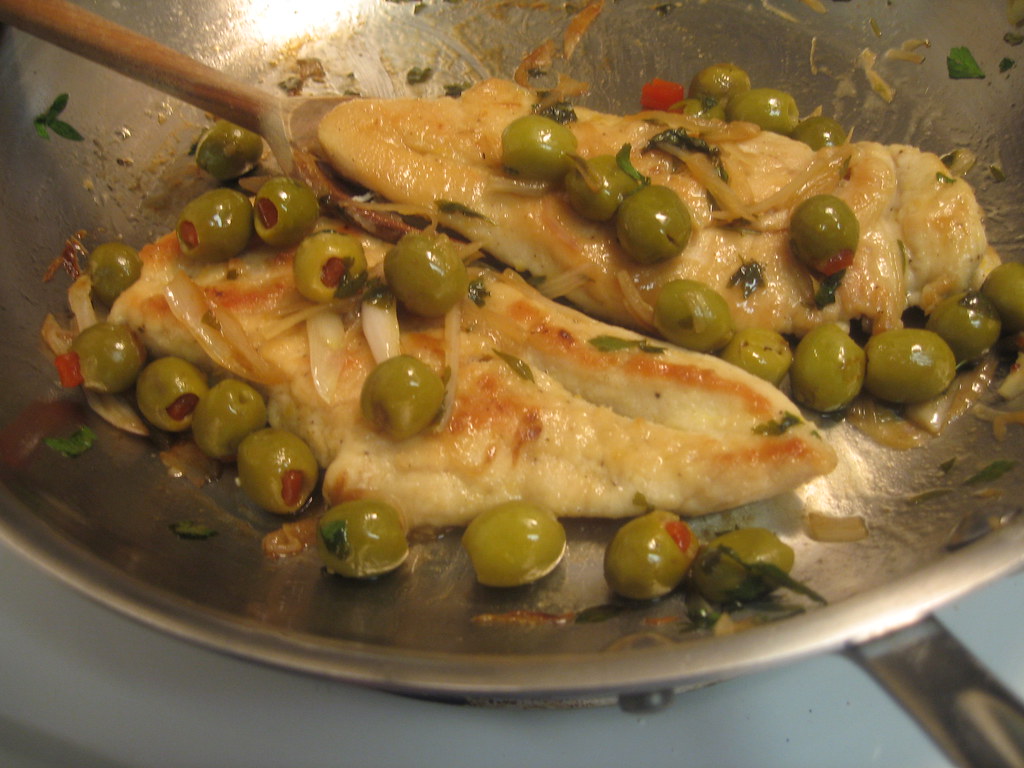
Lemon Olive Chicken for Two

One pan dishes are definitely some of my favorite .  I adapted this recipe from Real Simple online to be perfect for two people.  Sometimes you just don't need leftovers or you only have two chicken breasts on hand, and this is definitely a way to spruce up plain old chicken.  The chicken really soaks up all the flavor from the wine, shallots and olives for a very tasty chicken breast.  


Lemon Olive Chicken
Adapted from Real Simple Online 
Recipe Notes
As I mentioned earlier, I paired down this recipe to be for two.  However, I have tweaked it so that you have more sauce.  My first test with the original recipe left me wanting more sauce.  The original recipe calls for green pitted olives.  I used pimiento stuffed olives that tasted great, so try whatever you think you like.  If you use bigger olives, I would suggest halving them.  A note about chicken cutlets: Chicken cutlets simply mean thinly sliced chicken breasts.  There are a couple of ways to achieve this.  If you go to a grocery store like Central Market, you can pick up a package of chicken breasts and ask the butcher to pound them thinner.  I will say that I asked for this service at my local grocery store, Kroger, and they laughed at me.  So, other options... companies like Pilgrim's Pride sell cutlets or you can simply slice a chicken breast horizontally so that you have two thinner halves.  It is essential for this kind of cut to get a good saute.  
Ingredients
2 tablespoons all-purpose flour
1/2 teaspoon ground cumin
2 teaspoons lemon zest, plus 1 tablespoon fresh lemon juice
kosher salt and pepper
2 chicken cutlets (if cutlets are small, you can do 2 pieces per person)
2 tablespoons olive oil
1 shallot, thinly sliced
1 cup pitted green olives
1/2 cup flat-leaf parsley, roughly chopped
1/2 cup dry white wine  (I used a chardonnay)
Directions
1. Pat chicken dry with a paper towel to remove all moisture.  Mix the flour, cumin, zest, 1/2 teaspoon salt, and 1/2 teaspoon pepper in a shallow bowl. 
2.  Dredge chicken cutlets on both sides in the mixture.
3. 
Heat 1 tablespoon of the oil in a large skillet over medium-high heat.  Saute chicken until no longer pink in the 
 middle.... about 5 to 6 minutes.  Remove chicken from pan and cover with foil to keep warm.
4. Wipe out the same skillet  with a paper towel and heat the remaining oil.
5.  Add the shallot and cook until soft, 5 to 7 minutes. 
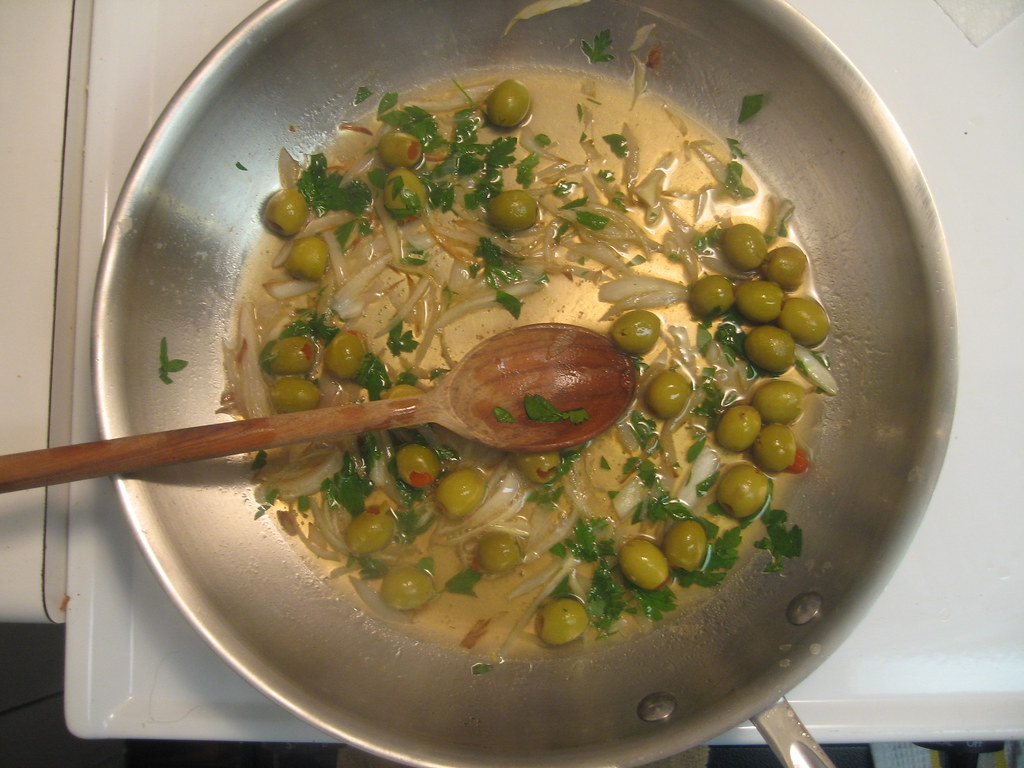
6.  Stir in the olives, parsley, lemon juice, and wine and bring to a low boil.
7.  Add chicken to the pan and spoon sauce, olives and shallot on top.  Cover the pan and simmer on low for about 5
minutes. 
8.  Divide among plates and serve immediately.


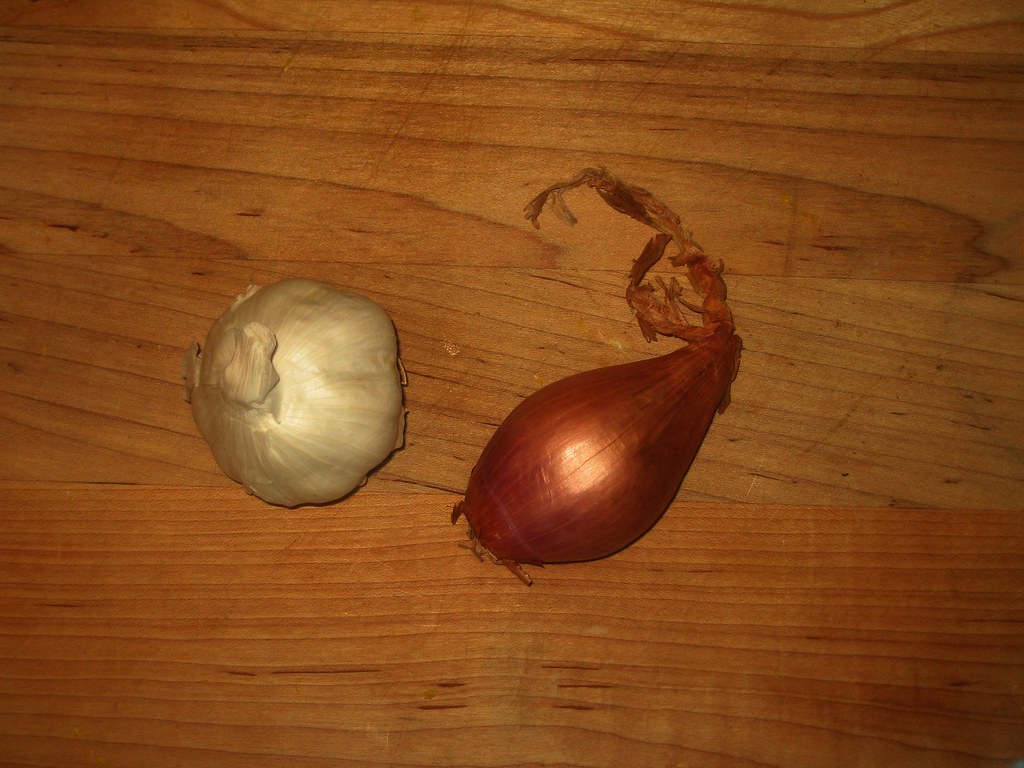
On the right, is a shallot.  If you were already aware of what this is, then just ignore.  I will admit when I first started cooking a lot in Waco, this was a foreign item to me and they were no where to be found in those glorious Waco grocery stores.  It is about the size of garlic and can usually be found near garlic, ginger or onions in a grocery store.  

5.10.2009

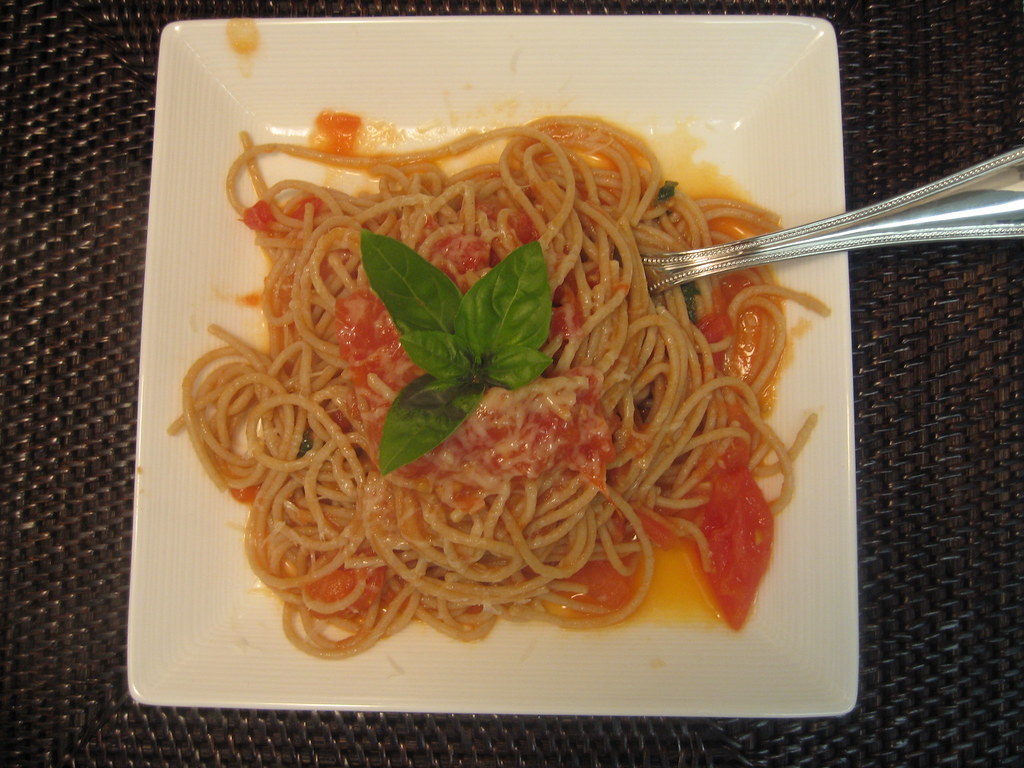
Fresh Tomato Sauce with Whole Wheat Spaghetti

I love convenient canned products, but some items are always be better fresh in my book.   Tomato sauce is one of them and this recipe couldn't be simpler.  This is the first thing I created without following a recipe to a tee and I can still remember the joy I had oh so many years ago of making something without a cookbook... and it actually being tasty.  I have since spruced it up a little, but it is still very simple and delicious!  The best thing is, you really can't mess it up and it makes great leftovers... Enjoy!
Fresh Tomato Sauce with Whole Wheat Spaghetti
Recipe Notes
I will definitely say this recipe is its best during the summer.  It allows the flavor of the fresh tomatoes, garlic and basil to really shine through.  Using summer tomatoes at their peak produces the best results.  Any variety of tomato can work, but I think vine-ripened gives the best flavor.  Having tried several types of pasta, I think angel hair whole wheat pasta is definitely the best.  I enjoy it way more than when I have made it with whole wheat spaghetti.  
Ingredients- Tomato Sauce
2 tablespoons of olive oil
2 cloves of garlic, finely chopped
4 medium sized vine-ripened tomatoes, roughly chopped (bite size chunks)
1/4 teaspoon salt
1/4 cup of torn basil leaves
salt & pepper
1/4 cup parmesan cheese (1/2 cup if you like things extra cheesy)
Pasta
8 oz. angel hair whole wheat pasta (approximately half a box)
Directions
1.  Heavily salt a pot of water and bring to a boil.
2.  Cook pasta according to directions; drain pasta and return to pan.
3.  While pasta is cooking, heat olive oil over medium heat in a separate pan. (do not let the heat get too hot or it will burn the garlic)
4.  Add garlic and let simmer for about 30 seconds (do not let it brown).
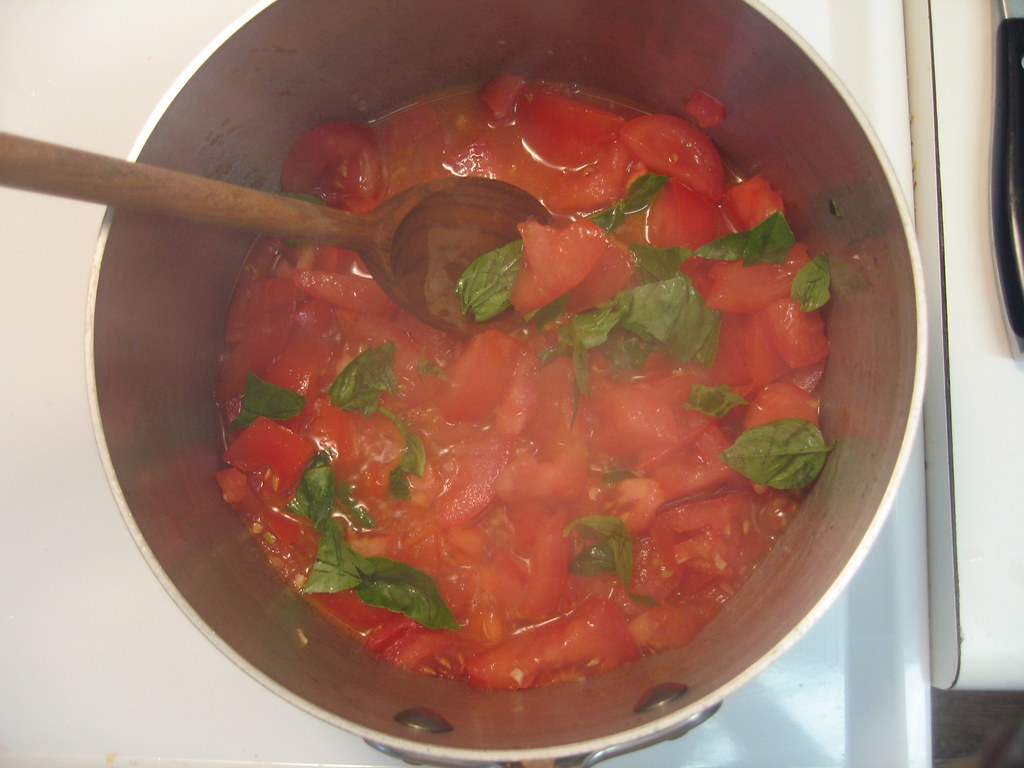
5.  Add tomatoes and salt; bring to a slight boil.
6.  Add torn basil leaves and turn heat down to medium low.
7.  Let simmer for about ten minutes, stirring occasionally.  Taste the sauce and add extra salt and pepper to taste. 
8.  Add pasta and sauce together over low heat. 
9.  Right before serving, toss with parmesan cheese.
Serves: 2 main course servings or 4 side servings
this recipe is my first in a category called skinny cook.  this category is for healthy recipes.  If you were to stick to recipes only in this category, I believe that is exactly what you would be... a very skinny cook.  Good luck with that though.  I myself think life is just not fun without a fresh strawberry cupcake every now & then. 

5.07.2009

Angel Hair Pasta with Shrimp & Pesto... from leftovers.

I am very picky about leftovers. I often think that meats get a little funky or if something sits there too long, I just don't want to touch it again.  And even if they do taste good, who wants to eat the same meal for 3 days in a row?  However, when something reheats well it is worth having on hand so you don't have to cook from scratch every night. With just a tiny adjustment, you have a completely different meal! This meal is an extra bonus because it combines the leftover Angel Hair Pasta with Spicy Shrimp from yesterday's post, and the pesto from the chicken pesto sandwiches posted on April 28th.  So not only do you already have these ingredients, but you make a whole new meal in less than 5 minutes! The flavors go together perfectly. 


Angel Hair Pasta with Shrimp & Pesto
Recipe Notes
The amounts in this recipe will vary a little.  Depending on how much pasta you have leftover, adjust pesto accordingly.  If you don't have tons of pasta and shrimp leftover, use whatever you do have as a side to grilled chicken. My favorite pesto is found at Central Market in the prepared foods aisle.  You really can't beat homemade pesto, but this is pretty close!
Ingredients
2 servings of Spicy Angel Hair Pasta with Shrimp (half of the recipe)
3-4 tablespoons of pesto
Handful of parmesan cheese (optional)
Directions
1.  Heat shrimp pasta in the microwave for about 1 minute or until heated through.
2.  Stir in pesto one tablespoon at a time until covered with desired amount.
3.  Heat an additional 30 seconds.
4.  Sprinkle shredded parmesan cheese on top (optional).
Serves 2

4.28.2009

Chicken Pesto Sandwiches

I grew up not being a sandwich fan at all. I can say I have still never had a peanut butter and jelly sandwich in my 24 years of living and grew up taking cheese and turkey separately in my lunches. I just never warmed up to the idea of soft bread with turkey, mayo and soggy tomatoes. However, sandwiches with yummy ingredients and nice toasty bread are now some of my favorites. This is basically a sandwich I ordered all the time at Central Market and then figured I could easily make this at home. Not only is this so easy, but goes great with really any kind of cheese and your favorite bread can easily replace the ciabatta roll, which happens to be my favorite. This is already a pretty fast meal, but can be sped up even more by using precooked chicken breasts or shredded rotisserie chicken.

Chicken Pesto Sandwiches
ingredients
2 ciabatta rolls
2 thick slices of fresh mozzarella cheese
3 tablespoons of pesto (fresh or store bought)
coarse sea salt

step by step

1. Preheat oven at 375 degrees

2. Generously sprinkle chicken with salt & pepper.

2. Grill chicken till cooked thoroughly.

3.  While chicken is grilling, lightly brush olive oil on one side of the bread and lay a slice of     mozzarella on the other side

4.  Bake both sides of bread in oven for 5 to 10 minutes (cheese melted and bread slightly crispy)

5. Let chicken cool slightly and slice into 1/2 inch thick slices.

6. Set oven to broil

7.  Add sliced chicken to cheese side of bread and 1 1/2 tablespoons to the other side of bread.  Add a couple dashes of coarse salt to taste. 

8.  Bake in oven on broil for 1 to 2 minutes (watch carefully because sandwich can burn quickly).

9.  Remove from oven and combine sides of sandwich.  Cut diagonally to serve.


Ever have all of the wonderful insides of your sandwich come spilling
out when you try to cut your sandwich in half?
Solution! Wrap in wax paper and then cut in half.


Stay tuned later in the week to find a great way to use leftover pesto!