
 There are two situations that you could in find yourself in on this Thanksgiving Eve that could make this recipe quite worth your while.
Showing posts with label appetizers. Show all posts
Showing posts with label appetizers. Show all posts
11.21.2012
Cranberry Apricot Brie
There are two situations that you could in find yourself in on this Thanksgiving Eve that could make this recipe quite worth your while.

6.14.2012
Mini Potato Boats + Father's Day Food

Invite your pops over. If he is not a Southern Baptist minister, crack him open a beer. Find him a cozy chair to settle into and hand him the remote to channel surf for a couple hours. Don't worry, you don't have to be a witness to the channel surfing. You will be busy in the kitchen cooking up a storm. Let's make man food and make our dads proud (and full).

1.20.2012
Buffalo Chicken Meatballs w/ blue cheese dressing

You've got two opportunities in the very near future to kill it with these meatballs.
This is the ultimately perfect football watching food. Superbowl... check.
And if you are looking for someone to fall in love with you on Valentine's (or stay in love with you) these will do it. They are that serious. Perfect appetizer.


And let's get real, if you can get past the idea of gnawing between those bones, you still don't look pretty doing it. Enter these mini buffalo chicken meatballs that have all that good flavor without the carnage.

FYI... Mr. Hungry has updated his favorite thing I have ever ever made to this right here... I told you it was serious.
From my little kitchen to yours... Enjoy.
Buffalo Chicken Meatballs
Adapted from Glamour Magazine February 2012
Recipe Notes
I used nonfat greek yogurt in place of the sour cream because I had it on hand. It makes for a healthier dressing, but if want the full richness of a blue cheese dressing, use sour cream. If you plan on doubling or tripling a recipe for a big party, you do not need to double the dressing. One batch is plenty. Use leftover dressing on a wedge salad. If you are unfamiliar with ground chicken, it can be found in most grocery stores near the ground turkey or ground beef. You could also have a butcher freshly grind a few boneless, skinless chicken breasts if you cannot find it anywhere. Leftover meatballs can be stored in the refrigerator and reheated in the oven or microwave.
Ingredients
1/2 stick (4 tbsp.) butter
1/4 cup Frank's RedHot hot sauce
1 lb. ground chicken
1 tsp. salt
1/2 stalk celery, minced
1 large egg
3/4 cup panko bread crumbs
For the dressing
1 cup sour cream (or nonfat greek yogurt)
1/2 cup milk
1/2 cup crumbled blue cheese
1/2 cup mayonnaise
1 teaspoon salt
1 tablespoon red wine vinegar or balsamic vinegar
(makes 2 1/2 cups of dressing)
Step by Step
Preheat oven to 450 degrees F. In a small pot, combine butter and hot sauce over low heat, whisking until butter is melted. Set aside to cool for 10 minutes. Cover a baking sheet with parchment paper. Place remaining chicken meatball ingredients in a bowl and mix by hand, adding the hot sauce butter mixture as well. Make sure the ingredients are combined throughout. Using a teaspoon, roll the meatball mixture into marble sized balls. Place balls in rows on the parchment paper. Roast until firm and cooked through, about 15 minutes. Allow the meatballs to cool for 5 minutes.
To make dressing, combine all ingredients in a medium sized bowl and whisk until blended. Refrigerate until ready to use.
For an extra kick, drizzle extra hot sauce onto meatballs. Serve with dressing and extra celery.
Makes 65 mini meatballs.
1.13.2012
Honey Comb Goat Cheese Spread
 True story.
 The first time I served this to a crowd was for a ladies tea/ luncheon/ get together sort of thing that I catered in the fall. I spent quite a bit of time preparing all kinds of tea sandwiches, making a few dips and mini appetizers. When I got to the party, I threw together this dish in about 5 minutes.
About 30 minutes into the party, the honey comb goat cheese had been utterly devoured and the other dishes were just starting to show signs of being nibbled on.
Moral of the story: Preparation time does not equal the amount of goodness or popularity of a dish.

Okay, so that is not brain science, but listen up... you are totally going to to need to serve this at your next get together. A tiny bit of extra sweet honey comb with a bite of tangy goat cheese topped off with the burst of a fresh berry or a fig is the definition of a party in your mouth.
 This is just what January needs. Fresh flavors that are a tad funky. This is so 2012.
Honeycomb honey is great. The honeycomb is insanely sweet so a little goes a long way. I'm sure it is quite helicopter momish of me, but I feel like I must instruct people on how to eat this. If I'm leaving the party, I make sure to instruct folks and also urge them to pass on the word to other guests who might not have shown up yet. It's just that if you get the perfect bite, it is pure bliss.
So my instructions include: Grab a cracker, slice off a tiny piece of the honeycomb... like 4th of a marble size tiny... scoop a little goat cheese honey mixture and top with a berry. Perfection.
From my little kitchen to yours... Enjoy.
Honey Comb Goat Cheese Spread
Recipe Notes
Honey with a honey comb can be bought at specialty grocery stores and some of the larger stores as well. If you are in Texas, HEB carries the brand pictured below. It will be on the shelf with the rest of the honey selection, but look closely and you will see a honey comb floating in the middle of a few varieties. Use berries depending on the season. I love fresh figs this time of year, but raspberries and blueberries (or a mix) are also great choices. If using figs, cut off stems and quarter them. I also like to serve this with two types of crackers. Wheat Thins ( I like the "BIG" ones that are a little bit larger of a square than the regular) and Wafer thin crackers that seem to be popping up in most grocery stores. There are a lot of brands, but this is what they look like.
Ingredients
1 jar of honey with a honey comb (see recipe note)1 large log of goat cheese (10 or 11 ounces), or the same amount of pre crumbled goat cheese
1 to 2 cups of figs, raspberries, blackberries, blueberries
Your favorite plain crackers and Wheat Thins, for serving
Step by Step
Remove honey comb from jar of honey and place in the middle of a large serving platter. Drizzle a little bit of honey on the rest of the plate. Crumble goat cheese all over the plate and honey comb. Drizzle a little more honey on top. Sprinkle berries on top.
Serve with crackers.
Serves 8 to 12.
12.30.2011
Truffle Butter Popcorn

Ah, these days.
I love 'em. Christmas was fantastic... I love the fresh start of a new year...and here we are in the in between. It's totally perfect. It's like these days don't count. It feels right to sleep absurdly late. It seems perfectly acceptable to see two movies during the day.
It's the perfect afternoon to throw away every sock that doesn't match and try to find matching lids to tupperware. Yep, I'm totally ignoring my rotting Christmas tree and opting to organize the kitchen and my closet. By the time 2012 rolls around, I'll be moving at the speed of light because everything will be so organized. It's my vision...I'm goin for it.
In the meantime, we must ring in the New Year. Make it fun. Keep it simple. Ignore the hype.
Make this fancy popcorn that is exactly that... fun and fancy and ridiculously simple.
Truffle popcorn and champagne is all you need to say goodbye to 2011 and hello to 2012.
Hope you have a smashing New Year's and I'll catch ya in 2012.
Truffle Butter Popcorn
Recipe Notes
Truffle oil is expensive, but totally worth it. I have a tiny bottle that cost about $12, but has lasted years. You only need a smidge so make the investment and you will have a sprinkle whenever you need it.
Ingredients
1 bag unsalted, unflavored popcorn (8 to 10 cups popped)
2 tablespoons butter
1/2 teaspoon truffle oil
1 to 2 tablespoons freshly grated parmesan cheese, to taste
kosher or fine sea salt
Step by Step
Melt butter in a small microwave safe bowl. Mix truffle oil into butter. Pop popcorn. As soon as popcorn is finished pour in a medium sized bowl. Drizzle butter mixture over popcorn, making sure to turn the popcorn and evenly coat. Sprinkle parmesan evenly over popcorn while still warm. Taste popcorn and add salt to taste. Serve immediately or reheat in a 350 degree oven for about 5 minutes.
7.18.2011
Antipasto Platters

I make a mean antipasto platter.
I'm not sure that's really an accomplishment since there is little that you are actually cooking, but they are always a hit at cocktail parties. It's kind of the perfect answer to what serve at a party in the summer. You turn on your oven for .5 seconds and then you just assemble.
Granted this is another one of my non-recipe recipes, but sometimes the simpler the better. And what better for a cocktail party than savory food that you do not have to keep warm and can be assembled ahead of time? Perfection.
This is my personal version of an antipasto platter. Traditionally, they are made with a variety of meats and cheeses, but I like to spice it up a bit. I thought I'd share my favorites, but let's get real, the possibilities are endless.
So let's get started...
I always include marinated tomatoes. Click here for recipe. They have such great flavor and very addicting. You just need to think about these the night before so they can marinate, but that's about all the prep work there. Moving on...
These prosciutto wrapped asparagus are what make this platter feel fancy. Check below for recipe...

My favorite cheese to serve is this marinated mozzarella. This big tub comes from Costco and is super cheap for the quantity. I prefer this to just plain fresh mozzarella balls because these have a lot more flavor.

You need some crackers to balance all this. My two favorites are Carr's table water crackers and these Italian breadsticks that can be found at most specialty grocery stores. They also add nice height.
And then I like to pile on olives. But I'm an olive person. If you are not, let's talk about some other ideas.
Thin slices of prosciutto, cuts of salami, artichoke hearts, sliced hearts of palm, piles of nuts, dried apricots... again more of my favorites, but they all work pretty well.
Hopefully you have something to work with here. Now go ahead and invite your friends over.
From my little kitchen to yours... Enjoy.


Proscuitto Wrapped Asparagus
Recipe Notes
The key to this is having extremely thin proscuitto. If it is thick, it will be hard to bite through. Costco sells a great prepackaged very thinly sliced prosciutto at a great price. Or ask your butcher to cut it paper thin. Be careful to not overcook the asparagus. You want it slightly cooked, but still crunchy... not mushy. Asparagus size can vary dramatically so if you have very thin spears, keep your eye on them.
Ingredients
Asparagus (2 to 4 per person)
Prosciutto, about 1/2 a slice per piece of asparagus, sliced paper thin.
olive oil
kosher or sea salt
freshly ground pepper
Step by Step
Preheat the oven to 375 degrees F. Trim the white, woody ends of Spread the asparagus in one layer on a rimmed baking sheet. Drizzle with olive oil and sprinkle with salt and pepper. Roast asparagus for about 5 minutes (see recipe note for timing). Remove from oven and allow to cool.
Cut each piece of prosciutto in half, so you have two strips. Wrap each piece of asparagus with a half piece of prosciutto. Repeat until all asparagus have been wrapped. Can be made up to 6 hours in advance and kept refrigerated. Serve at room temperature.
olive oil
kosher or sea salt
freshly ground pepper
Step by Step
Preheat the oven to 375 degrees F. Trim the white, woody ends of Spread the asparagus in one layer on a rimmed baking sheet. Drizzle with olive oil and sprinkle with salt and pepper. Roast asparagus for about 5 minutes (see recipe note for timing). Remove from oven and allow to cool.
Cut each piece of prosciutto in half, so you have two strips. Wrap each piece of asparagus with a half piece of prosciutto. Repeat until all asparagus have been wrapped. Can be made up to 6 hours in advance and kept refrigerated. Serve at room temperature.
5.02.2011
Roasted Shrimp Cocktail

Shrimp lovers, let's make a bet.
Make this recipe and you will never again be as excited about boiled shrimp cocktail. Not to take the wind out of your sails for boiled shrimp, but the simple step of tossing these with olive oil, salt and pepper and roasting gives so much more flavor than boiling in water and serving ice cold.
This is one of my favorites for an appetizer or cocktail party because it's easy and fancy all at the same time.
From my little kitchen to yours... Enjoy.


Roasted Shrimp Cocktail
Adapted from Ina Garten
Recipe Notes
One thing that makes this recipe incredibly easy is if your shrimp are already peeled (tails left on) and deveined when you buy them. My go to store for this item is Costco. In their freezer section, they have large 15- 20 count shrimp (and they also carry larger shrimp) in 2 1/2 pound bags for $9.99 a pound. This is such a steal for the fact that they are high quality shrimp and they are already peeled a deveined. You can look up homemade cocktail sauce recipes, but I like the prepared cocktail and remoulade sauce from Central Market that can be bought in the seafood section (literally in the seafood section, on ice, next to the fish).
Ingredients
2 lbs. large shrimp (15-20 count), peeled and deveined with tails left on
2 Tablespoons olive oil
1 1/2 teaspoons kosher or sea salt
1/2 teaspoon freshly ground pepper
To Serve:
Cocktail Sauce
Remoulade Sauce
Step by Step
Preheat oven to 400 degrees. Place shrimp on a baking sheet. Toss with olive oil, salt and pepper and spread in one layer. Roast for 8-10 minutes, just until pink and cooked through. Set aside to cool. Serve warm or at room temperature.
Makes 6 to 8 servings.
4.21.2010
Herbed Goat Cheese Stuffed Tomatoes

I am starting to have a serious urge to prepare everything bite size. Every time I see a cake or an appetizer dip, I start thinking about how I could make it into mini portions. Not sure what this urge has to do with, but I'm goin with it and I have a couple of bite size sussies to share with you.
Maybe it has something to do with being at a party or restaurant and not sitting close enough to the appetizer. You know, you are at a long table and you just feel like a beef cake if you reach over 4 people one more time to get another nacho. Or you are at a cocktail party and you are trying to balance a glass while taking a bite of something with a tiny little fork all the while trying you are trying to keep up conversation with people you barely know. So here's my solution. This way, everyone can either get a few bites or make a balancing act a little bit easier.
I made these for a ladies luncheon a couple of months ago and everyone seemed to really enjoy them. I think my above point was proven because these went way faster than the pasta salad or fruit, which required a fork.
From my little kitchen to yours... Enjoy.

Herbed Goat Cheese Stuffed Tomatoes
Adapted from here
Ingredients:
24 cherry tomatoes, a mixture of red and yellow if possible1/4 lb. chevre (fresh goat cheese)
1 tsp. half and half
1/8 c. basil, minced
1/8 c. parsley, minced
1/2 tsp. salt
1/2 tsp. freshly ground pepper
Directions:
Cut a circle in the top of each and with a small spoon or the edge of the knife, scoop out the juice and seeds. This should produce a sturdy, hollow shell.
In a small bowl, combine the remaining ingredients and mix until combined. Using a small spoon, a pastry bag fitted with a small tip, or a ziploc bag with the corner cut off, fill each tomato with the herbed goat cheese mixture.
Just plate and serve. These can be made the night before and refrigerated until ready to serve.
11.18.2009
Baked Brie + A Memorable Thanksgiving
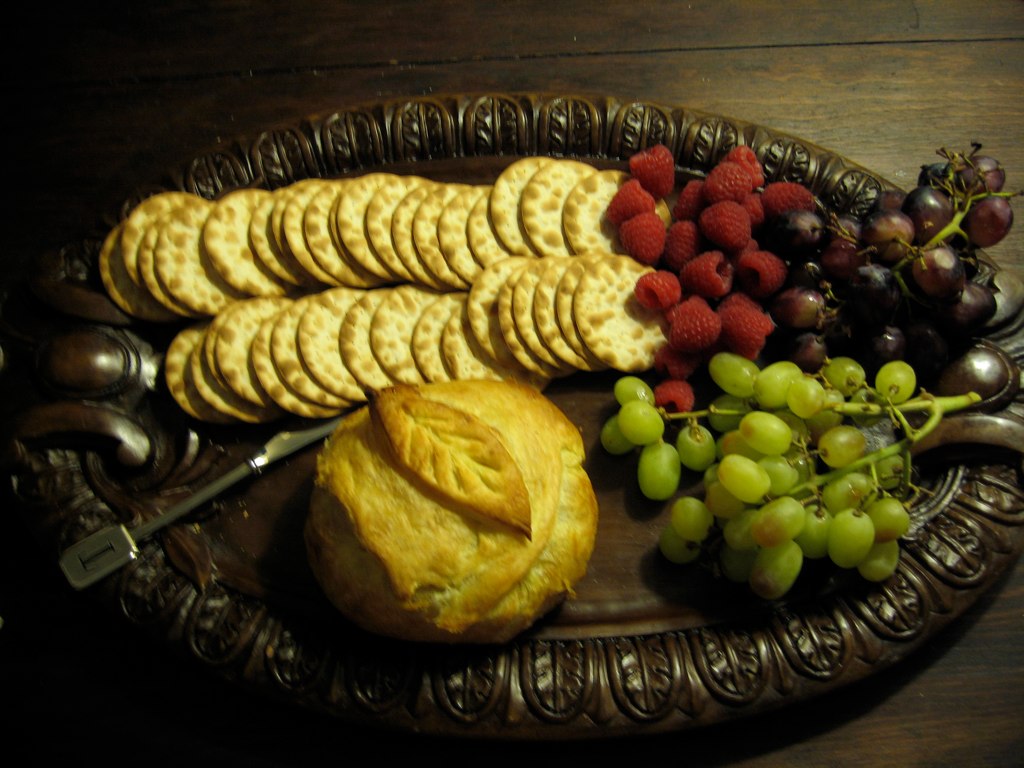
Baked Brie
Ingredients
1/2 package frozen puff pastry, thawed
1 8 oz round brie cheese wheel
1/8 cup toasted pecans
1/4 cup apricot preserves
egg wash, one egg lightly beaten with one tablespoon of water
Step by Step
1. Preheat oven to 425 degrees.
2. Lightly grease a cooking sheet or use a non stick cookie sheet.
3. Roll puff pastry out slightly on baking sheet.
4. Sprinkle pecans in the middle of the pastry (no wider than the wheel of brie)
5. Spoon preserves on top.
6. Place cheese wheel on top of nuts and preserves.
7. Bundle pastry dough around brie being careful to closely wrap the dough on the brie without letting the dough tear..
8. Flip the pastry over and make sure all corners are tucked in underneath the pastry so that the preserves do not leak out while being cooked.
9. Optional: Use additional pastry to cut a shape and place on top of pasty dough.
10. Using a pastry brush, lightly coat the pastry dough with the egg wash.
11. Bake for 20 to 25 minutes, until pastry is golden brown.
12. Serve with your favorite crackers and fruit.
And on to what I call a memorable Thanksgiving... Last year was a first for me and my family. It was our first holiday that my brother and I would both be with in-laws. I was excited to spend Thanksgiving with Mr. Hungry's family, but I did not want this year to be remembered only for the fact that my parents did not have either of their children for the first time. So instead, Mr. Hungry and I went to an extreme length to turn this into the most memorable Thanksgiving my family has ever seen. We decided to have a traditional Thanksgiving meal a week before the actual day with everyone's favorite dishes. This is all that my parents and brother and sister-in-law knew. They had no idea that when they arrived, there would be two pilgrims greeting them with costumes to turn this into a traditional celebration of Pilgrims and Indians. Or that we would spend the night playing Thanksgiving themed games. I will say, the first 10 minutes of my parent's arrival was spent with tears rolling down both of their faces in disbelief of Mr. Hungry in a pilgrim's cap. It was memorable to say the least. I have a feeling I will soon be getting in trouble for sharing these pictures, but I just thought if there was anyone out there that needed to turn a sad holiday into a memorable one, a few head dresses and prairie skirts can do the trick. I was inspired to share this because I am again hosting our Thanksgiving meal tonight. So no matter what your reasons are for needing to start new traditions for a holiday, there are plenty of ways to spice up a special day.
Life has been a little busier this fall so it will not be quite the same soiree(I think we might have set the bar too high), but I want to keep the tradition alive. No costumes this year, but the menu is a Thanksgiving dinner with a twist. I will get back to you shortly with recipes and how all of that goes.

My father... taking his role as an Indian very seriously.

11.11.2009
Sliders

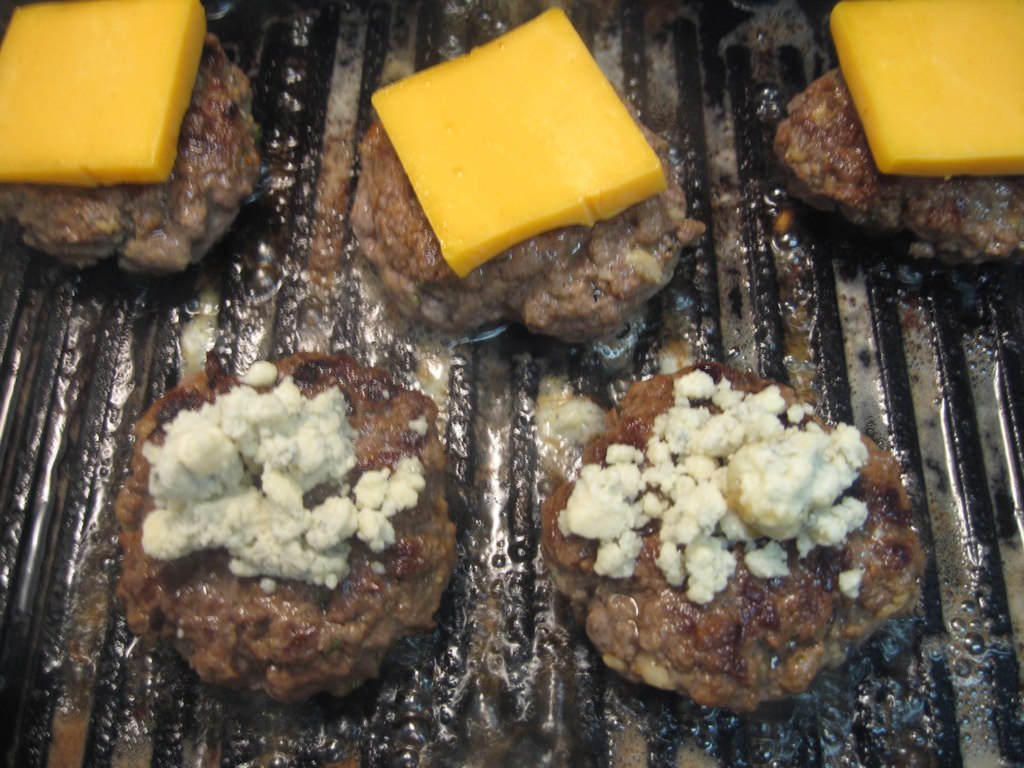
Oh, I love a good burger. I am not the type to order one just anywhere I go, but a well seasoned burger with my favorite toppings is a favorite. When I saw Ina make these the other day, I knew I had to try them. This was my first attempt at finding a good hamburger recipe and my search is over. There is so much flavor in the meat and the combination of herbs and spices makes for a very tasty burger. This was delicious and sliders are easy to handle and allow you try try different combinations in one meal. For example, we had half with blue cheese and half with cheddar. Whether you are feeding two or a crowd, they work for anything!
From my little kitchen to yours... enjoy.
Sliders
Adapted from Ina Garten
Recipe Notes
Ina's original recipe called for thyme. I had rosemary on hand so that is what I used, but either will work great. I also added the worcestire for an extra kick, but if you do not have any on hand, you do not need to worry because you will still have very flavorful burgers. For the buns, I used kaiser rolls, but any mini sized bun will work.
Ingredients
- 1 pound premium ground beef (80 percent lean and 20 percent fat)
- 1/2 tablespoon good Dijon mustard
- 1 1/2 tablespoons good olive oil, plus extra for brushing the grill
- 1/2 teaspoon fresh rosemary, chopped
- 1 1/2 teaspoons chopped garlic
- 1 teaspoon kosher salt
- 1 teaspoon freshly ground black pepper
- 1/2 tablespoon worcestire sauce
- 6 thin small slices of your favorite cheese (I used sharp cheddar on some, and blue cheese on others)
- 6 small buns (I used kaiser rolls) brioche buns work well too
- 2 ounces baby arugula
- 1 medium tomato, sliced in 1/8-inch-thick rounds
- 1 small red onion, sliced in 1/8-inch-thick rounds
- Ketchup, for serving
- Step by Step
- Heat a grill or grill pan to medium high heat.
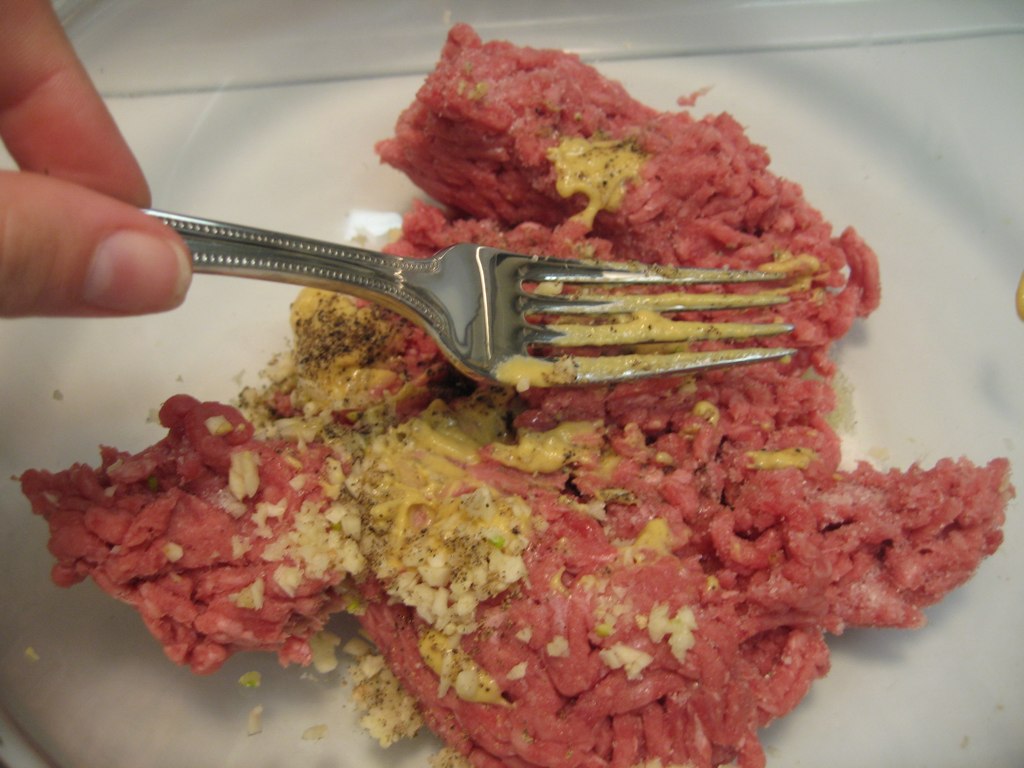
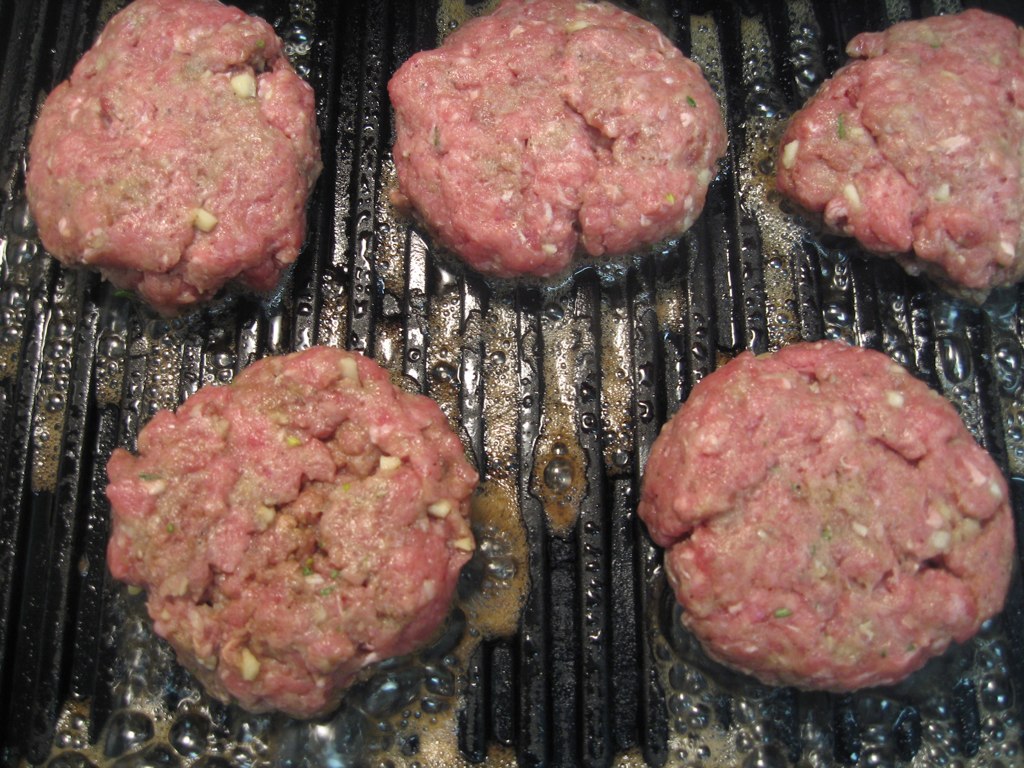
Place the ground beef in a large bowl and add the mustard, olive oil, rosemary, garlic, salt, and pepper. Mix gently with a fork to combine, without compressing the meat. Shape the meat into 12 (2-inch) patties of equal size and thickness.
When the grill is medium-hot, brush the grill grate with oil to keep the sliders from sticking. Place the sliders on the grill and cook for 4 minutes. Turn the sliders over with a spatula and cook for another 4 to 6 minutes, until medium-rare, or cook longer if you prefer the sliders more well done. For the last 2 minutes of cooking time, place 1/2-ounce Gruyere on the top of each burger and close the grill lid. Remove the sliders to a platter and cover with foil.
Slice the buns in half crosswise and toast the halves cut side down on the grill.
Divide the baby arugula among the 12 bottom buns, top each with a slider, and finish with a slice of tomato and red onion. Cover with the top of the bun and serve hot with ketchup.

9.17.2009
Toasted Almond Cheese Ball
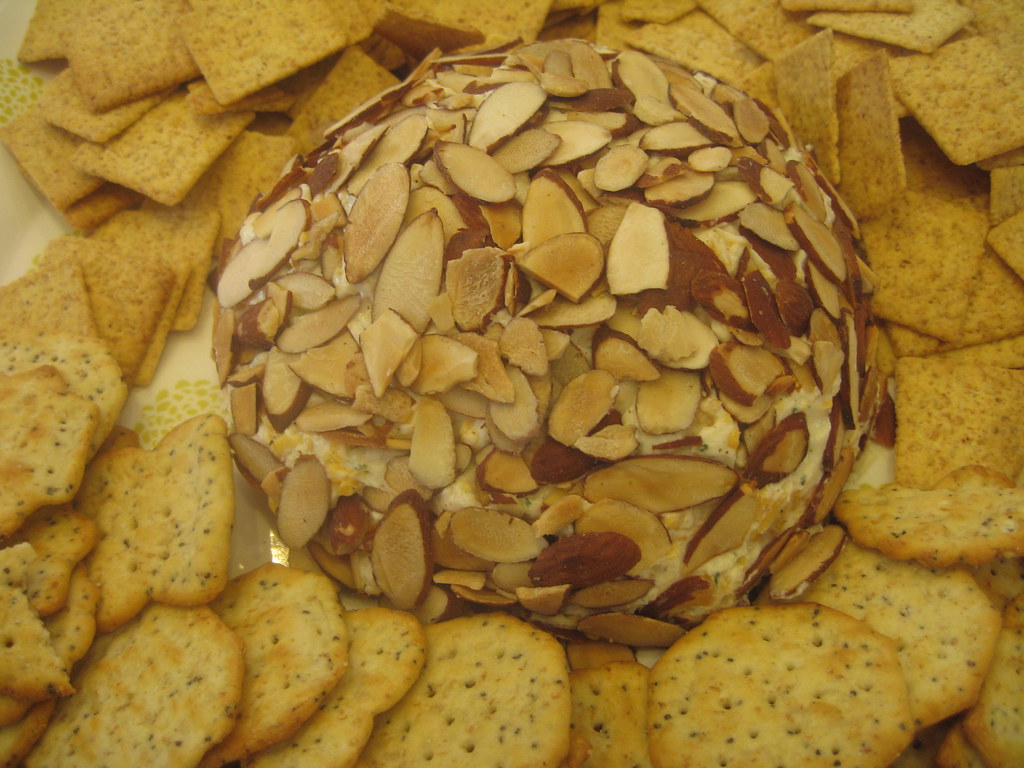
Toasted Almond Cheese Ball
Ingredients
1 pkg. Hidden Valley Ranch Dressing
½ cup milk
½ cup mayo
Mix together
8 ounces shredded cheddar cheese
8 ounces cream cheese
3 ounces sliced almonds – browned (see below)
Step by Step
1. Mix dressing & cream cheese – beat with mixer
2. Add & blend cheddar cheese
3. Cover & put in freezer for 30 minutes
4. Shape in ball and roll in almonds
To brown almonds:
1. Preheat oven to 400 degrees.
2. Spread almonds in a thin layer on a baking sheet.
3. Brown in oven for about 10 minutes until almonds are slightly darker. Watch closely so they do not burn!
4. Serve with your favorite crackers. My favorites are Wheat Thins and Sociables.
9.15.2009
Sweet & Spicy Bacon Chicken Wraps


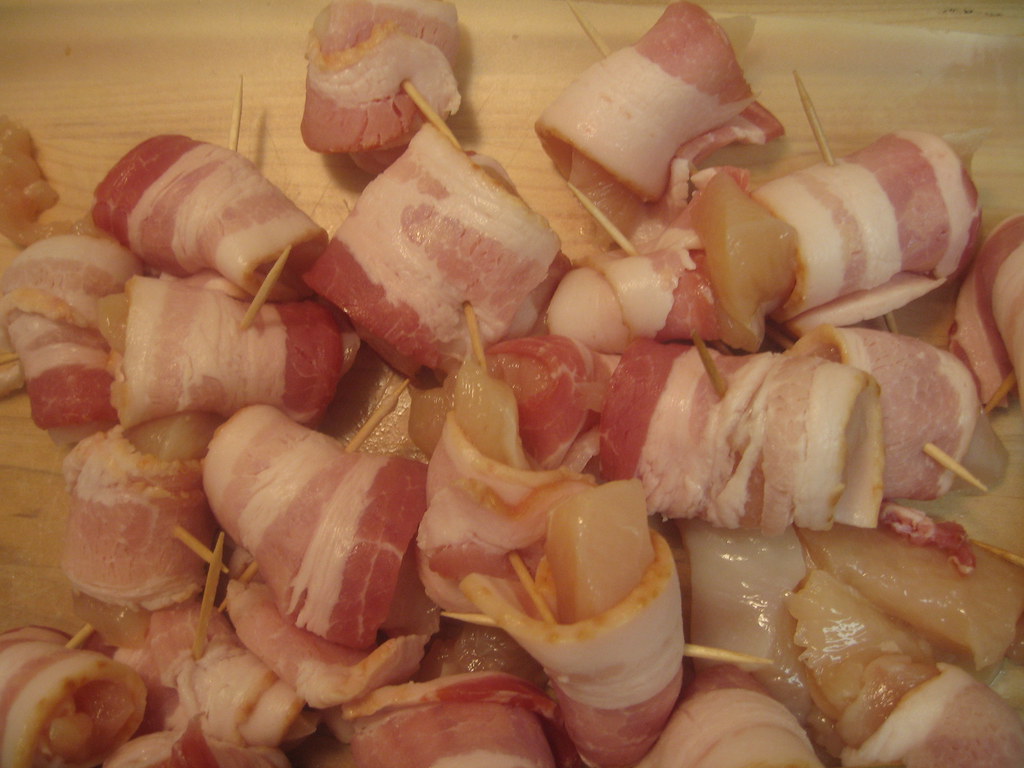
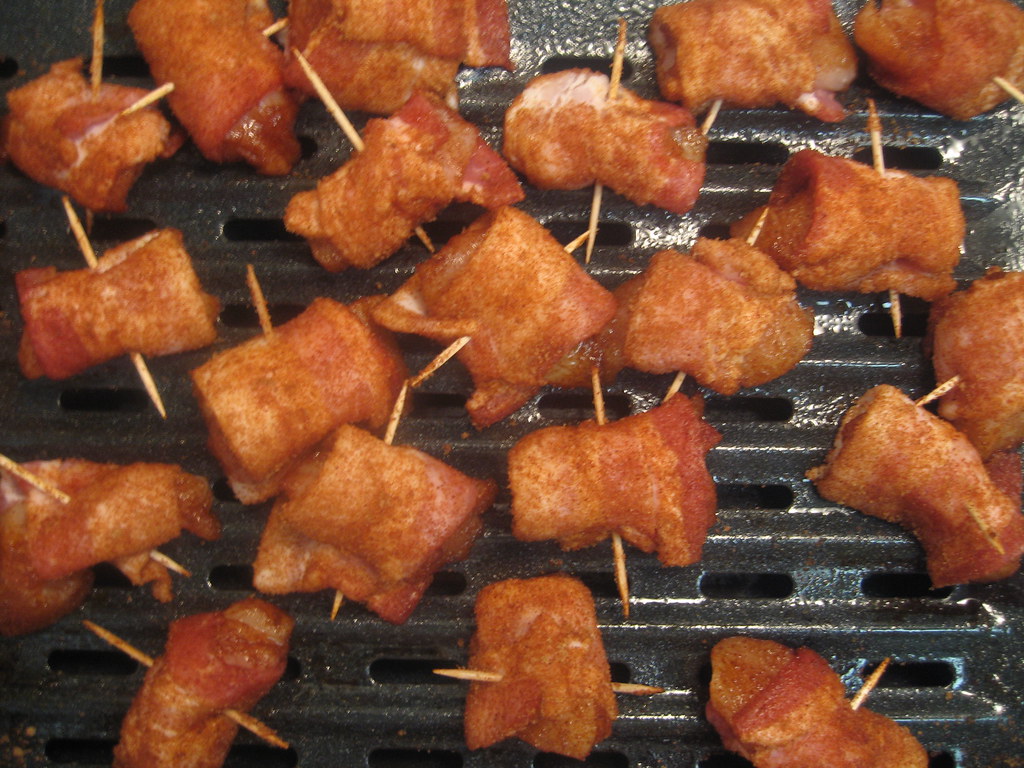
Sweet & Spicy Bacon Chicken Wraps
Recipe Notes
I like to give credit to where a recipe came from or even the inspiration if I did not follow it correctly. However, I was given this recipe in college and do not know the source so forgive me!
Ingredients
1 1/4 pounds boneless, skinless chicken breasts (about 4 breasts)
1 package sliced bacon (about 1 pound)
2/3 cup firmly packed brown sugar
2 tablespoon chili powder
Step by Step
1. Preheat oven to 350 degrees.
2. Cut chicken breasts into 1-inch cubes. Cut each bacon slice into thirds.
3. Wrap each chicken cube with bacon and secure them with a wooden toothpick.
4. Stir together brown sugar and chili powder. Dredge each chicken/bacon wrap through the chili powder/ brown sugar mixture until evenly coated.
5. Coat a rack and broiler pan with nonstick cooking spray.
6. Place chicken wraps on rack and bake for 35 to 40 minutes or until bacon is crisp.
9.03.2009
Marinated Tomatoes

Recipe Note
Below, you will see this calls for grape tomatoes. I would not suggest trying this with any other kind. Cherry tomatoes are close to the same, but grape tomatoes are a little smaller and seem to hold the seasoning better.
Ingredients
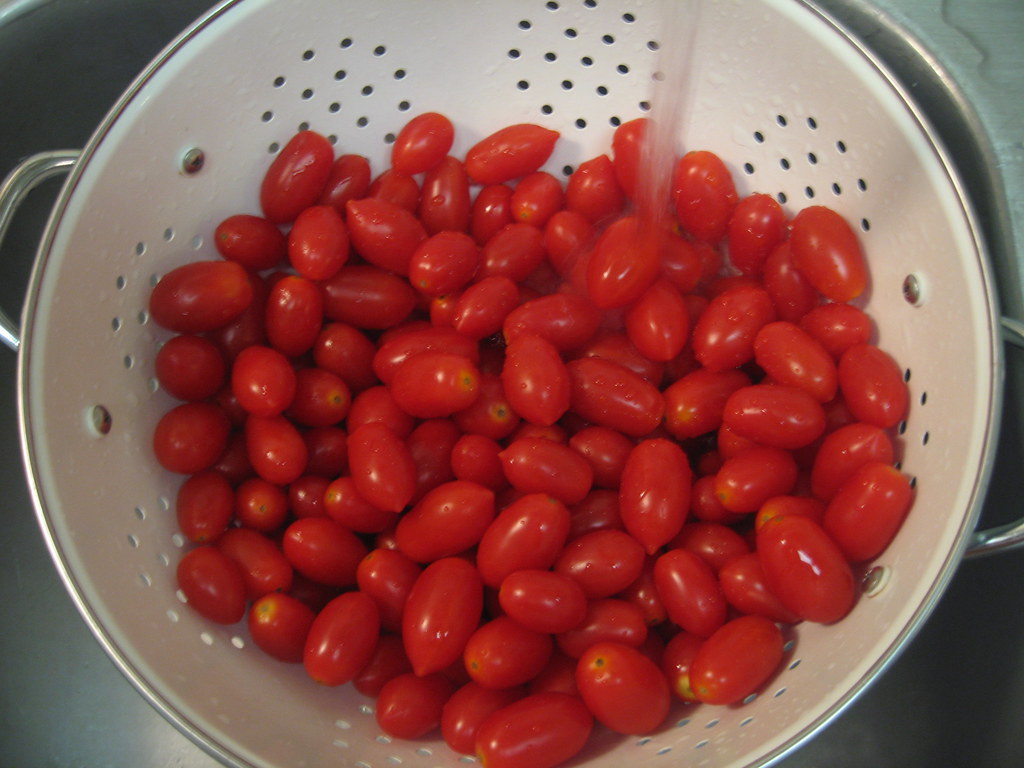
1 pint grape tomatoes
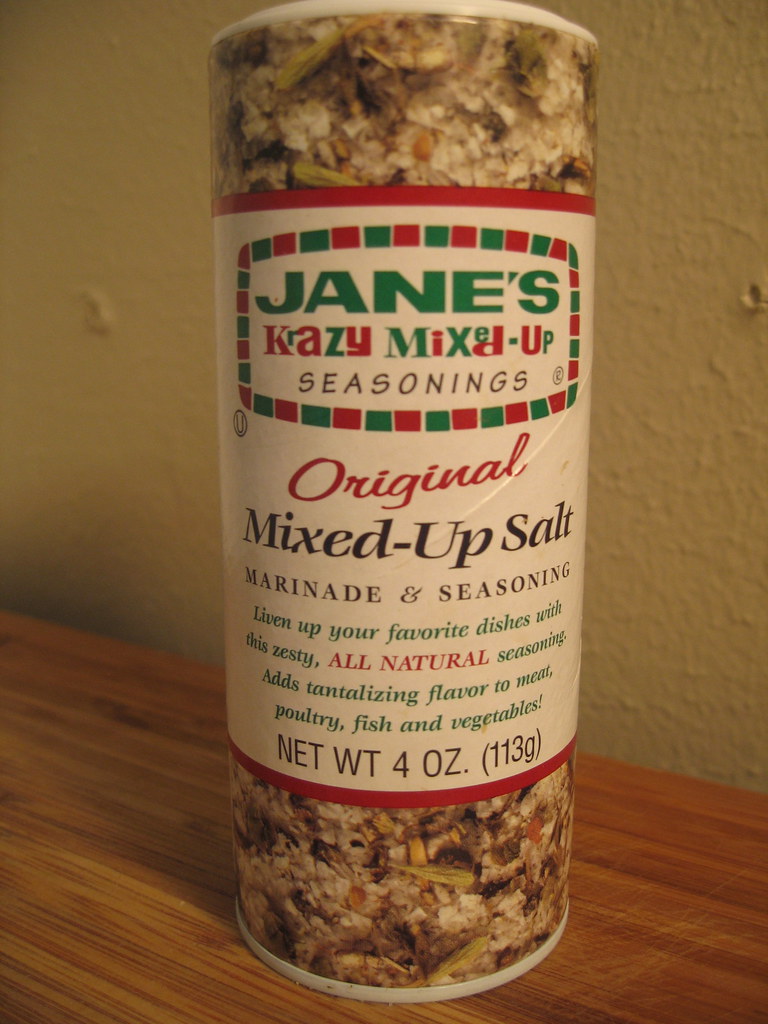
Jane's Crazy Mixed Up Seasoning
Step by Step
1. Rinse tomatoes and put in a medium sized bowl.
2. Sprinkle with water so that the tomatoes are slightly damp.
3. Heavily season with Jane's Krazy Salt and toss tomatoes to coat.
4. Season the top of the tomatoes one more time with seasoning and then cover with plastic wrap.
5. Allow to marinate overnight in the refrigerator.
6. Serve at room temperature or slightly cold.
8.07.2009
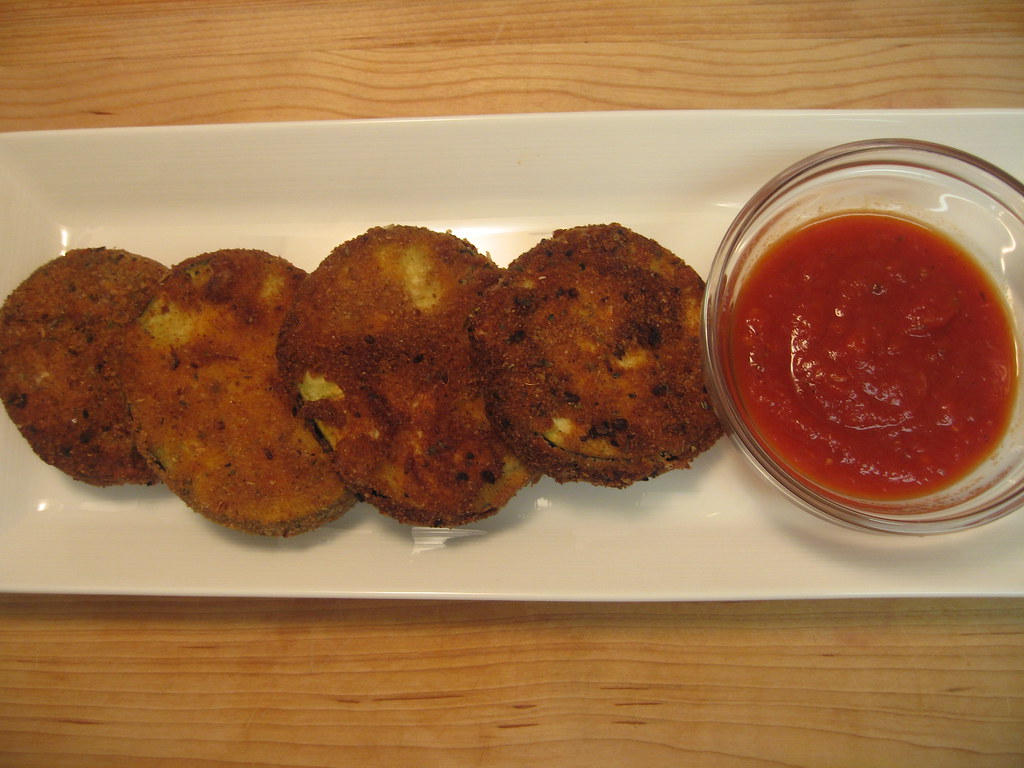
Fried Eggplant


Adapted from Emeril Lagasse from the Food Network
Recipe Note
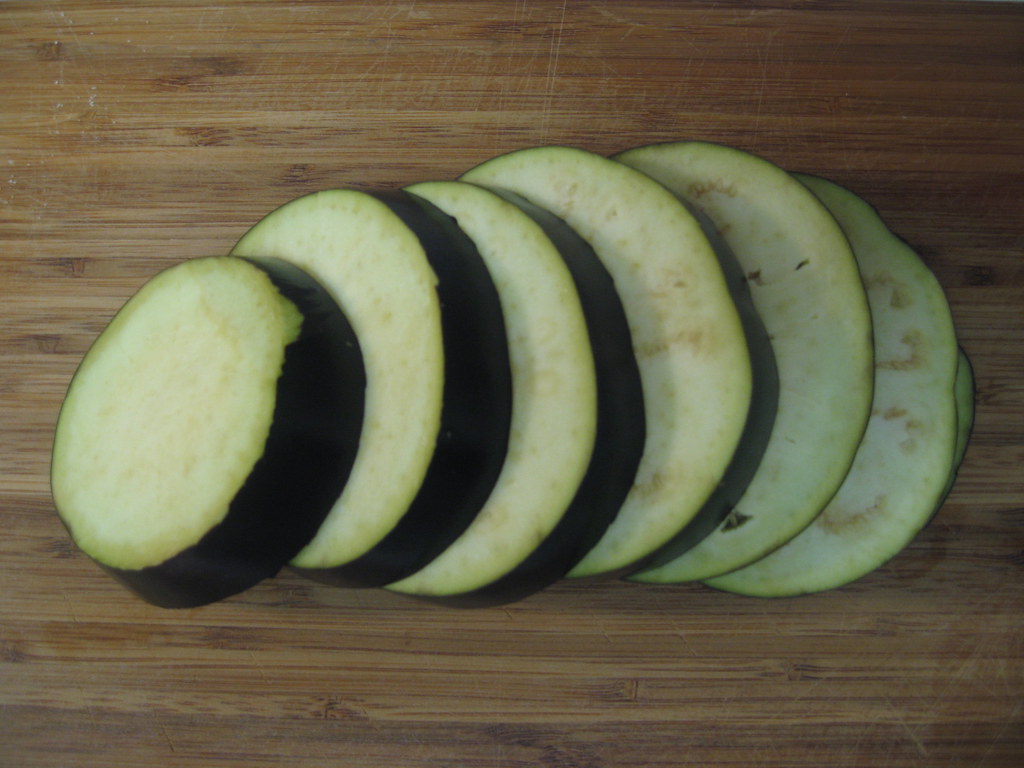
Do not be scared by all the spices that go into Emeril's Essence. I actually didn't use the thyme because I didn't have any and substituted the onion powder for the onion flakes I already had. Of course the goal is to use all of the ingredients, but you can skip one or two if you need to. I would suggest cutting the eggplant no thicker than 1/4 inch. I cut one piece that was slightly thicker and it was a little bit tough. A tip to know when your oil is the right temperature: When you have heated your oil over medium to high heat, sprinkle a little bit of flour in the oil. If it sizzles and pretty much dissappears, your oil is ready.
Ingredients
1/2 cup all-purpose flour or cornstarch
3 eggs, lightly beaten
2 cups fresh bread crumbs
1/2 teaspoon salt, plus additional for sprinkling eggplant
1 tablespoon Essence, recipe follows
1 small eggplant, cut into 1/4 inch disks
Vegetable oil, for deep frying
Marinara sauce, for dipping
Ingredients for "Emeril's Essence"
2 1/2 tablespoons paprika
2 tablespoons salt
2 tablespoons garlic powder
1 tablespoon black pepper
1 tablespoon onion powder
1 tablespoon cayenne pepper
1 tablespoon dried oregano
1 tablespoon dried thyme
Combine all ingredients in a small bowl.
Step by Step
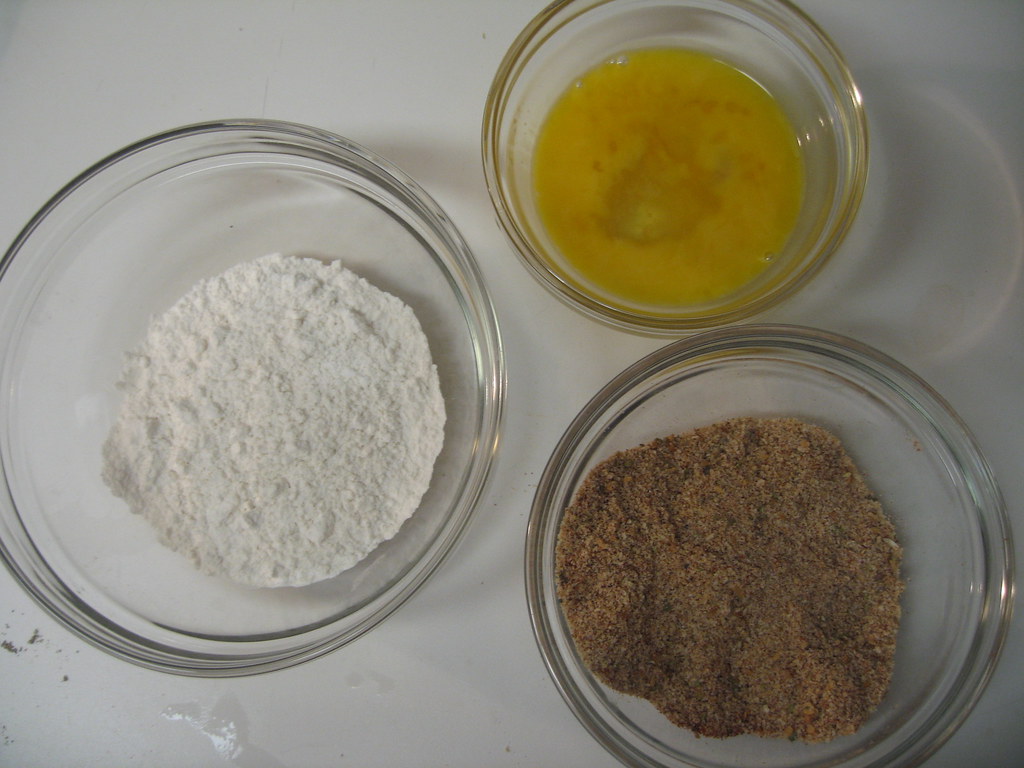
1. Place the flour, egg, and bread crumbs each in 3 small bowls.
2. Add the 1/2 teaspoon of salt to the egg and whisk to combine.
3. Season the bread crumbs with the tablespoon of Essence and stir with a fork or your hands to thoroughly combine.
4. Dredge each piece of eggplant in the flour, coating thoroughly and then shaking to remove any excess flour.
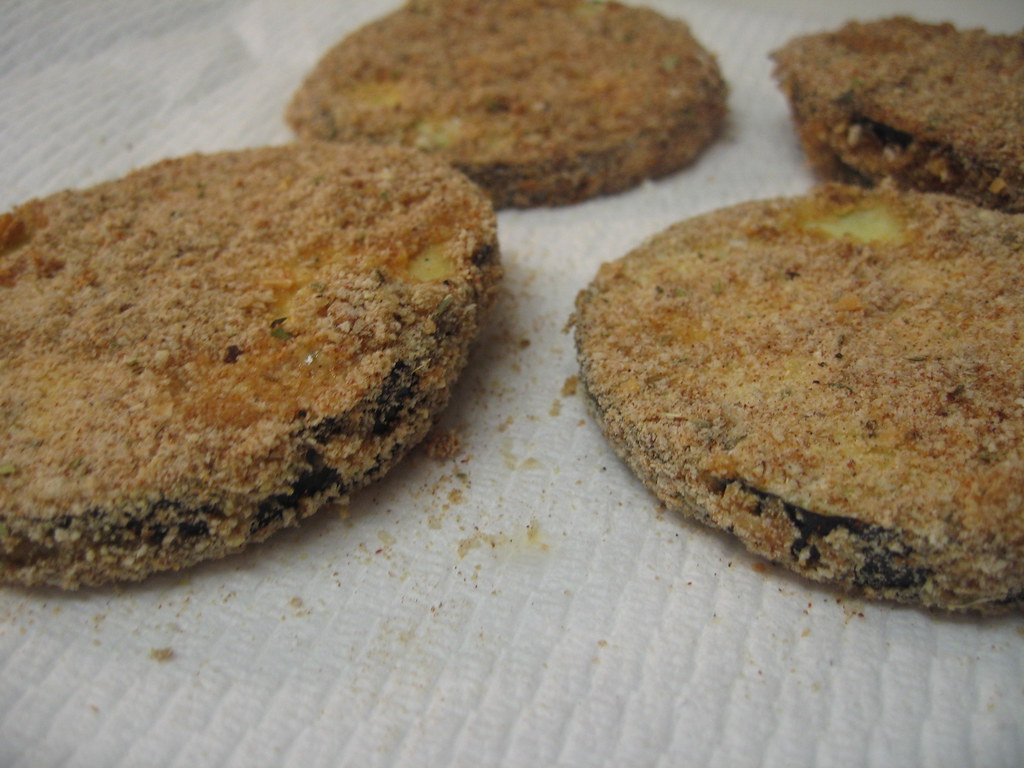
5. Coat each piece with the egg, then dredge in the bread crumb mixture, pressing to make the bread crumbs adhere. Transfer the eggplant pieces to a paper towel to let them dry slightly before frying.
6. In a heavy skillet, heat 1/2-inch of vegetable oil to 375 degrees F (medium to high heat).
7. Fry the eggplant pieces, in batches if necessary, for about 1 minute on each side, or until golden brown. 8. Transfer with tongs to paper towels to drain.
9. Sprinkle lightly with salt before serving. Serve with marinara sauce, or as desired.
7.31.2009
Rosemary, Oil & Vinegar Dipping Sauce
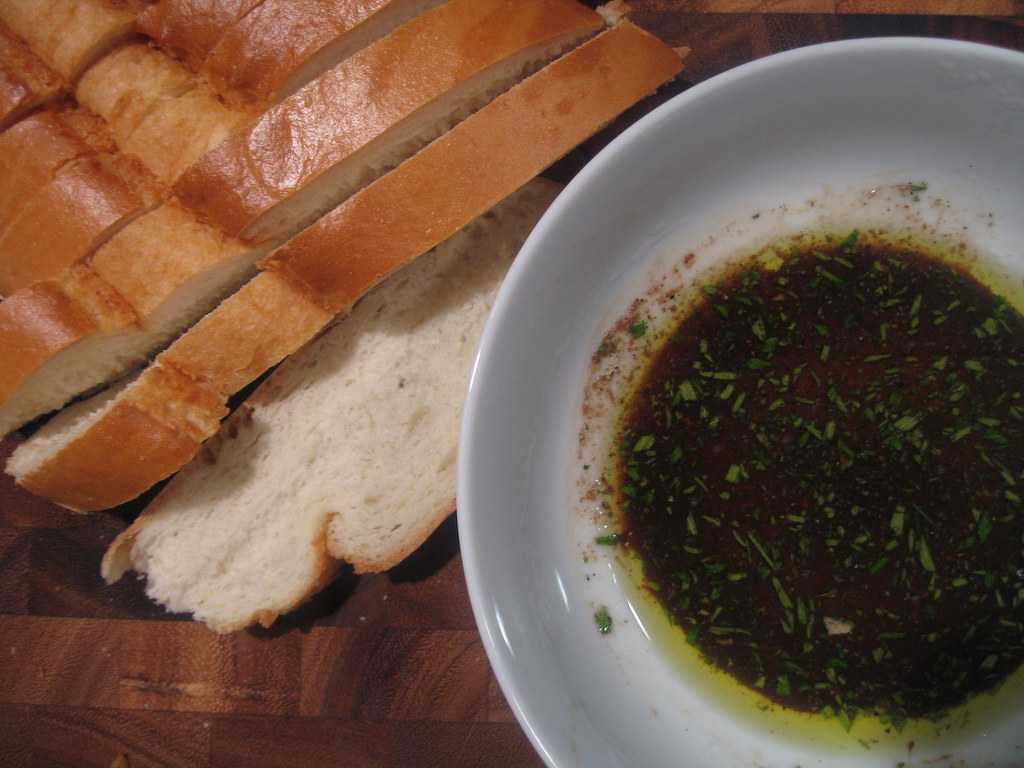
All that to say, I would like to share this wonderful dipping sauce I had last time I was at her house. I know this is nothing too out of the ordinary, but I do hope to share more of her recipes in the future (I just have to follow her around in the kitchen and write down every "splash of this and pinch of that"). Now olive oil and vinegar is something most everyone has had at a restaurant, but the addition of rosemary and sea salt makes this wonderful. This is a great dipping sauce to serve as an appetizer to almost any meal.
Rosemary, Oil & Vinegar Dipping Sauce
Recipe Note
My favorite bread to serve with this sauce is the Rustic Loaf from Central Market.
Ingredients
1/2 olive oil
1/2 cup balsamic vinegar
1-2 teaspoons finely grated sea salt
1 teaspoon finely chopped fresh rosemary
Step by Step
1. Combine all ingredients and lightly stir.
2. Serve with a crusty loaf of bread. My recommendation: Central Market's Rustic Loaf
7.22.2009
Caprese Skewers
Caprese Skewers
Recipe Notes
You can use just red cherry tomatoes if you can't find the yellow ones as well. However, they do add great color if you can find them!
Ingredients
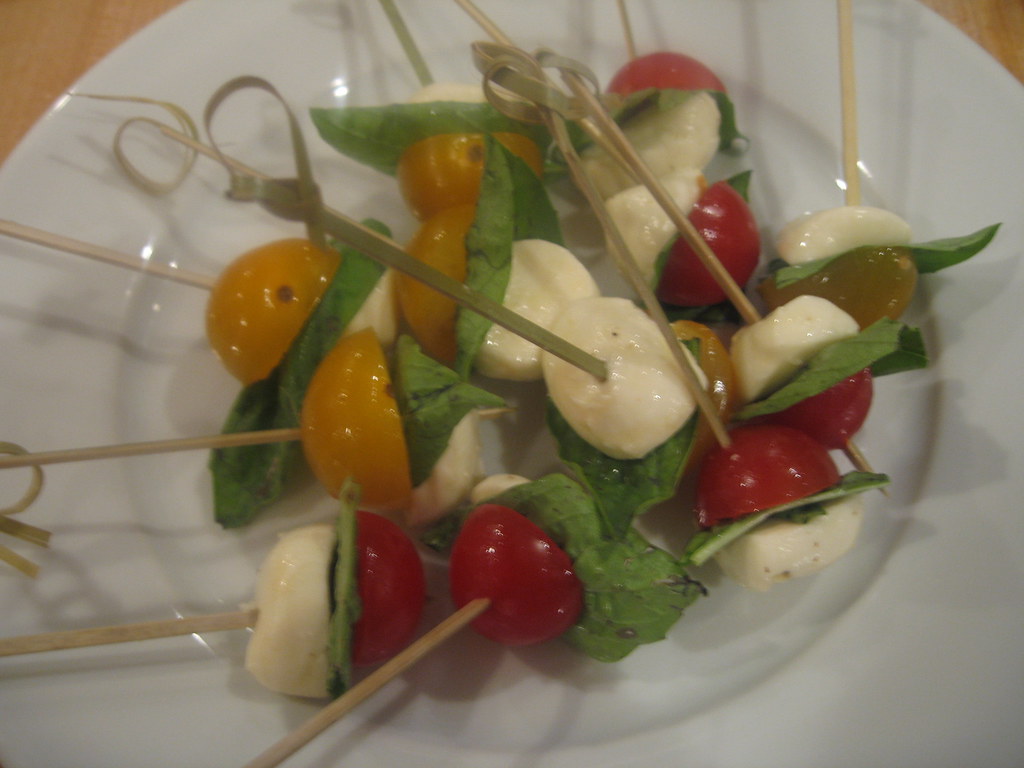
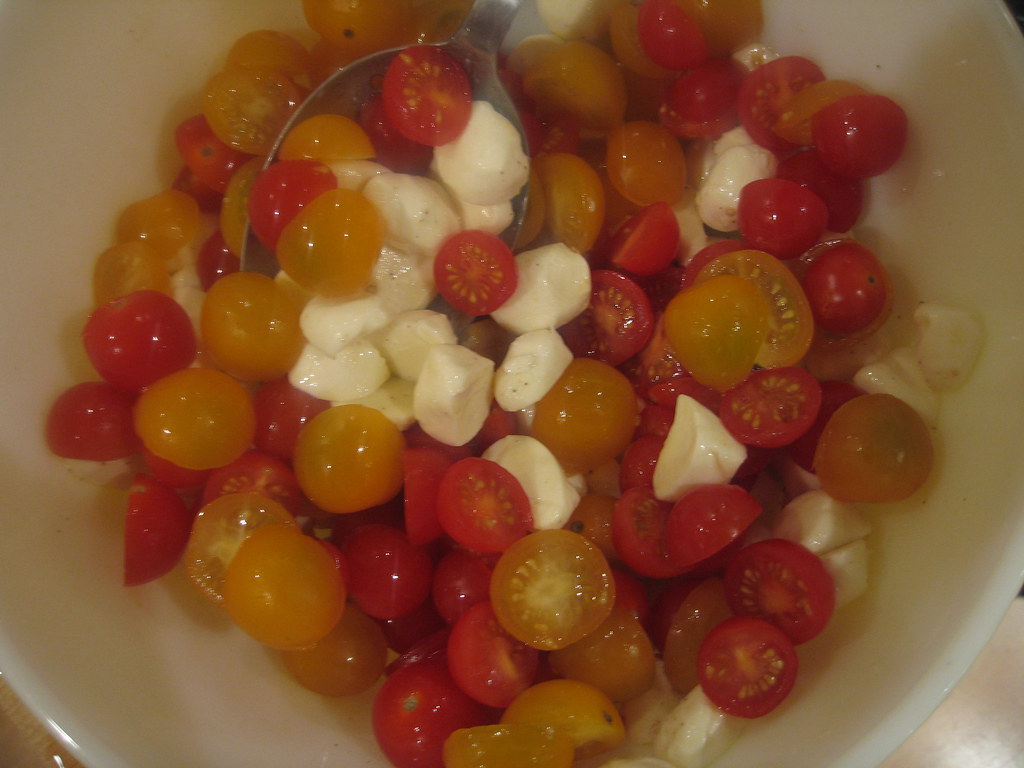
1 cup yellow and red cherry tomatoes, sliced in half
1 cup small mozzarella balls, sliced in half
10-20 fresh basil leaves
1 teaspoon kosher salt
1 teaspoon olive oil
pepper
10-20 toothpicks or small skewers
Step by Step
1. Place mozzarella balls and tomatoes in a bowl.
2. Toss mozzarella with salt and olive oil until lightly coated (more salt can be added to taste). Sprinkle with pepper.
3. Layer a piece of mozzarella, a tomato half and a basil leaf on each skewer.
4. Serve at room temperature.
7.10.2009
Baked Brie & Rosemary Pizza
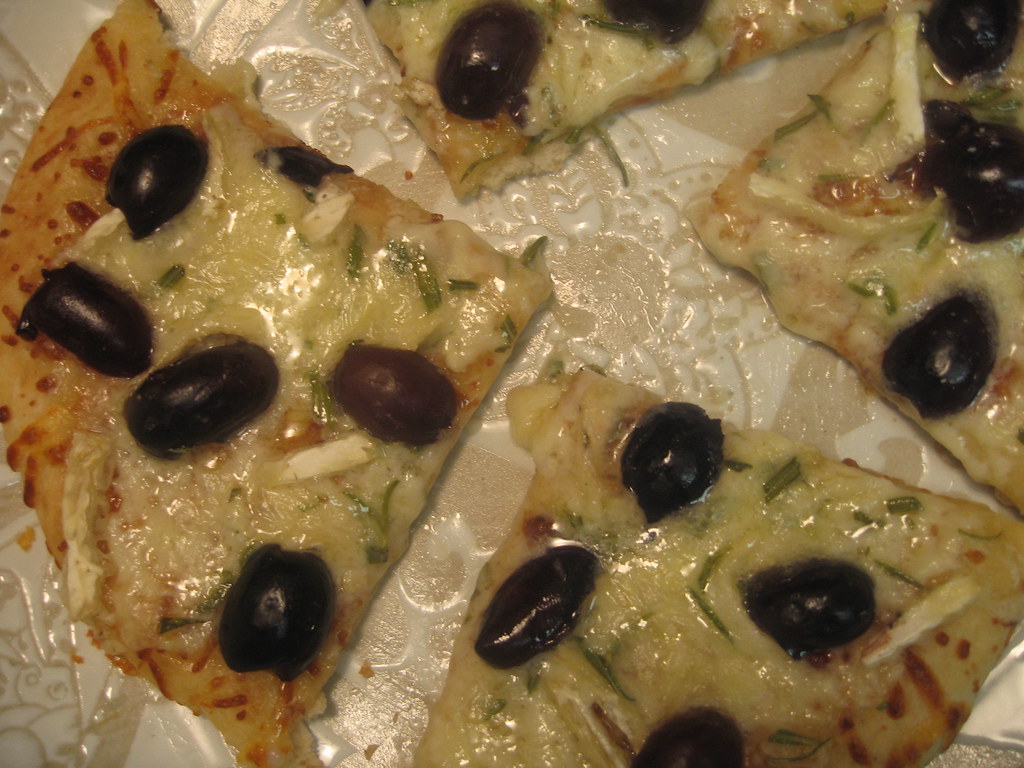
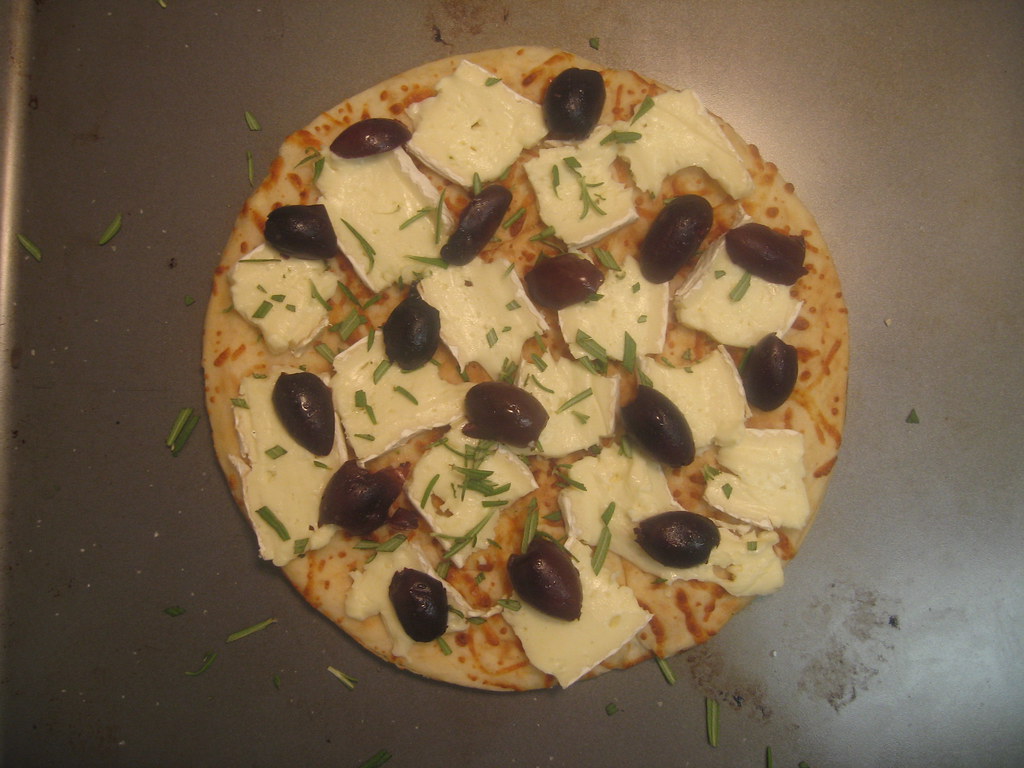
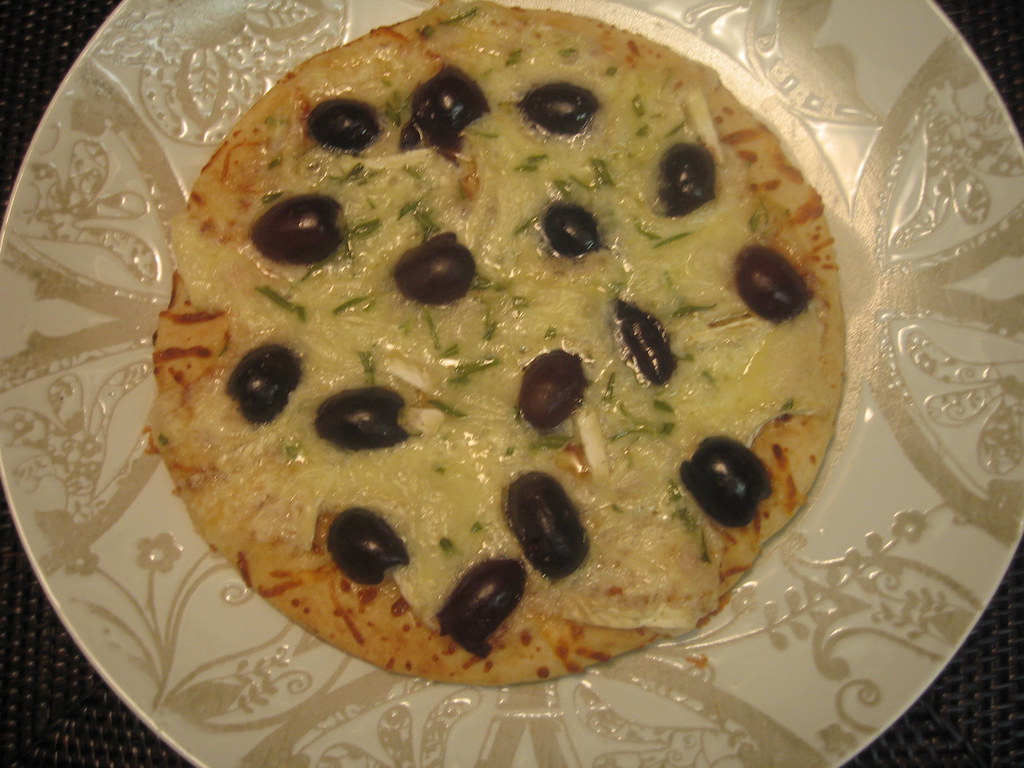
I have to admit I get a little giddy when I venture out by trying my own twist on a recipe and it turns out to be amazing. Well, that is exactly what happened here. My friend Kate told me about the combination of a Boboli pizza crust, brie and rosemary. As I was pulling out the ingredients to try this, I spotted some leftover kalamata olives and thought I would really live on the edge and add a few. They were the perfect compliment!
Try this pizza for a delicious and quick meal or appetizer, and try your own twist with whatever you have in the fridge!
Baked Brie & Rosemary Pizza
Recipe Notes
Below I have not added amounts for these ingredients. I do this because you can easily gage how much to put of each ingredient depending on which size crust you choose. You can also alter ingredients based on you and your guest's tastes. If using as an appetizer for a large group, use a sharp knife and cut into small squares. Enjoy!
Ingredients
Boboli Pizza Crust
Brie, sliced thinly (about 1/4 inch thick)
Fresh rosemary
Kalamata olives, pitted and halved
Step by Step
1. Preheat oven to 350 degrees.
2. Cover entire crust with slices of brie.
3. Top cheese with kalamata olives.
4. Sprinkle with rosemary.
5. Bake pizza for 10 to 15 minutes until cheese is melted and bubbly.
6. Cut into pie slices or squares to serve.
Subscribe to:
Posts (Atom)


 Posts
Posts


