2.12.2011

DIY Brownie Bags

twig & thistle's brownie bag
So hopefully you checked out Twig & Thistle when I posted the fruit stickers, but if you missed it then, check these out too!  How fun and special would a homemade brownie hiding in this darling bag on Valentine's Day be for friends or loved ones?  A boxed brownie mix could do the trick, but if you really want to go over and above, make these over the top fudgy brownies.  

Check out Kathleen's blog here and dowload her template for this project.
twig & thistle's brownie bagstwig & thistle's brownie bags

2.10.2011

French Chocolate Bark

DSC_0656

I just love a good snow day.  Snow day, sleet day, ice day.... whatever you want to call it in Houston when the temperature drops and they insist you do not leave your house.  Last week we had what was to be about aa 12 hour warning, but let me tell you, the grocery store lines the day before would make you think they told us to stay in for a month.  But then again, I was right there too, and was thinking of all the things I could stay in and cook.  On top of the list was this french chocolate bark.  Again, I can't get enough of Ina Garten and I've been dying to try this recipe of hers and then take her suggestion to use this for s'mores.
DSC_0640

DSC_0642

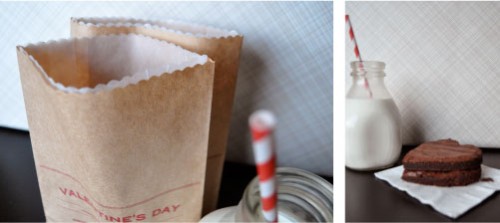
So what better to do than make s'mores inside on an icy day.  If you have plans for a Valentine's Day at home, this would be fun to eat on its own or make s'mores.  I sure felt fancy making it, but it could not have been easier.
DSC_0660

DSC_0671

Stay warm out there.  From my little kitchen to yours... Enjoy.

French Chocolate Bark
Adapted from Ina Garten
Recipe Notes
Ina uses crystalized ginger on her version and I thought I would try it out, but since I know I'm not usually a fan of this stuff (has an odd spiciness that doesn't do it for me), I just used a little on one side to try.  If you love the stuff, go for it, but I'm leaving it out of my version.  Another note... the cheapest way to do this is to go to a grocery store that has a variety of items you can buy in bulk.  This way, you can get just the amount you need of nuts and fruit (and chocolate too, if you are at a really good one like Central Market or Whole Foods).  I also love the idea of not having leftovers of anything.
Ingredients

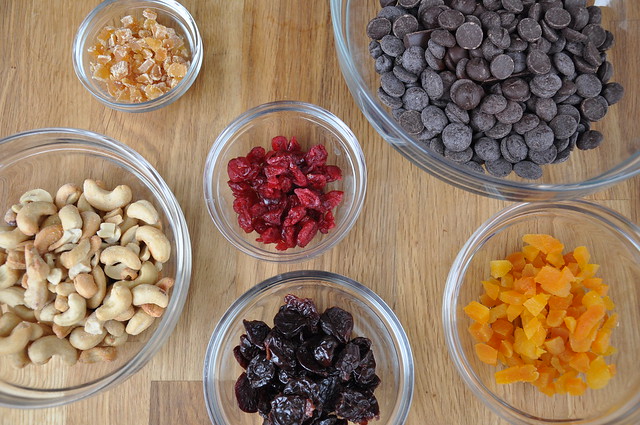
8 ounces very good semisweet chocolate, finely chopped
8 ounces very good bittersweet chocolate, finely chopped
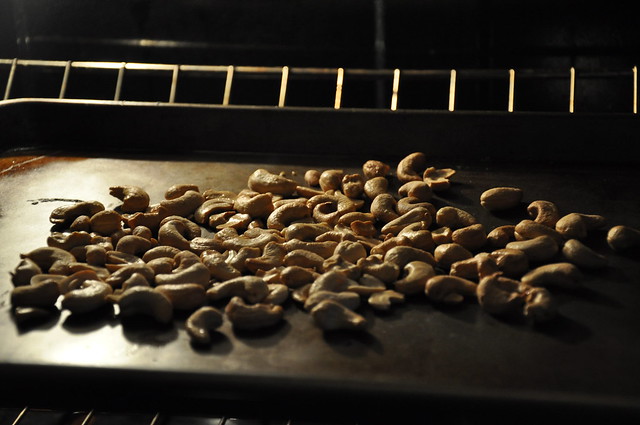
1 cup whole roasted, salted cashews
1 cup chopped dried apricots
½ cup dried cherries
½ cup dried cranberries or golden raisins

Step by StepLine a sheet pan with parchment paper. Using a ruler and a pencil, draw a 9 by 10-inch rectangle on the paper. Turn the paper face down on the baking sheet.

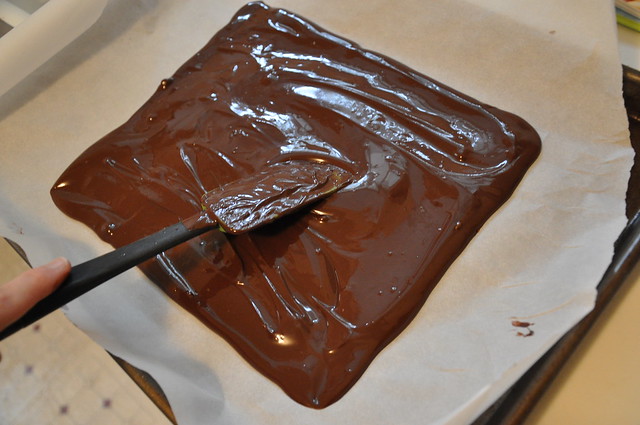
In a microwave proof bowl, melt the semisweet chocolate and half the bittersweet chocolate. Stir chocolate after every 30 seconds until chocolate is just melted. Remove from microwave and immediately add the rest of the bittersweet chocolate. Stir vigorously until smooth and all of the chocolate is melted and has become glossy.

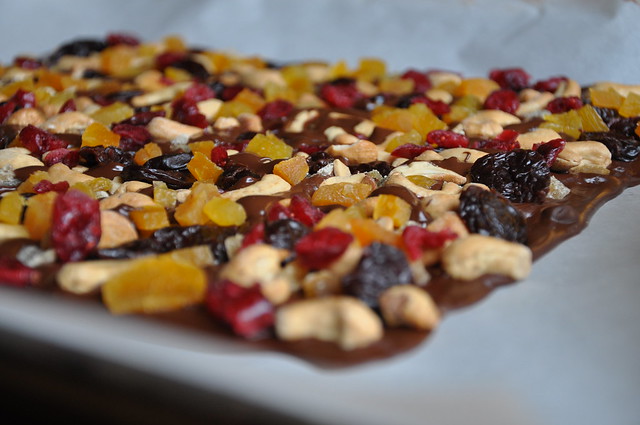
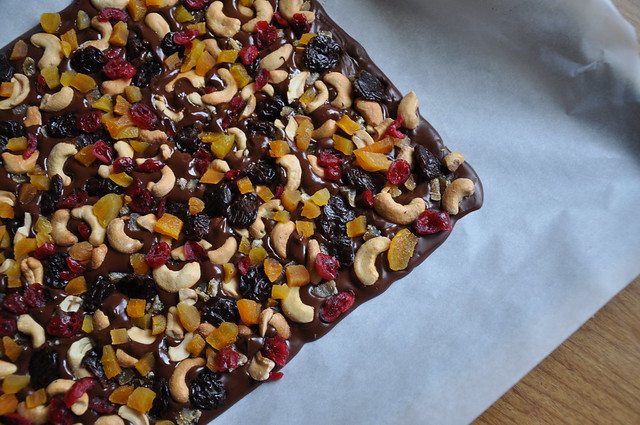
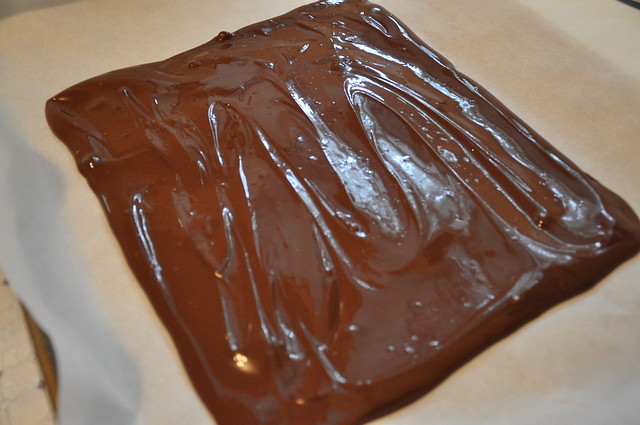
Pour the melted chocolate over the paper and spread with a spatula to form a rectangle, using the outline. Sprinkle the cashews, apricots, cherries and cranberries evenly over the chocolate. Set aside for 2 hours until firm. Cut the bark in 1 by 3-inch pieces and serve at room temperature.
DSC_0647

DSC_0645

DSC_0658

2.08.2011

DIY Valentine Stickers

Twig & Thistle Vday stickers

Are these not the cutest?  Just in case your valentine is on a diet or you want to add a little surprise to a brown bag lunch on Valentine's Day.  Head over to Twig and Thistle to download these for free and see a few more. 
Twig & Thistle Vday stickers

Twig & Thistle Vday stickers

2.06.2011

the little kitchen garden

DSC_0614
It’s a MIRACLE.  We have edible things in our backyard, that I planted, that are actually growing and taste amazing.  There is a good chance no one but my dad was reading this blog when I posted about this, but to say the least, I have had a rough past trying to grow anything.  Lo and behold, when we moved into this new house, we had a backyard that had been full of fruits and vegetables.  A Japanese couple had been growing just about everything you could imagine and while this intrigued me, I didn’t know where to start to carry this on.

By the time we got over this and started thinking about the backyard, we had weeds knee high where a garden use to be.  So I decided to get serious about this and get rid of these weeds one by one.  One of the hardest projects I have ever tackled, but probably the most satisfying. 

Next, Mr. Hungry constructed the beds with stones that were in the backyard already plus a few fresh ones.  And then sometime last fall, I took the plunge to see if I could make anything grow.
DSC_0385
I started with all tiny plants (instead of seeds…I needed to see some progress quick to feel like I could half way do this) and around Christmas, I had managed to keep all of the herbs alive and we started getting broccoli.  I’m still sticking with the fact that we have magical soil because I’m not sure I gave these things TLC everyday like they might need.
IMG_0010
I meant to take pictures of the growth process, but kind of fell behind so instead I will show you some of what I got out of this thing...  We ended up with 8 heads of broccoli, parsley, rosemary, basil, parsley, sage, lavender, oregano, thyme,  tons of arugula and 3 heads of cauliflower.

DSC_0613

DSC_0611
Anyone else have any kind of garden?  Or interested in starting one? And yes, I consider an herb in a pot a garden.  So here is my attempt at one of my resolutions of growing more of the food I eat, and I feel like I have picked up a few things from my first crop and I am ready for spring. 

2.04.2011

Roasted Tomato Basil Soup

Roasted Tomato Basil Soup

I could not let the coldest weather I think we have ever had come without making some soup.  But here is the catch, there is a chance this could look familiar because I had already posted it, but due to my picture debacle, I decided to photograph it again.  And it's just such a wonderful soup, I thought it couldn't hurt to remind you that it should be on your list of things you should be making right now in this cold weather. Here are the reasons I love it... pretty easy and straightforward to make, so much great flavor, and it's actually healthy, but tastes really hearty. I am still in search of finding "the recipe" for many of my favorite foods.  

This tomato basil soup combines slow roasted tomatoes with plum tomatoes and lots of basil for a perfect, robust soup.  And if you are already a fan, you know most tomato basil soups are loaded with cream.  This does not have a drop to speak of and is still very thick and creamy. You might as well make a double batch and freeze some for next week.

From my little kitchen to yours... Enjoy.

Makes 6 to 8 bowls.
Tomatoes for roasting

time for blending

Roasted Tomato Basil Soup
Adapted from Barefoot Contessa
Recipe Notes
Since I was preparing quite a few dishes for the meal, I roasted the tomatoes the day before and tightly covered and refrigerated them until ready to assemble the soup.  Also, the last step is to use a hand blender to slightly blend the soup.  If you do not have one of these, you can wait until the soup cools and put it in a blender.... This might just be a good excuse though for you to go ahead and get a hand blender because you will use it more than you would imagine.
Ingredients
3 pounds ripe plum tomatoes, cut in half with stems removed
1/4 cup plus 2 tablespoons olive oil
1 tablespoon kosher salt
1 1/2 teaspoons freshly ground black pepepr
2 cups chopped yellow onions (1 large onion or 2 small)
6 garlic cloves, minced
2 tablespoons unsalted butter
1/4 teaspoon crushed red pepper flakes
1 (28 ounce) canned plum tomatoes, with their juice
4 cups fresh basil leaves, packed
1 quart chicken stock (4 cups)
Step by Step
Preheat the oven to 400 degrees F.  Toss the fresh tomatoes with 1/4 cup olive oil, salt and pepper.  Spread the tomatoes in a single layer on a baking sheet.  Roast for 45 minutes.

In a large stockpot over medium heat, saute the onions and garlic with 2 tablespoons of olive oil, the butter, and red pepper flakes for 10 minutes, until the onions start to brown.  Add the canned tomatoes, basil and chicken stock.  Add the oven-roasted tomatoes and their liquid from the baking sheet.  Bring the soup to a boil.  Reduce heat and simmer uncovered for 45 minutes.  Blend using a hand blender until the consistency is slightly chunky.  If you do not have a hand blender, wait for the soup to cool completely, and blend in a blender until slightly chunky.

Serve hot or cold.  Refrigerate in an airtight container for up to one week.

2.03.2011

little kitchen loves... the stick blender

 This is one of those kitchen tools that once you have for awhile you will wonder how you ever lived without it. Number one reason it is amazing... you do not have to use your blender for soups.  This is amazing for 3 reasons.  I hate cleaning a blender, you have to wait till the soup cools in order to blend it and you can blend to just the consistency that you want... for me, that is usually slightly chunky.  

The best part, you can find a good one for under $30.  You just need the hand blender.  Don't bother buying one with all the fancy attachments... I have yet to use anything but the actual blending attachment.  

What better time to buy than right now when you can put it to good use on a few hearty soups.