Pages

3.31.2010

Blackberry Shortbread Bars

IMG_6769
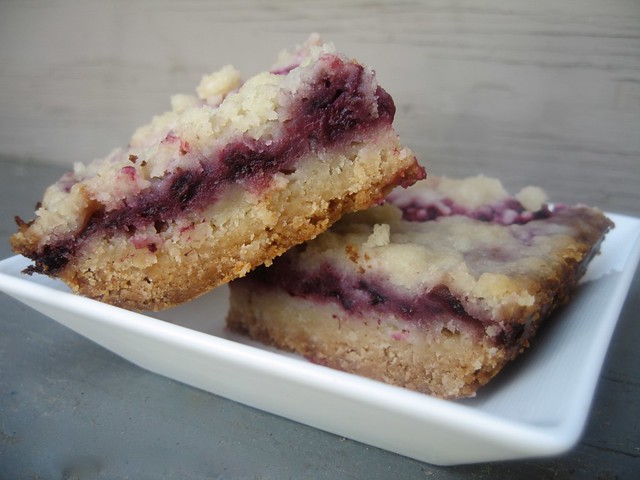
Do you happen to be searching for a dessert for an Easter brunch?  You can stop.  Even if you aren't, this is my favorite spring time dessert.  These little bars are the perfect mix of a decadent buttery crust with a sweet and tangy layer of blackberries.  I made them this weekend when our place was quite the revolving door.  Between parents, in-laws and our of town friends, these went fast.  Everyone was raving about them and while quite I'm sure not any one of these groups would tell me to my face that they did not like them, I will take the fact that most came back for seconds as a good sign.

Oh, and can you possibly guess where this recipe came from?  Again, the Junior League of Houston's Peace Meals has delivered one of my favorite recipes.  I have shared a couple of recipes, but I promise you this one is worth owning.  So you should probably buy it here, and you can thank me later.

Blackberry Shortbread Bars
Adapted from Junior League of Houston's Peace Meals
Recipe Notes
Make sure and drain the extra water and juice out of the bag when you thaw the blackberries.  I didn't do this the first time and the middle layer was a little bit soupy (but still tasty).  Two other keys to making this work.  Make sure the butter is very cold when you add it.  I actually put mine in the freezer after I cut it into cubes to keep it extra cold.  This helps make a good crumbly crust.  You also want to fit your food processor with the metal blade so that it cuts through the butter and again helps with the crumbly crust.   
Ingredients
Crust
3 cups all-purpose flour
1 1/4 cups sugar
3/4 teaspoon salt
1 1/2 cups (3 sticks) unsalted butter, chilled
Filling
2 eggs, whisked 
1/2 cup sugar
1/2 cup sour cream
1/2 cup all-purpose flour
16 ounces frozen blackberries, thawed
Step by Step
Crust:
Preheat the oven to 350 degrees F. Prepare a 9 by 13-inch baking pan with butter or cooking spray; set aside.  Combine the flour, sugar and salt in a food processor for about 45 seconds.   Cut the butter into 1/2-inch cubes and process with the flour mixture for 30 seconds or until the butter is evenly distributed but the mixture is still crumbly.  Reserve 2 cups of the crust mixture to use for the topping.  Press the remaining crust mixture firmly into the bottom of the prepared pan.  Bake for about 25 minutes or until golden brown; allow to cool for at least 10 minutes before adding the filling.
Filling:
Combine the eggs, sugar, sour cream and flour in a large bowl.  Fold in the blackberries.  Spoon the fruit filling evenly over the crust and sprinkle the reserved crust mixture over the filling.  Bake for 45 to 55 minutes or until the top is lightly browned.  Let cool for at least 1 hour before cutting into bars. 

3.29.2010

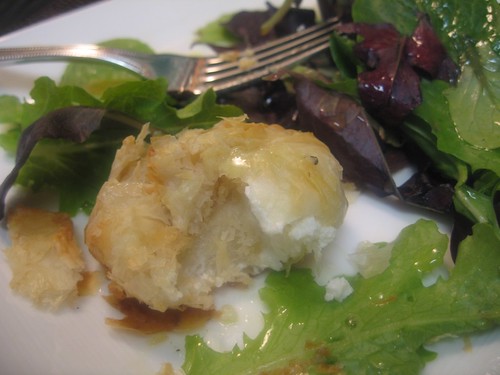
Warm Goat Cheese in Phyllo Salad

IMG_6621
I have a bit of a disorder when it comes to the weather.  I usually gage what I will be wearing for the day off of what I feel that the weather will be and not what it actually is.  For example, last week... it's 7:30 a.m. and I'm thinking it's the middle of March in Houston... hmm, sounds hot... I'll go with a skirt and short sleeved shirt. Then as I'm running out the door, I realize it's about 45 degrees with not a lot of time to turn back and change.  But I still justify that it's March in Houston and it has got to be at least 75 degrees by about 10. Wrong again... we had a cold windy spell and I spent most of the day freezing.  What's the point of this story you are wondering?  I seem to ignore the weather when it comes to food too.  I had already bought all the ingredients for this salad I had been dying to try so even though it might not have been the night for a light, spring salad, I made it for dinner.  Not too worried about it now because I am finally getting around to sharing this and the weather has cooperated. 

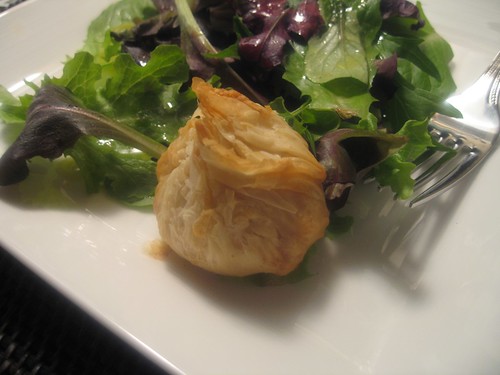
But what you really need to know is how amazing this salad is.  I have to admit that it seems fancy to me so I wanted to try it because I thought if it was successful, it would be something impressive to serve for company. And even more than being delicious, it is pretty easy. 

From my little kitchen to yours... Enjoy.
IMG_6602
IMG_6613
IMG_6619
IMG_6624
Warm Goat Cheese in Phyllo Salad

Adapted from Ina Garten's Back to the Basics
Recipe Notes
The original recipe calls for regular bread crumbs. I happened to have panko so I substituted, but either one will work. I did enjoy the little bit of crunch from the panko, but if you don't feel like venturing into the world of Japanese bread crumbs, you can use regular. The phyllo dough I bought ended up being quite tricky. Mine was less in sheets and more in little strips. As you can see the picture below, I just made a pinwheel with the strips and built the little cheese sacks from there. I was worried it would not work out because I did not have nice sheets, but there was no problem. Bottom line... don't worry if the bundles are kind of messy when they come together. Whether you have to adjust the amount of goat cheese that will fit or your phyllo dough is acting funny, just keep going and worry about making the bundles look pretty at the very end. You can always add extra phyllo layers to make the outside have a good presentation.
Ingredients
12 sheets phyllo dough, defrosted
6 tablespoons unsalted butter, melted
2 to 3 tablespoons panko bread crumbs (or plain bread crumbs... see note above)
12 tablespoons of goat cheese, divided into 6 balls
Baby salad greens, such as a spring mix or arugula
For the Vinaigrette
2 tablespoons champagne vinegar
1 teaspoon Dijon mustard
1/2 teaspoon minced garlic
1 teaspoon kosher salt
1/2 teaspoon freshly ground black pepper
1/2 cup good olive oil
Step by Step
Preheat the oven to 375 degrees.
Unroll the sheets of phyllo dough on a flat surface and cover them with a slightly damp towel. (if the towel is too wet, the dough will get sticky). Working quickly so the dough doesn't dry out, place one sheet of phyllo on a board, brush lightly with melted butter, and sprinkle lightly with bread crumbs. Place a second sheet of phyllo on top, brush with melted butter, and sprinkle with bread crumbs. Continue until you have 4 sheets stacked up. Cut the sheets in half crosswise to make 2 almost-squares.

Using two tablespoons of goat cheese at a time, make 6 small balls of goat cheese. Place each ball in the center of one phyllo square. Starting at one corner, fold the phyllo up over the cheese and continue folding and pleating the phyllo around the cheese, as though you're wrapping a round gift that's tied on top. You will end with extra phyllo dough on top; twist the excess into a top knot. Brush the discs all over with melted butter and place on a sheet pan lined with parchment paper. Continue with the remaining phyllo dough and goat cheese to make 4 additional packages.

Bake for 20 minutes, until the phyllo is lightly browned. Allow to cool for 5 minutes.

While the cheese packages bake, place the salad greens in a large bowl. Whisk the vinegar, mustard, garlic, salt, and pepper together in a small bowl. Still whisking, slowly add the olive oil, making an emulsion. Toss the salad greens with enough vinaigrette to moisten.

Distribute the salad among six plates and place on warm goat cheese package in the center of each plate, Sprinkle with salt and pepper and serve.

Leftover goat cheese bundles can be refrigerated in an airtight container for up to 2 days. Reheat in the oven at 350 degrees until bundle is heated all the way through, about 10 minutes.

3.25.2010

armed & ready

IMG_6751

I wish I was normal...

It seems to me that when most people know that their in-laws are coming in town, their brother-in-law is staying with them and they all of a sudden find out that a very exciting and rare event will be taking place where they live, which will likely bring lots of out of town friends through their door this weekend, this spurs most people on to get their home looking extra clean for the weekend.  Not me... I know of all these events and all I can seem to do is come up with more things to make in the kitchen because I can't stand the thought of anyone coming over and not having something to eat.

IMG_6741
I also don't like the idea of being stuck in the kitchen when we do have guests (doesn't work well with the little kitchen... guests always want to help out if everything is not finished and we all know this kitchen is most conducive to a one man operation... although it has been pushed to the limit before).  We will be having my parents and Mr. Hungry's family over on Friday night to watch that very exciting event I was telling you about so I did all the prep work I could beforehand.  I thought homemade pizzas would make for a delicious and casual meal.   And I'll cut to the chase about this event... Baylor has made it to the Sweet 16!  This is a very big deal for quite a few reasons... We are Baylor alumni, this hasn't happened in... (I won't even talk about how long it's been), and the game is in Houston! The last reason being why I also felt the need to pop a few other treats in the oven... We have friends from college who might be stopping by.


IMG_6737

So that brings me to my current situation... it's a little past 10 p.m. on Thursday and here I sit taking a small break from what I have done... grated 5 lbs. of cheese, made 8 pizza doughs, sliced up some grilled chicken... and what I am still working on... blackberry shortbread bars and banana chocolate chip snack cake and still hoping to get motivated to clean this place up.  A blackberry bar can only keep you distracted from undusted shelves for so long...

...will be back with the recipes.

3.22.2010

Chocolate Peanut Butter Cupcakes

IMG_6670
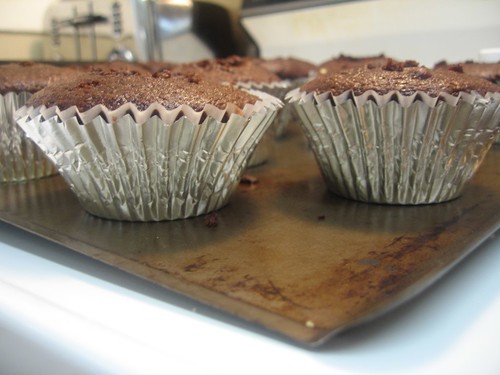
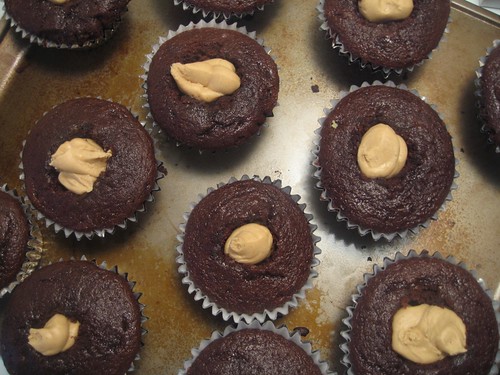
So I talked about these cupcakes the other day... I had an order for 24 birthday cupcakes and it was decided that half would be these chocolate peanut butter cupcakes.  Oh, these are one of my absolute favorites and I was glad to hear they went over well at the party.  The little kick of peanut butter frosting that is hiding inside of these is what makes them so special.  Well, that's about it... these are delicious... knock yourself out.

From my little kitchen to yours... Enjoy.
IMG_6652
IMG_6657
IMG_6655
IMG_6659
IMG_6662
IMG_6664
IMG_6667
Chocolate Peanut Butter Cupcakes
Recipe Notes
These cupcakes are made in XL foil cupcake liners because having a bigger cupcake allows for more peanut butter frosting.  These cups are also nice because you don't even need a cupcake pan to make cupcakes.  They stand alone on a regular baking sheet and you can remove the foil layer when they are finished baking.  You can make these in a regular cupcake pan, but you will not have as much cupcake left after you carve some out for the peanut butter frosting.  The XL cupcake cups can be found in almost any grocery store next to regular cupcake liners.  To make these extra special, you can make homemade chocolate frosting, but the peanut butter frosting and mini chocolate chips are two new twists that make this cupcake seem very special even if you use boxed cake mix and frosting.  If you are piping the icing on, you will need 2 cans, but if you are just spreading the chocolate frosting on top, you will have enough with one can.
Ingredients
12 XL stand alone cupcake cups (see recipe notes above)
1 boxed devil's food cake mix + ingredients to make cupcakes
1 cup of smooth peanut butter
1 1/4 cup of powdered sugar
1 stick of butter, softened
2 cans of chocolate fudge flavored frosting 
2 cups mini chocolate chips
Step by Step
Bake cupcakes according to directions, filling cupcakes cups 2/3 of the way full.  Allow a few minutes extra baking time for extra large cupcakes.  To test: Push cupcake with finger... when it springs back, cupcakes are done.  Allow to cool completely.
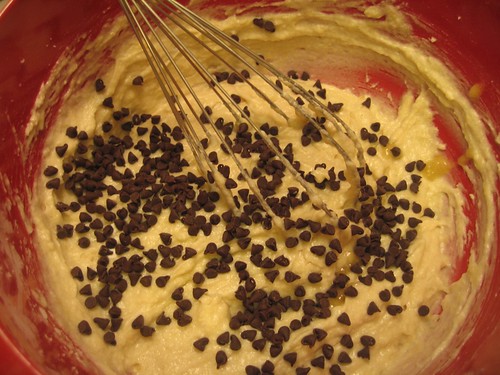
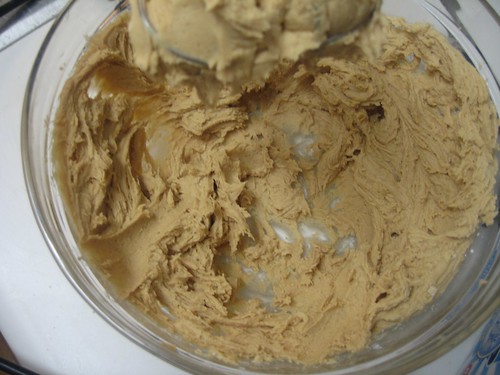
While cupcakes are baking make peanut butter frosting.  Combine peanut butter, powdered sugar and butter in a bowl.  Beat until combined and a smooth frosting has formed.  Spoon peanut butter frosting into a ziploc bag.  Cut the tip off of the bag.   
Using a sharp knife, cut a small cone shape in each cupcake and remove cone.  To do this, cut into cupcake diagonally and draw a circle.  (see picture above)  Pipe a small dollop of frosting into each cupcake.  Cover and place cupcakes in the refrigerator.  Allow the peanut butter icing to firm up.  (This will make frosting the top easier.) 
Remove from refrigerator and top cupcakes with chocolate frosting.  Option #1:  Spread icing on with a knife.  Option #2:  Place chocolate frosting in a piping bag and pipe icing on to cupcake.  Immediately sprinkle each cupcake with mini chocolate chips before the icing dries.


3.17.2010

Birthday Cupcakes

IMG_0335

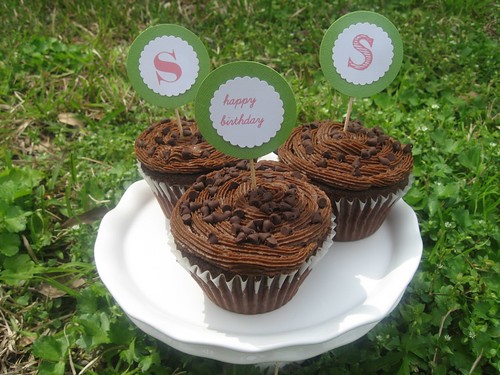
I had an order for birthday cupcakes this weekend and considering I didn't get any, I sure was excited about them.  I suspect the excitement was because I wanted to experiment with cupcake toppers.  These were for a 60th birthday party and the order was for a dozen triple lemon cupcakes and a dozen chocolate chip peanut butter cupcakes (recipe coming soon).  The birthday girl's name started with an S so I decided to do different font S's on one side with happy birthday on the other.  I have to say they sure do spruce up a cupcake and can be made with paper and toothpicks.  If you don't love this idea, I'm sorry... because I have a feeling you will be seeing these at every opportunity I get to top something.
IMG_0326


IMG_0334
IMG_0325

3.16.2010

Lemon Pistachio Tart

IMG_6572
I have concluded that there are three types of dessert lovers in this world. Those who love the rich and chocolaty types... Those who prefer lighter sometimes fruity desserts... and those who love anything that is sweet, whether it be a hint of sugar or a make-you-pass-out-for-the-rest-of-the-day piece of cake. (I fall into the third category in case you were wondering).  My friend and colleague, Frances had a birthday last week and she is definitely in the second category of my made-up dessert world.  So to celebrate, I made this lemon pistachio tart.  It was the perfect combination of tangy and sweet lemon, mixed with crunchy and salty pistacios, all wrapped up in a buttery, crumbly crust.  If you can manage to keep your crust alive, this is a pretty simple dessert that looks quite fancy.

This was my first attempt at a tart and I have to be honest again... it was not all smooth sailing.  So if you are taking your first spin with a removable tart pan, read this. If you are interested in a tart pan and don't want to invest in one, I found mine for $5.25 at Marshall Home Goods in Houston, which was the exact same one I had seen at Williams Sonoma for $21.00.  These can be found at most home discount stores at one time or another.  But I have already found it to be worth the five buckaroos and will be doing some more tart experimenting soon.

From my little kitchen to yours... Enjoy.
IMG_6545
IMG_6556
IMG_6524
IMG_6527

IMG_6550
IMG_6558
IMG_6562
IMG_6564
Lemon Pistachio Tart
Adapted from Peace Meals
Recipe Notes
This recipe originally called for Meyer lemons.  Couldn't find those and regular lemons worked just perfectly so I went ahead and left them out.  But if you happen to have great meyer lemons at your grocery store, you should try them out.
Ingredients
Crust
3/4 cup unsalted butter
1/4 sugar
1 tablespoon powdered sugar
2 cups all-purpose flour
1/2 cup chopped shelled pistachios
Filling
1 cup sugar
2 tablespoons all-purpose flour
1/2 teaspoon baking powder
1/2 teaspoon salt
2 eggs, at room temperature, beaten
1 teaspoon grated lemon zest
2 tablespoons fresh lemon juice
Topping
1/2 cup powdered sugar, sifted
1 tablespoon fresh lemon juice
1 tablespoon butter, melted
1/4 cup chopped shelled pistachios
1 tablespoon powered sugar 
Step by Step
Crust
Preheat the oven to 325 degrees F.  Melt the butter in a medium saucepan over low heat.  Remove the butter from heat and add both sugars, stirring to combing.  Mix in the flour.  Let the mixture cool for 15 minutes; the dough will still be warm.  Press the dough against the bottom and up the sides of a 9-inch tart pan with a removable bottom.  Bake for 15 minutes.  Allow the crust to cool.  Sprinkle the pistachios evenly over the crust. 
Filling
Stir together the sugar, flour, baking powder and salt in a medium bowl.  Add the eggs, lemon zest and lemon juice, and stir to blend.  Pour the filling into the partially baked crust.  Bake for 30 minutes or until the crust is golden.  Let cool.
Topping
Combine the powdered sugar, lemon juice and butter in a small bowl.  Spread the glaze over the cooled tart.  Sprinkle with the pistachios and powdered sugar to finish.

3.15.2010

Tart Tragedy

IMG_6552

Ever since I started sharing my little kitchen, the has been a misconception about this place.  Some of you have started sharing your blunders with me and telling me how that would never happen in the little kitchen.  Well, let me tell you, I don't have enough time in my day to go through all the mess ups, mistakes and even wounds I have from cooking, but today I will give you a sneak peek at just one.

So it's my first run with my new tart pan with a removable bottom and I thought things were going smoothly with my first tart until I tried to take this little sucker out of the oven.  In a rush, I thought I could just pop this out without any problem all the time being very aware that the bottom was removable.  So as you can see that didn't work out and I accidentally tapped the bottom, which led to crust flying everywhere.  What I didn't capture were the pieces of crust that lit on fire from hitting the burning coils.  For a minute I thought... this is it... this is the end of the little kitchen... I've officially burned this little box to the ground.  Thankfully, pieces of buttery crust don't have a long burn life and before I knew it, the flames were out and I just needed to clean up this mess.
IMG_6554

So there was good and bad news from this.  Good news is I was only baking the first part so I didn't even lose the filling.  Bad news was how long it took me to figure out the solution.  So I whipped up another crust (good thing this is the easiest crust I have ever made) and started over.  As I'm about to pop it in the oven and have come up with my elaborate plan to get this out of the oven... plan:  when tart is done, I will slowly and daintily nudge the pan towards the edge of the oven with one hand while balancing a baking sheet on the other hand to slide it on to... and then it hits me... bake the darn thing on a baking sheet from the get go! ugh... where is my mind?  So there you go... lesson learned.  Always place a tart pan with a removable bottom on baking sheet before cooking. duh


*Great tart recipe coming soon

3.11.2010

Pecan Rolo Pretzel Bites

IMG_6590
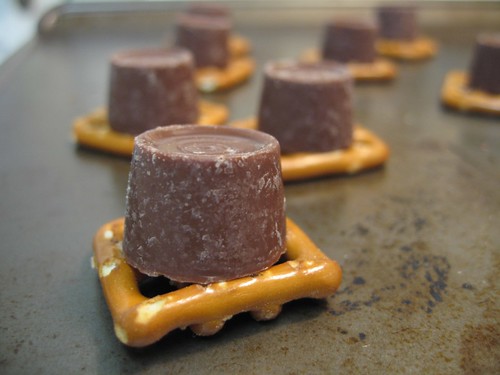
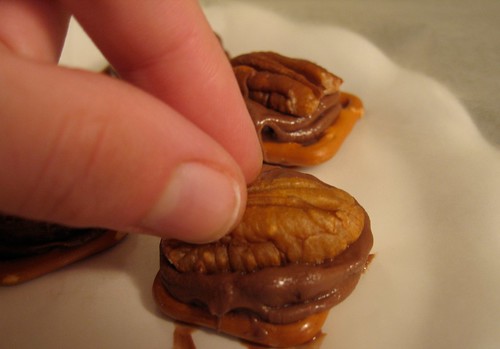
And they're baaaaaack. I'm sorry, but you people just keep giving me too many good ideas for these little puppies.  And I have to say this is a pretty darn good one.  And I personally don't see the harm in having as many combinations as possible.  If you've made a these or these, you probably still have extra pretzels in your pantry so you might as well give these a whirl.  And that's about all I can say about these... they're just good and easy. 

IMG_6586
IMG_6587
Pecan Rolo Pretzel Bites
Ingredients
Square Pretzels (I used Snyder's brand)
Rolo's (one per bite)
Pecan halves (one per bite)
Parchment Paper
Step by Step
1. Preheat oven to 200 degrees F.
2. Line a cookie sheet with parchment paper.
3. Place a single layer of pretzels at least an inch apart.
4. Place a Rolo on top of each pretzel.
5. Bake in oven for about two minutes. When Rolo's are slightly melty, remove from oven.
6. Place a pecan on top of each and push down slightly.
7. Allow to cool in refrigerator until completely hard, about 30 minutes.
8. Before serving, bring pretzel bites back to room temperature. Make sure and do this or the center of the Rolo's will be quite chewy.
9. Store in an airtight container for up to two weeks.

3.10.2010

Clean Out The Cheese Drawer Pizza

IMG_6430

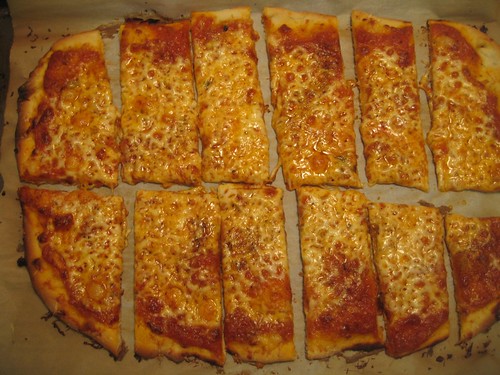
Still can't get enough homemade pizza... I'm tellin ya I guarantee I could open up your fridge and find something to throw on a pizza.  Now I will admit we eat an uncanny amount of cheese around here so that might explain why I had quite the buffet of cheese.  There was not enough of one kind to use for a recipe so I decided to throw it all on a pizza and see what happens.  And what do you know, another one I can't live without.  The tanginess of so many different cheeses with a crispy crust and robust (yeah, that's right... i said it... robust) tomato sauce is the bomb.

So anyway, sorry for no real recipe here, but I made this basic pizza dough and added a layer of tomato sauce, then mozzarella, cheddar, parmesan and topped it off with grated gruyere and salt and pepper.
IMG_6432

Here is the other pizza below. 
IMG_6433

3.08.2010

Chicken Tortilla Soup

IMG_6504
So we are almost at the end of soup season and I apologize that I am just now sharing this because it is one of my very favorites (oh yeah, and sorry for those of you who are not near the end of winter, but the tides will turn come July when I can't breathe in a tank top because it is so hot and humid).
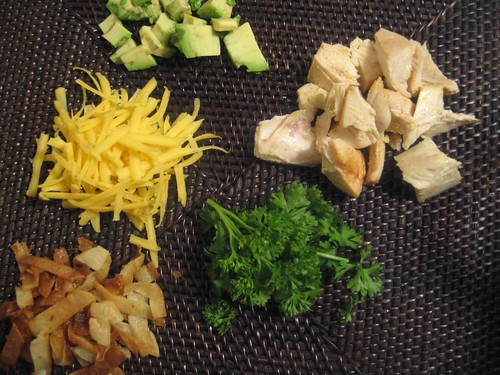
Chicken tortilla soup is one of those that has been interpreted in a thousand different ways. I prefer mine with a tomato broth base and to have a little bit of chunkiness to it. If I have one thing to say, it is don't skimp on the toppings. The soup is delicious, but the tender chunks of chicken, tangy cheddar, creamy avocado and crunchy tortilla strips are what will knock your socks off.  This is not the quickest version, but I do think it is one of the best, so I find it worth the time to make a batch and freeze half for later.

The original recipe calls for boiling the chicken, which is something I will never go back to after I discovered this.  Of all the ways I used my new, favorite roasted chicken, this might be the best one.  So if you are following me here... get one of these, make this, and then make this soup.

From my little kitchen to yours... Enjoy.
IMG_6489IMG_6490
IMG_6491

the yummiest part... the toppings
IMG_6502

Chicken Tortilla Soup
Adapted from the Mansion's Tortilla Soup
Recipe Notes
There are a couple of fussy steps to this one, so it might seem to be a little time consuming at first, but I promise it is worth it.  I adapted this recipe from here, but my favorite twist is to roast the chicken.  The flavor and tenderness from this method is unmatched.  In the past I have used regular plum tomatoes to puree, but this time, I had small cherry tomatoes on hand so I used them.  Moral of the story... any tomato will work.
Ingredients
3 tablespoons corn oil
4 corn tortillas, coarsely chopped
6 cloves garlic, finely chopped
1 tablespoons chopped fresh cilantro
1 cup fresh onion, pureed
2 cups pureed fresh tomatoes
1 tablespoon ground cumin
2 teaspoons chili powder
2 whole bay leaves
4 tablespoons canned tomato puree
2 quarts chicken stock
salt
cayenne pepper
Toppings
1 cup cooked chicken, cut into small chunks (click here for recipe)
1 avocado, peeled, seeded and cubed
1 cup cheddar cheese, shredded
3 corn tortillas, cut into strips and fried (directions below)
Step by Step
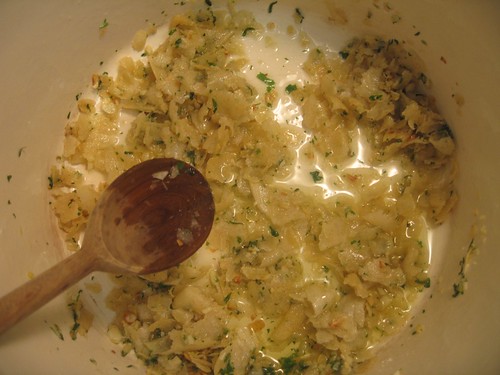
Heat oil in a large saucepan over medium heat.  Saute tortillas with garlic and cilantro over medium heat until tortillas are soft.

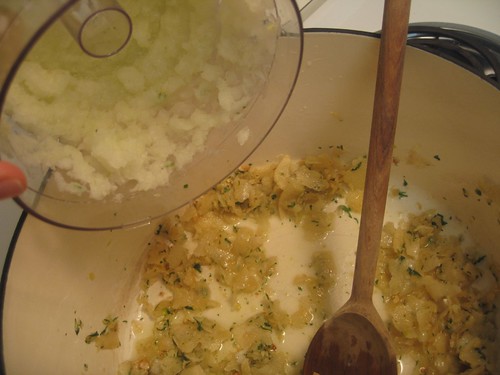
Add onion and fresh tomato puree and bring to a boil.  Add cumin, chili powder, bay leaves, canned tomato puree and chicken stock.  Bring to a boil again, then reduce heat to simmer.  Add salt and cayenne pepper to taste, and cook stirring frequently for 30 minutes.  Skim fat from surface, if necessary.

To make crunchy tortillas strips
Heat a thin layer of corn oil over medium high heat.  Cut three corn tortillas into thin strips.
IMG_6496
Lightly fry tortilla strips in oil.  Remove strips when they are golden brown and allow to drain on a paper towel to remove excess oil.  Lightly sprinkle with salt and pepper and allow to cool.
IMG_6498
IMG_6499

3.02.2010

The best home cooked chicken I have ever had.

IMG_6493
Okay, enough about cookies... this is important.  I believe I have discovered the best way to cook chicken ever! And I do hope you are soaking in the gravity of this situation because it has changed so much.  This and this have both been given more flavor and the possibilities are endless.  I have never had much luck with chicken and have been on a kick to find better ways of cooking.  I'm a little worried I won't continue my quest because I love this roasted chicken so much.  It is simply roasted chicken.

I have always been a boneless, skinless chicken breast kinda gal.  I knew there were other cuts with more flavor and versatility, but I have a tendency to get a little funny about meat.  I would rather not deal with bones and skin... until now.  So when I started cooking things that needed chunks of chicken, I would just boil the chicken like I did here.  I think my boiling days are over.

And also I would like to mention that this is the quickest and least messy method I have found too.  To borrow a phrase from Ron Popeil (who I use to have a weird obsession with... yes, I do own a food dehydrator and the must-have counter top rotisserie)  "set it and forget it."

This is why my trusty little meat thermometer has also changed everything.  I can literally pop the thermometer in a piece of chicken, and the timer will go off when the chicken is at a perfect internal temperature.
IMG_6487

Roasted Chicken
Recipe Notes
You can season this chicken with whatever you want.  If you are putting it in a Mexican dish, think about adding some chili powder or extra garlic powder or if it's Italian,  maybe add some extra fresh herbs... no matter what, you really cannot mess this up.  If you are planning on eating the skin, you might want to be a little careful with how much salt you use, but if you will be discarding the skin, the more seasonings the better to cook into the meat.  If you do not have a meat thermometer, you can roast for about 45 minutes to an hour, depending on the size.  
Ingredients
Bone in, skin on chicken breasts (also called split chicken breasts)
olive oil
Kosher salt and pepper
Garlic powder
Other herbs and spices, optional
Step by Step
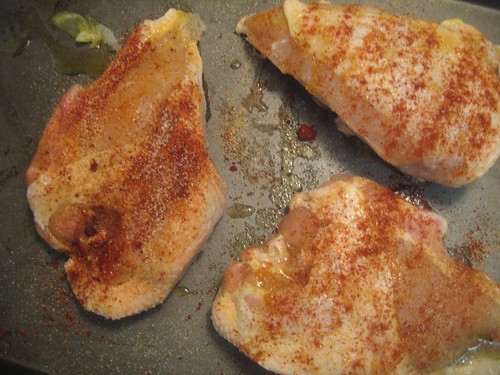
Preheat the oven to 375 degrees.  Lightly spray a baking sheet with edges or a roasting pan with cooking spray or lightly coat with olive oil.  Spread chicken in a single layer on baking sheet.  Rub each breast with a little bit of olive oil.  Heavily salt and pepper the skin.  Sprinkle with garlic powder as well and any additional herbs or spices you would like to use.  Stick one of the breast with a digital meat thermometer and set thermometer for an internal temperature of 150 degrees.
So whether you want to serve this with some veggies for dinner or cut it into chunks for a soup or salad, give it a try... I think you will be thrilled.

From my little kitchen to yours... Enjoy.

You can roast this chicken with some veggies to have a complete meal ready when the chicken is done...
IMG_5650
...or you can remove the skin, and cut it into chunks for a casserole or salad.  My personal favorite.

IMG_6495