Showing posts with label labor of love. Show all posts

7.21.2011

Homemade Gnocchi

DSC_0946
Homemade pasta use to scare me.  Maybe scare is the wrong word, but I would have never thought about diving into such a task on my own.  That all changed on my first trip to Italy and was reaffirmed this summer when I went back.  There are just a few ingredients and the taste you get doesn't come close to what you buy at the grocery.

I thought gnocchi would be a great first pasta dish to share because there is no special equipment needed... just patience.  This is not a dish for the faint of heart.  It can take practice and patience.  I am probably not winning you over right now on the idea of venturing into gnocchi making, but I don't want to make this seem like all rainbows and butterflies.  However, if you get it right, you will jump for joy at what you have created.

Gnocchi is little pillows of pasta made out of potatoes.  It pairs really well with fresh tomato sauces or thick cheese sauces.  I wanted to share the recipe I learned at Villa San Michele.  Simple and just so fresh.

So here we go.
Gather your ingredients. 
(We will chat about those riced potatoes at the end)
DSC_0892
Place your flour, potatoes and egg in a bowl. 
DSC_0896
Using your fingers, press the ingredients together until you get a nice ball of dough. 
DSC_0906
Knead the ball of dough until smooth with no big lumps. 
DSC_0324
Take about a 1/4 cup of dough and roll out into long strands about an inch thick. 
DSC_0911
Cut into 1 inch pillows. 
DSC_0913
To get perfect ridges, you would need a gnocchi paddle, but you can use the back of a fork to form ridges.  Press each pillow against the back of a fork to indent small lines.  This will help the gnocchi soak up sauce. 
DSC_0918
Cook gnocchi in salted boiling water.  The gnocchi will float to the top when they are finished cooking. 
DSC_0937

While sauce is still cooking add gnocchi and toss.  Serve hot. And just like that, you've made homemade pasta.

Go on, put yourself out there.. try this in your own kitchen.  If not, just make sure this class is on your bucket list.

Gnocchi
Recipe from Villa San Michele Cooking School
Recipe Notes
One more warning.  This is not the normal little kitchen recipe.  It's not quick, it's not something you are going to read and get on the table tonight, but instead a fun kitchen project that is rewarding if you stick with it.
Ingredients
About 2 pounds of starchy potatoes (2 or 3 large russets)
2 or 3 pinches of salt
1 whole egg
1 egg yolk
1 cup unbleached, all purpose flour
Step by Step

Fill a large pot with cold water. Salt the water, then cut potatoes in half and place them in the pot. Bring the water to a boil and cook the potatoes until tender throughout, this takes roughly 40-50 minutes.
Remove the potatoes from the water and allow to cool only enough for you to be able to touch them.  You want to mash them while they are still hot.   Place each potato piece on a large cutting board and peel it before moving on to the next potato. To get the potatoes mashed, you can either push them through a ricer or just use a fork.  If using a fork, you want to create a nice fluffy potato base so you do not want to mash it to death.  Run your fork through the potato until there are no noticeable lumps.  
Cool the potatoes enough so that egg will not cook when added to the potatoes.  When potatoes are cooled, place in a medium sized bowl.  Add the beaten egg and egg yolk, flour and salt. Mix together using your hands until you create a dough ball.  The dough should be moist, but not sticky.  Add a little extra flour if the mixture is too sticky.   Cut dough into 8 pieces.  Roll each piece out into a long skinny log, about a ½ inch thick.  Using a pastry cutter or knife, cut ¾ inch little pillows.  Dust with flour and repeat until you have used all of the dough.  Save the potato water.
Let the potatoes cool spread out across the cutting board - ten or fifteen minutes. Long enough that the egg won't cook when it is incorporated into the potatoes. 
To shape the gnocchi,  hold a fork in one hand and place a gnocchi pillow against the back of the fork prongs.  With pressure, use your thumb and press in and down the length of the fork.   With confidence and an assertive (but light) touch, use your thumb and press in and down the length of the fork. The gnocchi should curl into a slight curved shape, their backs will capture the impression of the fork prongs as tiny ridges, goodperfect  for catching sauce later.   Set each gnocchi aside, dust with a bit more flour if needed, until you are ready to boil them.  This is the step that takes practice.  My first five to ten always look a little rough, but you will get the motion down. 
When you are ready to cook the gnocchi, bring a pot of salted water to a boil.  Drop in about 20 at a time so they are not too crowded.  They will let you know when they are done because they will float to the top.  Using a slotted spoon, remove from the water about 10 seconds after they have reached the top.  Add to whatever sauce you will be serving.  Continue until all gnocchi are cooked.  Lightly drizzle with more sauce or olive oil.  Serve hot.

Serves 6.

1.18.2010

Corn Chowder


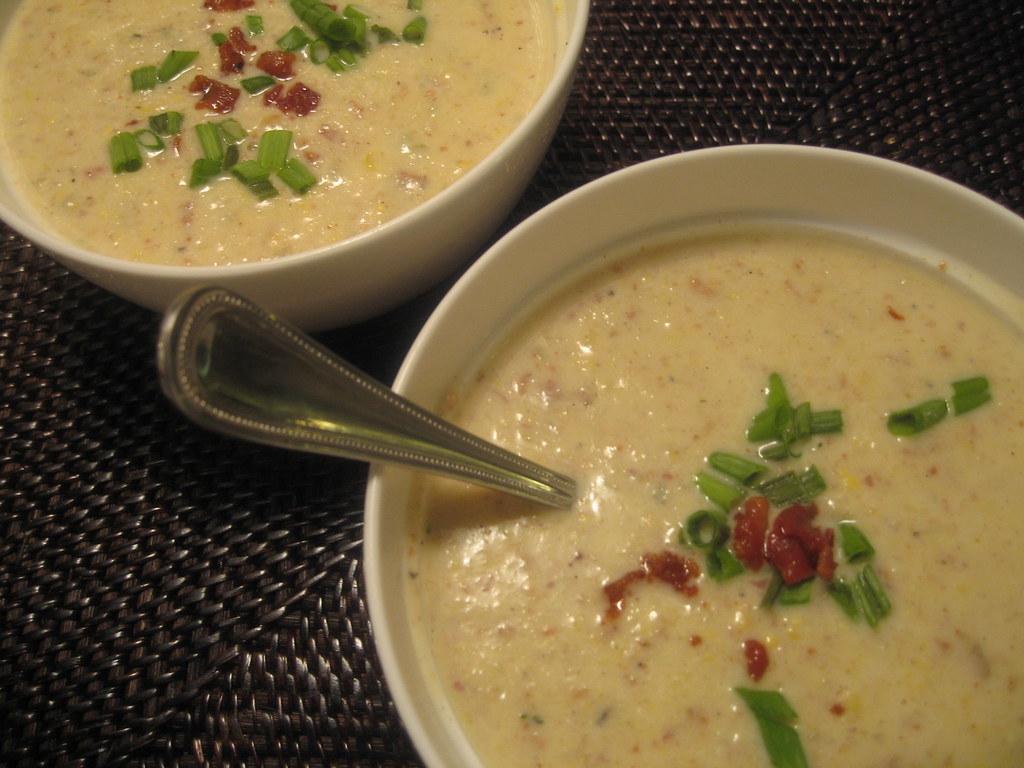
I have abandoned some of my main criteria to share this recipe with you.  It is not quick or healthy... but most definitely worth the time and calories.  The tale of this corn chowder started last summer.  I was out of town and Mr. Hungry and one of his friends from school decided to treat themselves to a meal at Mark's in Houston.  If you live in the area, you might be familiar with the fact that this is one of the nicest restaurants in Houston.  It is located in an old church and the food is known for being fabulous.  Ever since that summer night, I have heard about this corn chowder that is just inconceivably amazing.  I of course had to research further and read reviews of the restaurant where most critics and patrons say they have a hard time not ordering this chowder for all four courses.  I just keep thinking...this is corn chowder... not osso bucco or foie gras... I can do this.  
So I started my search to find a way to make this at home (even though I have never had it).  Well, my research did not take long before I figured out that Mark himself has posted the corn chowder recipe on his restaurant's website... or so he says.  I was immediately thrilled and thought there would be nothing to this... that is, until I read the recipe.  I quickly found that there were ingredients listed in the ingredient list that were not mentioned again in the recipe.  I won't even go into the fact that the soup is called roasted corn chowder yet there was no mention of roasting anything OR ever even cooking the corn.  I was not defeated by this though, because I at least had a list of ingredients to start with and tweak as necessary. 
 So I will give credit to Mark's for this recipe, but I stand by the fact that this is very loosely adapted and I give myself a huge pat on the back for coming up with the way to roast the corn which really developed the flavor.
p.s. In case you were wondering... Mr. Hungry and his friend Daniel who had dined with him at Mark's both agree that this soup is pretty darn close to what they had at the restaurant.

Corn Chowder
Recipe Notes
If you do not have a hand blender, a blender will work.  Wait until soup is completely cooled and
Ingredients
1 cup (4 oz) maple or apple smoked bacon, chopped
1 tablespoon garlic, finely chopped
1 cup yellow onion, chopped
1 cup celery, chopped
1 cup baby red potatoes, skin on, chopped
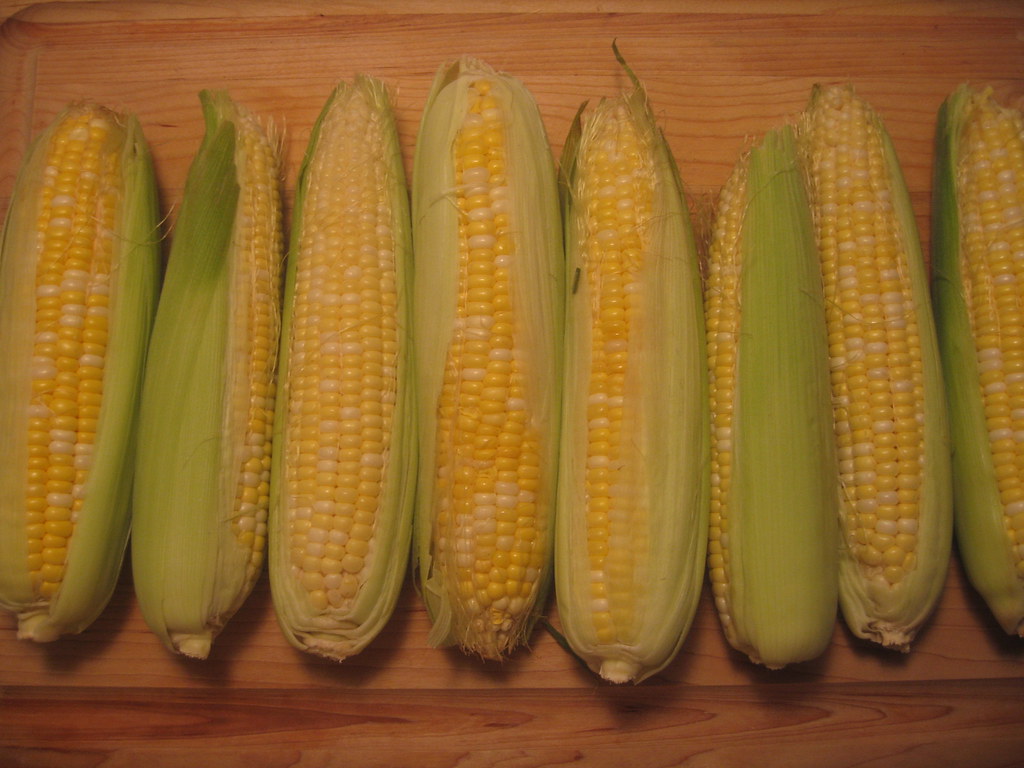
3 to 4 ears of corn (enough for 2 cups of kernels)
1/2 tablespoon unsalted butter
3 cups chicken stock
2 cups heavy cream
1/2 teaspoon salt
1/4 teaspoon ground black pepper
1 tablespoon lime juice
1 tablespoon fresh thyme
2 tablespoons thinly sliced chives
Step by Step
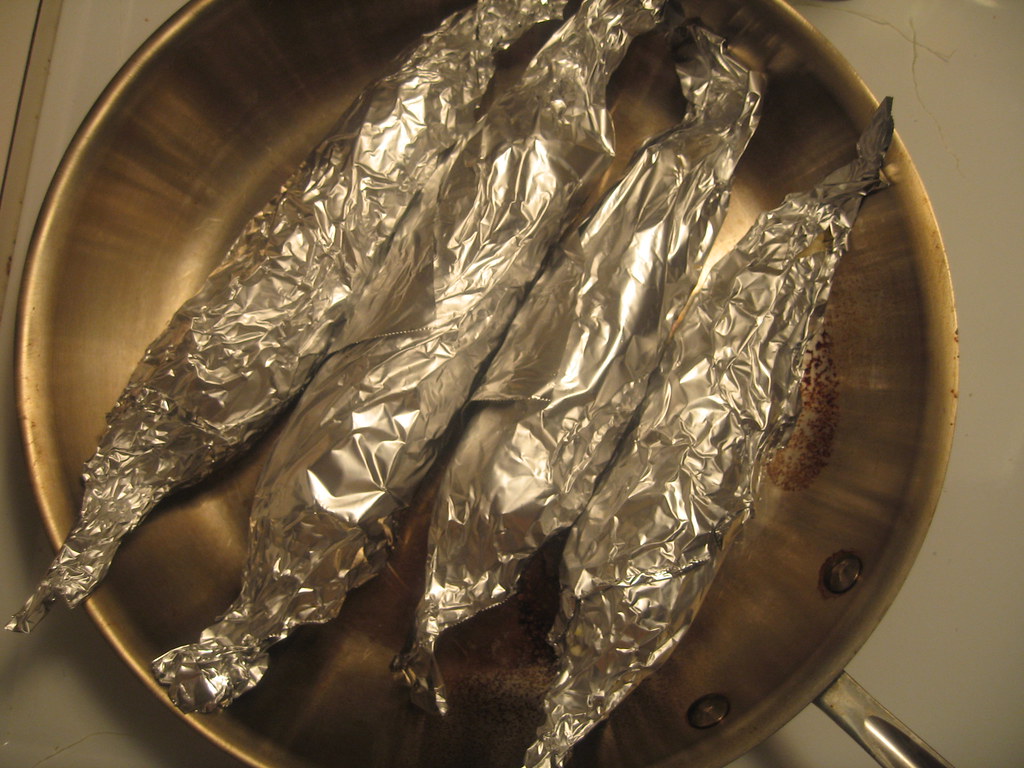
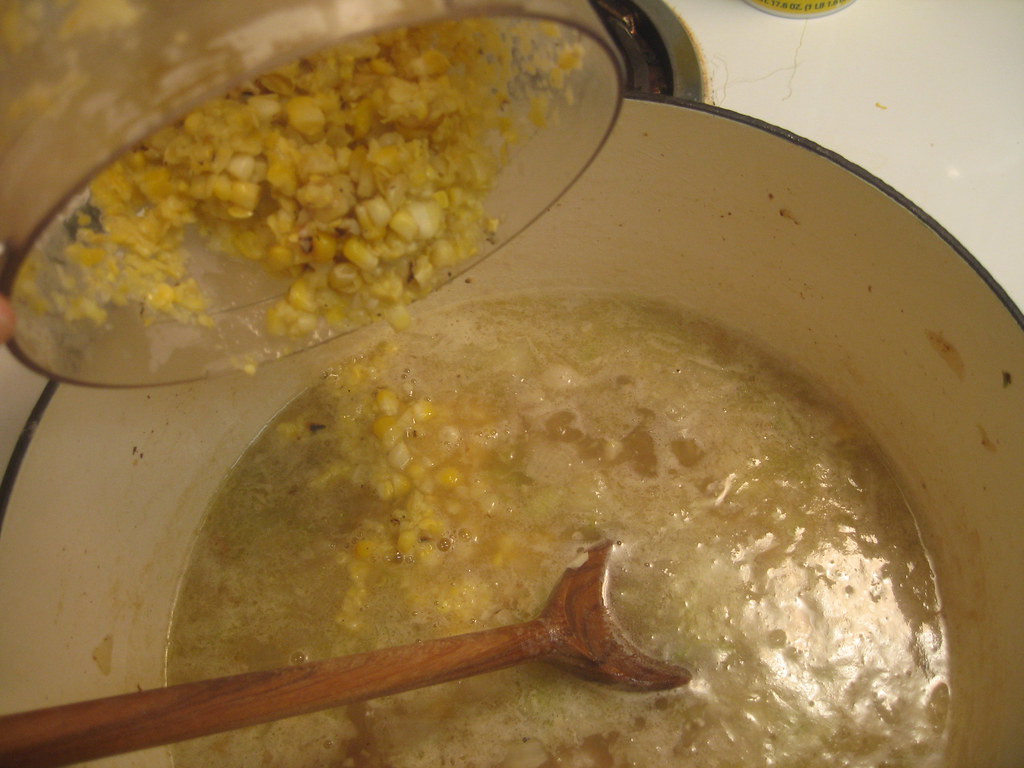
Remove all husks and strings from the ears of corn.  Lightly coat each ear of corn in olive oil and lightly salt.  Wrap each ear of corn in foil.  Heat a large heavy skillet over medium high heat.  Place ears of corn wrapped in foil in dry skillet.  Turn each ear a quarter turn after about 5 minutes of cooking and repeat until all four sides have been exposed to heat.  Peel back foil and remove from heat when corn is lightly blackened on each side.  Set aside to cool.  After corn is cooled, break ears in half in order to make removing corn easier.  Stand each piece of corn up and remove corn kernels with a sharp knife.

Boil 2 cups of water in a sauce pan over high heat.  Add potatoes and cover.  Reduce heat a little and allow to boil for 15 to 20 minutes.  Pierce potatoes with a fork, and when they are tender remove from heat, drain water, and set aside.

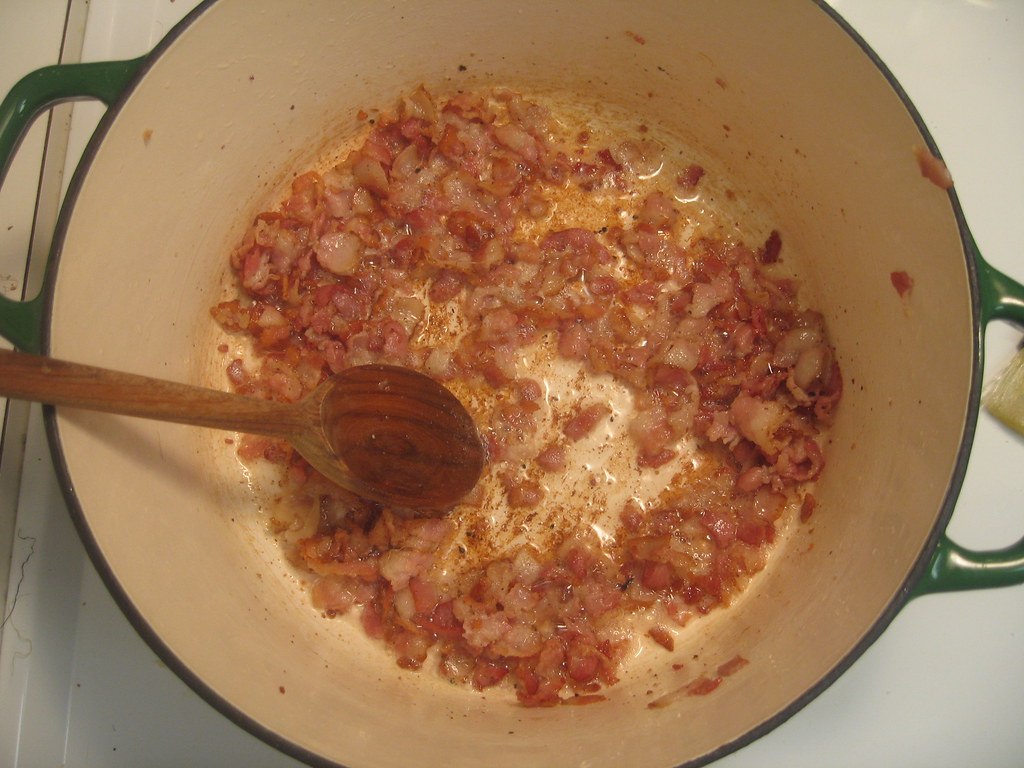
In a heavy sauce pot, over medium heat, saute the diced bacon until crispy and golden brown.  Remove bacon from pan and reserve.  To the bacon drippings, add garlic, yellow onions and celery.  Add potatoes and chicken stock.  Bring to a boil and simmer for 5 minutes.  Add the processed corn to the potato onion mixture.  Simmer for an additional 5 minutes.

Add heavy cream and bring to a boil for 7 minutes.  Remove from heat and add thyme, lime juice and bacon.  Add salt and pepper to taste.

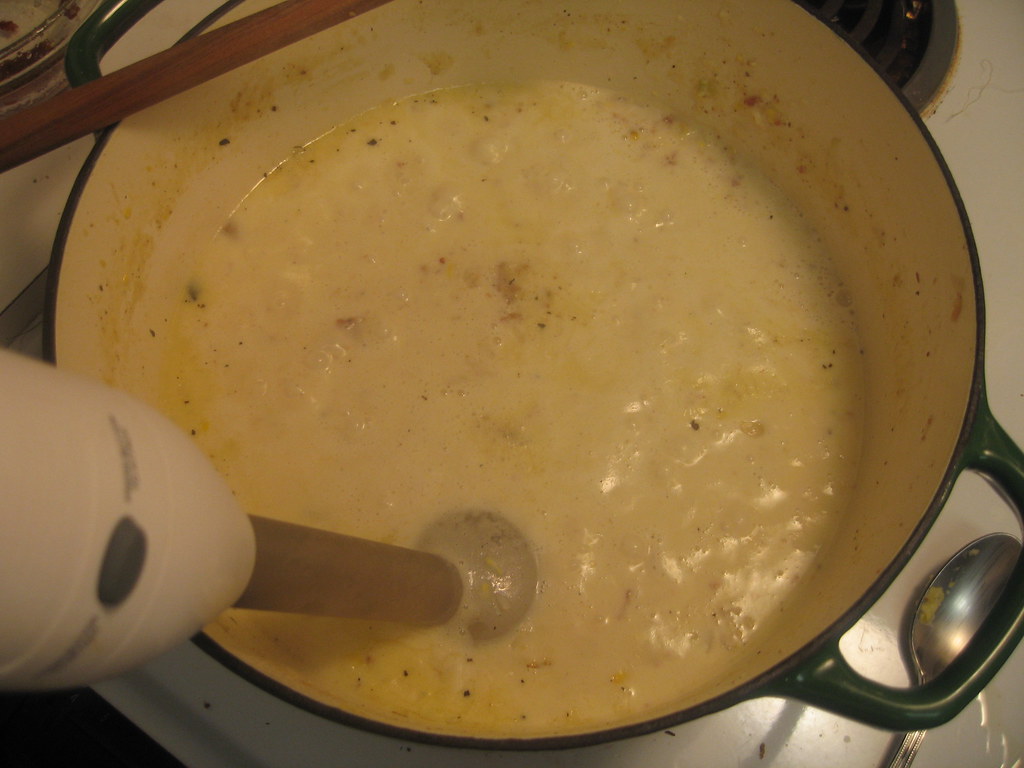
Using a hand blender, lightly blend soup mixture until a thick soup forms, slightly chunky, but remove any big bites of potato.  Garnish with bacon and green onions and serve.


12.05.2009

Martha's Mac & Cheese

IMG_5964
It snowed here yesterday.  It was just magical... now you are either in Texas and are aware of this or you have been snowed on for quite some time now and it's no big deal.  Well, let me tell you, it's a big deal here.  Actual white flakes falling to the ground for hours actually breaks some kind of record around here.  Special days call for special dishes and let me tell you this Martha Stewart's macaroni and cheese is special... or let's just say absolutely scrumptious.  It's the kind of mac that you save for a holiday... partly because its takes a little extra time and makes a huge amount and partly because you can't stop yourself from eating a large amount at a time, which if you do too often, will most likely result in you being... hmm... large).  Well, the stars seemed to align yesterday (got off work two hours early and remember, it was a very special day... almost a holiday as far as I'm concerned) and this was the exact kind of stick to your ribs dish I was in the mood to make.  Let me just tell you if you are even half the macaroni and cheese fan that I am, you will go crazy for this.  This recipe makes a ton of mac so even with halving the recipe, we still had leftovers.  If you are making it for a big crowd, here is the exact full recipe.
From my little kitchen to yours... Enjoy.
IMG_5923

IMG_5928

IMG_5929

IMG_5934

IMG_5938

IMG_5943

IMG_5959

IMG_5964

Martha's Macaroni & Cheese
Adapted from Martha Stewart
Recipe Notes
The original recipe calls for gruyere cheese.  I happened to have fontina on hand so I decided to substitute.  I also read that others have substituted swiss, but cannot promise the results on that one. Both fontina and gruyere are on the expensive side, which is also why this is not an everyday dish, but definitely worth the splurge.  On the milk, I used reduced fat 2%... because that is what I had, not because I was trying to trick myself into thinking I was saving any calories.
Ingredients
4 tablespoon (1/2 stick) unsalted butter, plus more for the dish
3 slices good white bread, crusts removed, torn into 1/4 inch to 1/2 inch pieces
2 3/4 cups of milk
1/4 cup all purpose flour
1 teaspoon salt
1/8 teaspoon of ground nutmeg
1/8 teaspoon freshly ground pepper
1/8 teaspoon cayenne pepper, or to taste
2 1/2 cups shredded sharp white cheddar cheese (about 10 ounces)
1 cup fontina cheese (see recipe notes above about cheese type)
1/2 pound elbow macaroni
Step by Step
Heat oven to 375 degrees.  Butter a 1 1/2 quart casserole dish; set aside.  Place bread pieces in a medium bowl.  In a small saucepan over medium heat, melt 1 tablespoon of butter. Pour butter into bowl with bread and toss to coat.  Set aside.

Return pan to medium heat (no need to clean it out from the butter that is left) and heat the milk in it.

In a high sided skillet, melt remaining 3 tablespoons of butter.  When butter melts, add flour and whisk for 1 minute.

While whisking, slowly pour milk into flour mixture.  Continue cooking and whisking until the mixture  bubbles and becomes thick.

Remove pan from heat.  Stir in salt, nutmeg, black pepper,  cayenne pepper, 2 cups of cheddar cheese, and 3/4 cup of fontina cheese; set cheese sauce aside.

Cook macaroni according to directions on package but undercook 2 to 3 minutes. The macaroni should be done on the outside and undercooked on the inside.  Drain pasta and rinse under cold water in a colander; drain well.   Stir macaroni into the cheese sauce.

Pour mixture into prepared dish.  Sprinkle remaining cheddar cheese and fontina cheese on top.  Sprinkle bread crumbs on top of cheese.

Bake until golden brown on top, about 30 minutes.  Transfer dish on a wired rack and cool for 5 minutes.  Serve hot.

11.23.2009

Turkey & Cranberry Ravioli... a.k.a. Pilgrim Potstickers


I have to admit I was a tad bit nervous about the recipe.  I have learned over the years that if something doesn't sound right, it usually isn't (EX. strawberry risotto... even if an Italian chef made it in Florence), but I was willing to take a chance because it had amazing reviews on Food Network.  I changed it up a little after my coworker, Frances, and I had a conversation about how turkey sausage might have more flavor than just regular ground turkey.    I decided to use half ground turkey and half sweet italian turkey sausage.  I think this was a good move because there was a smoky sage flavor that I believe came from the sausage.  If you are looking to buy as few ingredients as possible, you could try the original recipe, but I can't make any promises.  Needless to say, I am pretty sure it wouldn't matter what you put in the middle of these little wrappers because once you taste the cream sauce on top, you will be in heaven.  There was definitely some preparation involved in this one so I decided to make them a couple of days in advance and freeze them.  I suggest doing this so that you don't get bogged down trying to put ravioli together before guests arrive.  
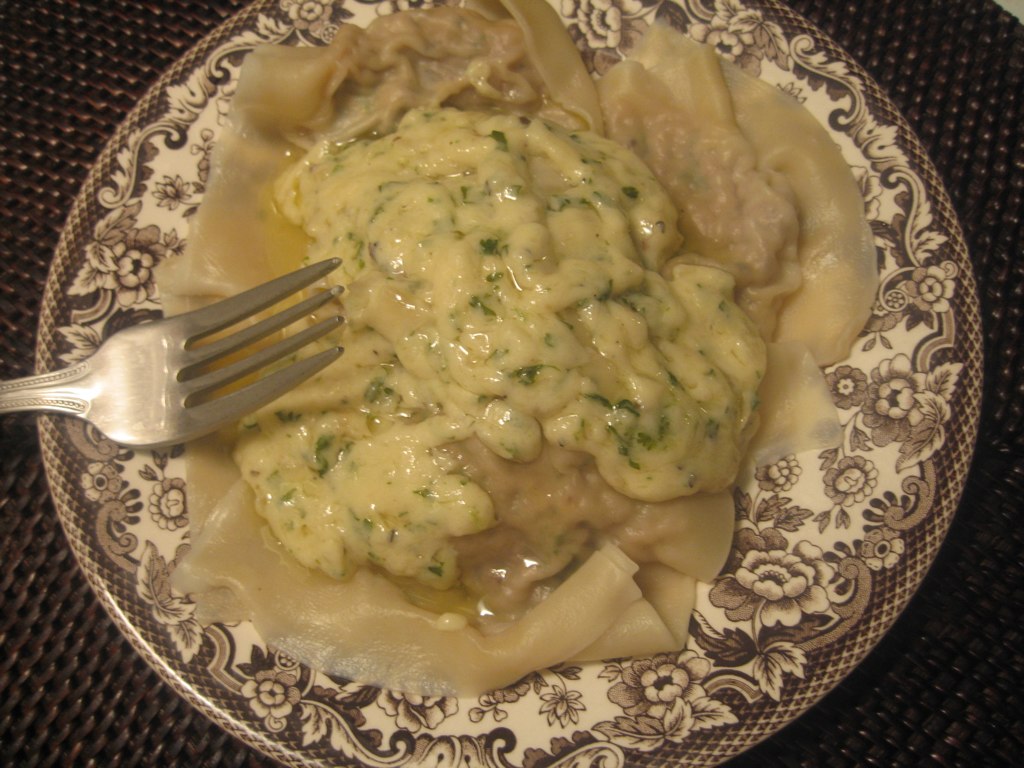
Once again (I seem to be giving this disclaimer more and more.. sorry), I did not share this for the fantastic final picture.  If you are going for visual appeal, this might not be your dish.  It looks a little bit like a blob on your plate, but they sure are delicious!  Oh yeah,  and my brother came up with the idea of calling them Pilgrim Potstickers, which I thought was pretty darn perfect. 
From my Little Kitchen to yours... Enjoy.


Toasting fresh bread crumbs... I put them in a mini food processor after I toasted the bread with olive oil and removed the edges.


Removing the casings of the turkey sausage.  Not pretty, but wanted to show in case you have never done this before.


Turkey & Cranberry Ravioli
Adapted from Giada De Laurentis
Ingredients
1/2 pound ground turkey, preferably dark meat
1/2 pound Italian turkey sausage, removed from casings
8 tablespoons cranberry sauce (I used the whole berry kind over the jellied kind)
8 tablespoons grated romano cheese
4 tablespoons toasted bread crumbs
4 tablespoons fresh parsley leaves
4 eggs
1 teaspoon kosher salt
1 teaspoon freshly ground pepper
80 store-bought wonton wrappers (2 packages)
for the cream sauce:
12 tablespoons butter
4 shallots, chopped
4 tablespoons all-pupose flour
2 cups chicken broth
8 tablespoons heavy cream
4 tablespoons chopped parsley leaves
1 teaspoon kosher salt
1 teaspoon freshly ground pepper
Step by Step
Make the ravioli:
In a medium bowl, stir together turkey, turkey sausage, cranberry sauce, cheese, bread crumbs, parsley, eggs, salt and pepper.  Place 10 wonton wrappers at a time on a work surface.  Brush each wrapper with water using a pastry brush.  Spoon 1 tablespoon of the turkey mixture on each of the wonton wrappers.  Top with another wonton wrapper and seal each ravioli.  Make sure to press out any air bubbles to tightly seal. Repeat 3 additional times until all turkey mixture has been used. 
To freeze for later:
Line a deep dish with wax paper.  Place ravioli in a single layer on top of wax paper.  Continue to alternate wax paper with single layers of ravioli.  Cover tightly and freeze for up to one month.  When ready to cook, take out of the freezer and cook for an extra 3 to 4 minutes, until turkey mixture is cooked thoroughly.  
Make the gravy:
In a medium, heavy skillet, heat the butter over medium heat.  Add the shallots and cook until tender, about 5 minutes.  Add the flour and stir until cooked, about 1 minute.  Slowly add the chicken broth, stirring quickly to avoid lumps.  Add the cream, parsley,  salt and pepper and cook, without boiling, for two minutes.  Make sure to stir often to avoid lumps and keep the sauce from burning.
To cook the ravioli:
Bring a large pot of salted water to boil over high heat.  Add the ravioli and cook until tender but still firm to the bite, making sure that the turkey is cooked, about 3 to 4 minutes.  Drain the ravioli and stir into the sauce to coat.  Serve immediately on individual plates with the remaining sauce drizzled on top. 


Serves 8
 (5 ravioli per person)


8.27.2009

Avocado Chicken Salad with Avocado Dressing

IMG_5657
There are certain recipes that are responsible for my love of cooking.  I have such vivid memories of tasting  certain meals and thinking how could I have lived this long without knowing about this!  I would immediately forget about the time that went into the preparation and be taken away to some foodie euphoria.  This is what keeps me in the kitchen... this is one of those recipes.  It was one day in college that my friend Allison and I decided to take a "personal day" and do lots of cooking.  At this point, I had made a few things that were tasty, but I knew Paula Deen's avocado chicken salad was going to always be one of my favorites from the first bite I took.  If you love chicken salad and avocado as much as I do, I would bet my crepe pan on the fact that this will be one of your favorites too! Enjoy!

I made this for my sister-in-laws baby shower last weekend and it is a definite go-to recipe for any brunch or luncheon.   It takes a little bit of time, but is definitely worth it for a special occasion!
Avocado Chicken Salad
Adapted from Paula Deen
Recipe Notes
One of the unique things about this chicken salad is the dressing that goes on top.  It is really what makes the dish pop.  Serve it alongside the chicken salad and drizzle over before eating.  This also goes great with your favorite cracker or some crusty french bread.  The chicken salad can be made the night before if you leave out the avocado chunks.  Add avocado up to 30 minutes before serving.  The dressing can be made the night before as well and stored in an airtight container in the refrigerator.
Ingredients
For the Chicken Salad
3 cups cooked, diced chicken (click here for instructions)
3 cups cooked white rice
2 avocados, peeled, diced and tossed with 1 tablespoon lemon juice
1/2 cup finely chopped onion
1 cup mayonnaise
1 to 2 teaspoons pepper
1 teaspoon salt
1/4 cup chopped fresh parsley leaves
For the Avocado Dressing
1 small avocado mashed with 2 teaspoons of lemon juice
1 cup mayonnaise
1/2 cup sour cream
1/2 teaspoon Worcestershire sauce
1/3 cup chopped onion
2 cloves garlic, minced
1 teaspoon salt
Dash cayenne pepper
Step by Step
For the Chicken Salad
1.  Mix all ingredients except for avocado chunks.  Mix until ingredients are well combined.
2.  Add chunks of avocado and toss lightly.
3.  Chill until ready to serve.
For the Dressing
1.  Combine all ingredients into a food processor.
2.  Blend until completely smooth.
3.  Chill and serve alongside the chicken salad.

Makes 8 servings.

8.14.2009

Homemade Pizza with Mushrooms & Pancetta

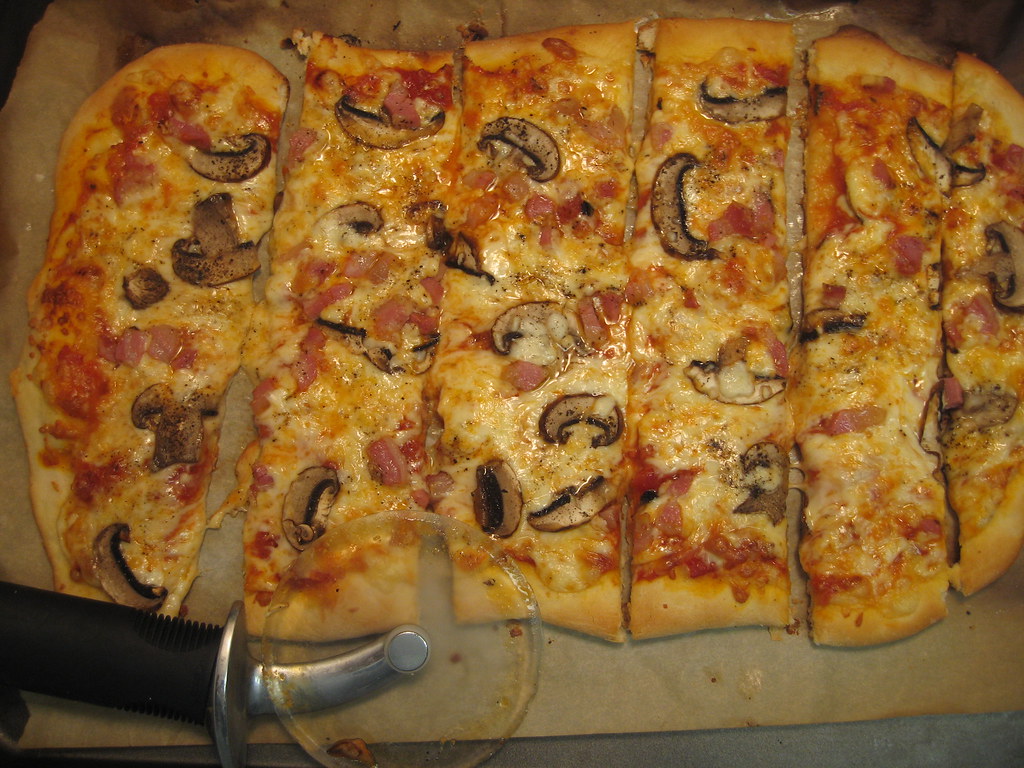
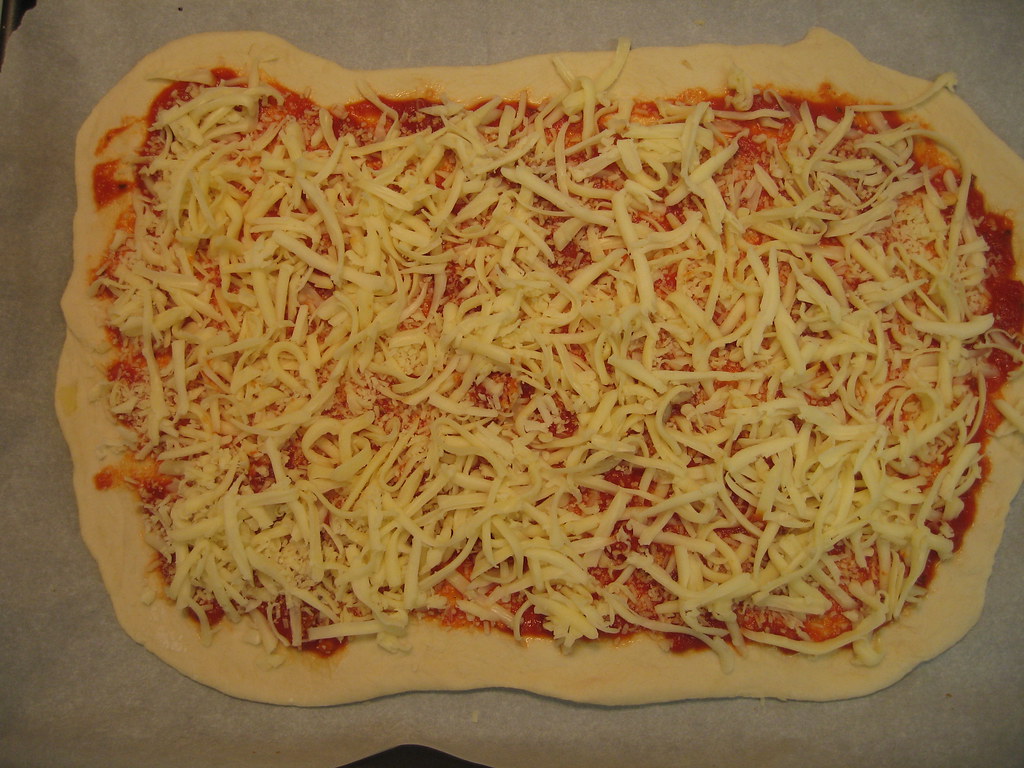
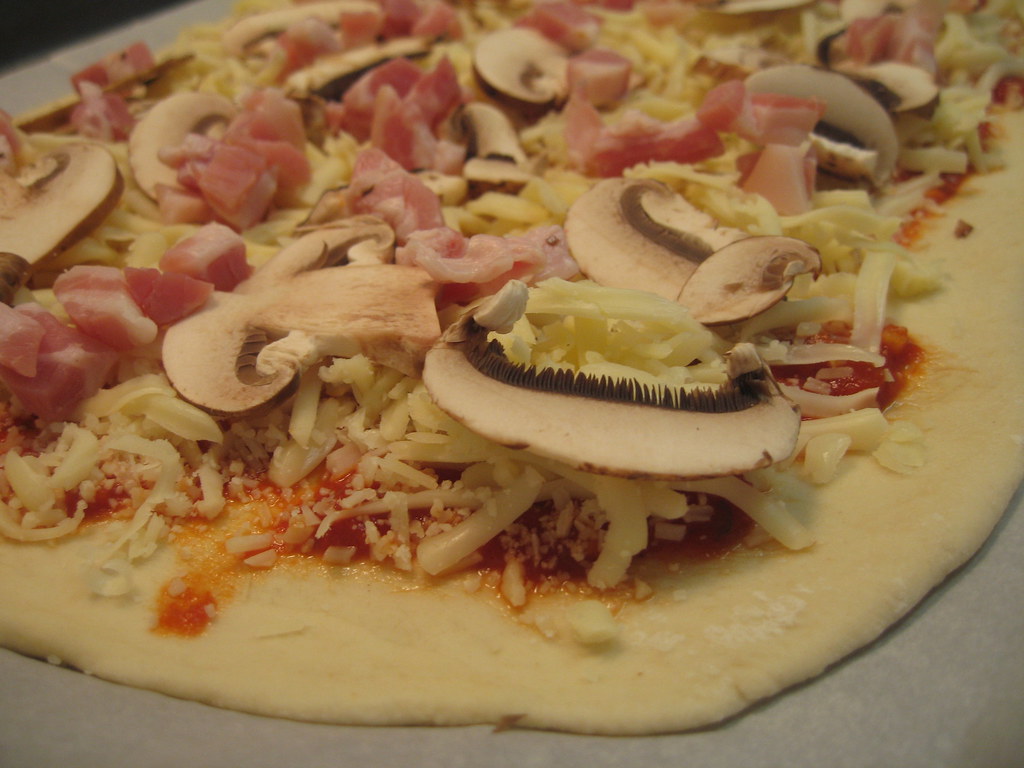
So how many of you were wondering if I really just left that dough plain? Sorry I left you hanging, but here is the final product of my homemade pizza endeavor.  This is the rest of the pizza recipe I had from Giada de Laurentis and I can barely put into words how delicious it is.  Chewy in the middle, crunchy on the outside crust... 3 different melted cheeses... topped with salty bites of pancetta... yum!  I set out to determine if going through all the trouble of making homemade pizza was worth it and my conclusion is a resounding yes! The options are endless and this combination is a great start.  Enjoy!
Homemade Pizza with Mushrooms & Pancetta

Adapted from Giada de Laurentis in Bon Appetit
Recipe Notes
For those of you unfamiliar with pancetta, it is Italian style bacon.  Regular bacon does not really work as a substitute for this recipe, but I do have a hint on how to get great pancetta without having to buy a ton.  Most every grocery store carries it in the deli and you can ask for two thick slices (about 1/2 an inch each), which is enough for this recipe.   Also, fontina cheese can be a tad on the expensive side, but a small piece will give you enough for two pizzas.  If you have to use less than the recipe calls for, just add more parmesan and mozzarella.  This recipe makes enough for two cookie sheet size pizzas so feel free to half the recipe and freeze the other half of the dough for another night.
Ingredients
1/2 cup purchased marinara sauce
1 cup coarsely grated Fontina cheese
1/2 cup finely grated Parmesan cheese
1/3 cup coarsely grated mozzarella cheese
2 ounces crimini (baby bella) mushrooms, thinly sliced
2 ounces thinly sliced pancetta (Italian bacon), coarsely chopped
Step by Step
1.  Preheat oven to 475 degrees.
2.  Line 2 large baking sheets with parchment paper.
3.  Divide dough in half.  Roll out one half on lightly floured surface to 13 1/2 by 8 1/2 inch rectangle.
4.  Transfer to one baking sheet.  Repeat with second half.
5.  Spread 1/4 cup marinara sauce over each pizza, leaving 1/2 inch border.  Sprinkle cheese over, then mushrooms and pancetta.  Sprinkle with salt and generous amount of pepper.
6.  Bake pizzas until brown on bottom and cheese is melter, about 15 minutes.  Cut each pizza crosswise into rectangles.

5.05.2009

Special Strawberry Cupcakes...for a very special day.

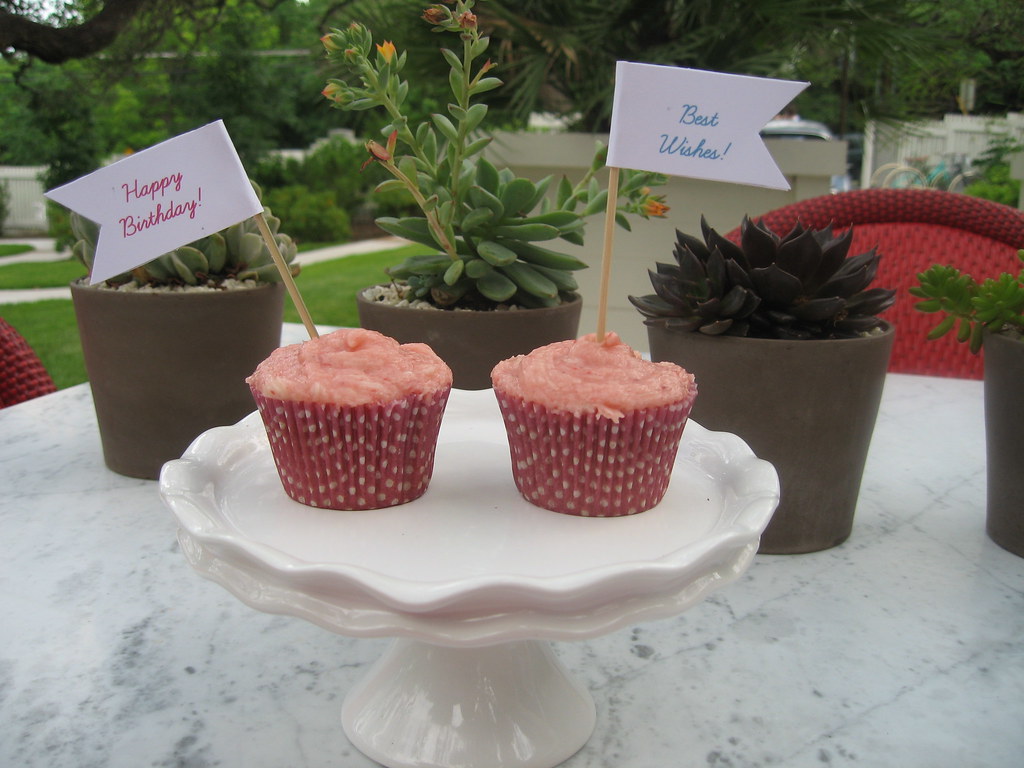
One of my best friends, Allison (who I have a long history of cooking with) had a very big day last week. It was her birthday and to her surprise, she was proposed to as well. We have cooked in everywhere from our dorm at college to a class in Italy and made cookbooks to journal our adventures as well. So for this day, I decided to make some fresh strawberry cupcakes that are acclaimed as the Sprinkles' recipe for strawberry cupcakes and icing on Martha Stewart's website.

Now I have to say Martha, I think you have been a little bit duped. When I first saw how they turned out, I could tell immediately the icing did not look the same as the cupcakes I have had at Sprinkle's bakery. However, whatever recipe they are, they were a hit! The cupcakes are barely sweet, which ends up being a perfect compliment to the very sweet and refreshing strawberry icing.


I can't tell which was more of a challenge, the seemingly endless steps and bowls used to make these (which only produced 11 cupcakes by the way... okay okay, maybe it could have been 12 if I hadn't helped myself to some of the delicious batter) or trying to keep them in tip top shape on my journey to Austin. But, as you can can see, they made it!


This is the first post of a category I will feature on here: Labor of Love Recipes. For the most part, I like to write about quick and easy recipes. These were definitely not quick or extremely easy. However, these kinds of recipes are definitely worth making if one of the following circumstances is true: it is for a very special occasion, the taste is worth the time, or it is for very special company. In this case, all three were true!


Strawberry Cupcakes
Sprinkles Recipe on Martha Stewart Website
Recipe Notes: 
This recipe got mixed reviews on Martha's website. Some said they did not get great results, but others raved about it. I will suggest having the ingredients exactly as they say. For example, butter at room temperature as well as milk and eggs. Also, I used fresh strawberries for the cupcakes and frozen for the icing. I highly recommend these for a special occasion!
Ingredients for cupcakes
2/3 cup whole fresh or frozen strawberries, thawed
1 1/2 cups all-purpose flour, sifted
1 teaspoon baking powder
1/4 teaspoon coarse salt
1/4 cup whole milk, room temperature
1 teaspoon pure vanilla extract
1/2 cup (1 stick) unsalted butter, room temperature
1 cup sugar
1 large egg, room temperature
2 large egg whites, room temperature


Ingredients for Strawberry Icing
1/2 cup whole frozen strawberries, thawed
1 cup (2 sticks) unsalted butter, firm and slightly cold
Pinch of coarse salt
3 1/2 cups confectioners' sugar, sifted
1/2 teaspoon pure vanilla extract


Directions for Cupcakes
1. Preheat oven to 350 degrees.


2. Line a 12-cup muffin tin with cupcake liners; set aside.


3. Place strawberries in a small food processor; process until pureed.


4. You should have about 1/3 cup of puree, add a few more strawberries if necessary or save any extra puree for frosting; set aside.


5. In a medium bowl, whisk together flour, baking powder, and salt; set aside.


6. In a small bowl, mix together milk, vanilla, and strawberry puree; set aside.


7. In the bowl of an electric mixer fitted with the paddle attachment, cream butter on medium-high speed, until light and fluffy.


8. Gradually add sugar and continue to beat until well combined and fluffy.


9. Reduce the mixer speed to medium and slowly add egg and egg whites until just blended.


10. With the mixer on low, slowly add half the flour mixture; mix until just blended.


11. Add the milk mixture; mix until just blended.


12. Slowly add remaining flour mixture, scraping down sides of the bowl with a spatula, as necessary, until just blended.


13. Divide batter evenly among prepared muffin cups.


14. Transfer muffin tin to oven and bake until tops are just dry to the touch, 22 to 25 minutes. 

15. Transfer muffin tin to a wire rack and let cupcakes cool completely in tin before icing.


Directions for Icing
1. Place strawberries in the bowl of a small food processor; process until pureed.


2. In the bowl of an electric mixer fitted with the paddle attachment, beat together butter and salt on medium speed until light and fluffy.


3. Reduce mixer speed and slowly add confectioners' sugar; beat until well combined.


4. Add vanilla and 3 tablespoons strawberry puree (save any remaining strawberry puree for another use); mix until just blended.


5. Do not overmix or frosting will incorporate too much air.


6. Frosting consistency should be dense and creamy, like ice cream.


Have extra strawberry puree?  Put it in a freezer bag with the date.  
Add to smoothies or other breads within 3 months.